A329, Assembly & installation instructions – Hubbardton Forge 137680 User Manual
Page 3
H U B B A R D T O N F O R G E . C O M
hand-forged, vermont-made lighting and accessories
154 RT. 30 SOUTH
•
CASTLETON, VERMONT 05735
All designs and images ©1989-2013 Hubbardton Forge
®
. All rights reserved.
28118
Assembly & Installation Instructions
If you need further assistance, or find that you are missing any parts, please contact the dealer from which you purchased this product.
We hope you enjoy your fixture!
* Hubbardton Forge will not be liable for injury or damage caused by improper installation, lamping or use of this fixture.
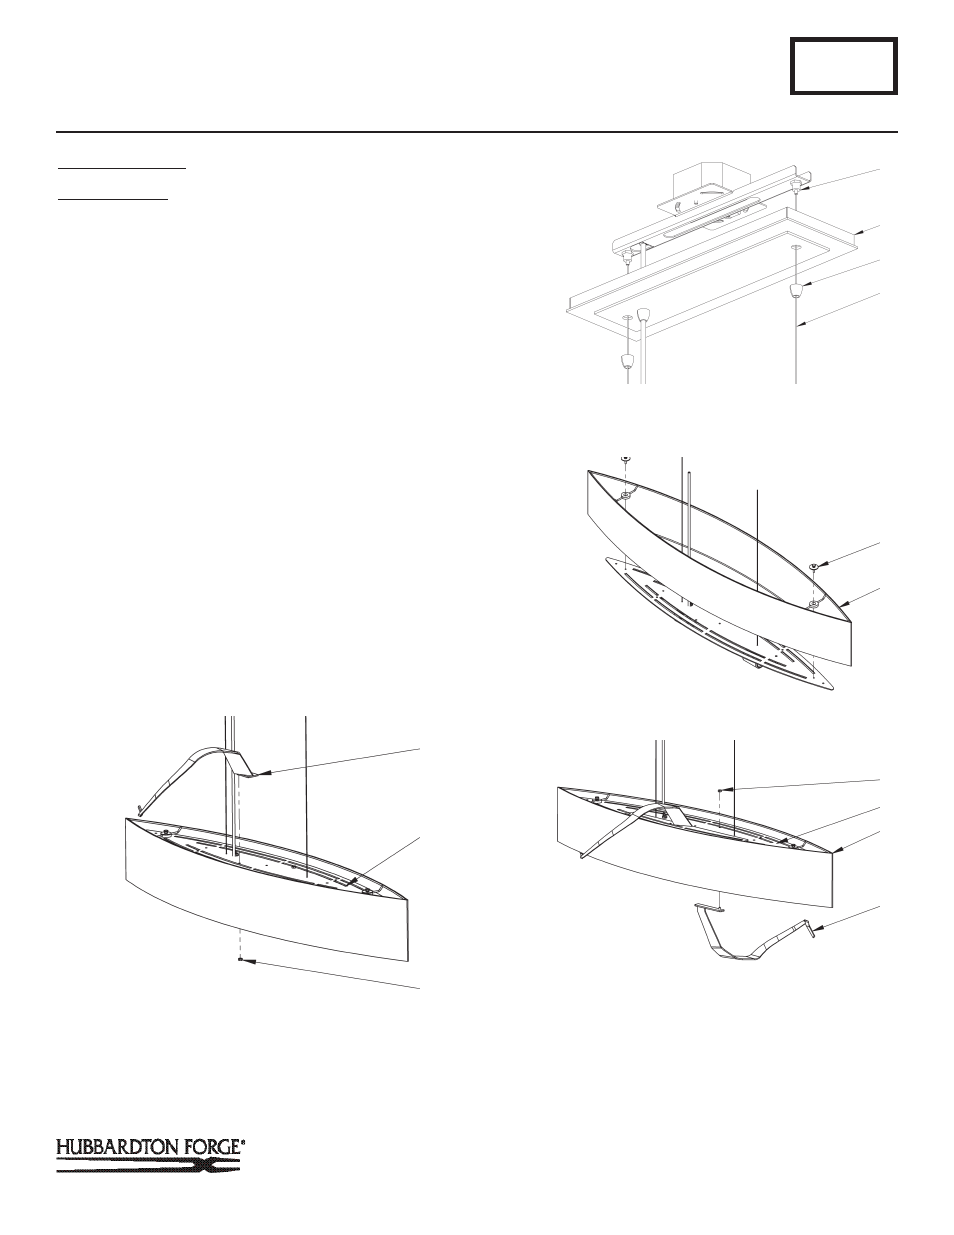
Fixture Assembly
(Figures 7 - 9)
Component Parts
F Fixture
M Upper Forged Element
N #8-32 Lock Nut
O Lower Forged Element
Q Shade
R Thumb Screw with Washer and Hex Nut (2)
1. Install Shade. Hardware for securing shade (Q) is shipped
attached to fixture (F). Remove Thumb Screw with washer
and hex nut (R) from fixture (F), set aside. Install shade (Q)
from bottom and tilt so it will pass fixture (F). Lower shade
so it rests on top of fixture. Secure shade (Q) with thumb
screw, washer and hex nut. (R) (Figure 7).
2. Install upper forged element (M) to fixture. Nut (N) is
shipped threaded onto stud of forged element (M). Remove
nut (N) and set aside. Line up stud of upper forged element
(M) with hole through fixture (F) and lower into position. Se
cure with nut (N). (Figure 8).
3. Install lower forged element (O) to fixture. Nut (N) is shipped
threaded onto stud of forged element (O). Line up stud of
forged element (O) with hole through fixture (F) and lift into
position. Secure with nut (N). (Figure 9).
4. Install bulbs (not included).
A329
Stream Pendant 137680
Page 3 of 4
(Figure 6)
(Continued)
B
D
C
E
R
Q
N
F
(Figure 7)
(Figure 8)
(Figure 9)
TAB
Q
O
M
F
N