A276, Assembly & installation instructions – Hubbardton Forge 137720 User Manual
Page 3
Assembly & Installation Instructions
A276
Erlenmeyer 4-Light Pendant 13-7720
Page 3 of 3
Hand-Forged,
Vermont-Made Lighting and Accessories
P.O. Box 827, 154 Route 30 South, Castleton, Vermont 05735
26494
3. Using suitable wire connectors (not provided) connect
fixture wires to supply (white to white and black to black).
Run a pigtail lead from crossbar ground screw (M) to the
junction box and connect all ground wires (bare copper or
green to bare copper or green).
Caution: Make sure wire
connectors are twisted on securely, and no bare wire is
exposed.
Push wires back into outlet box.
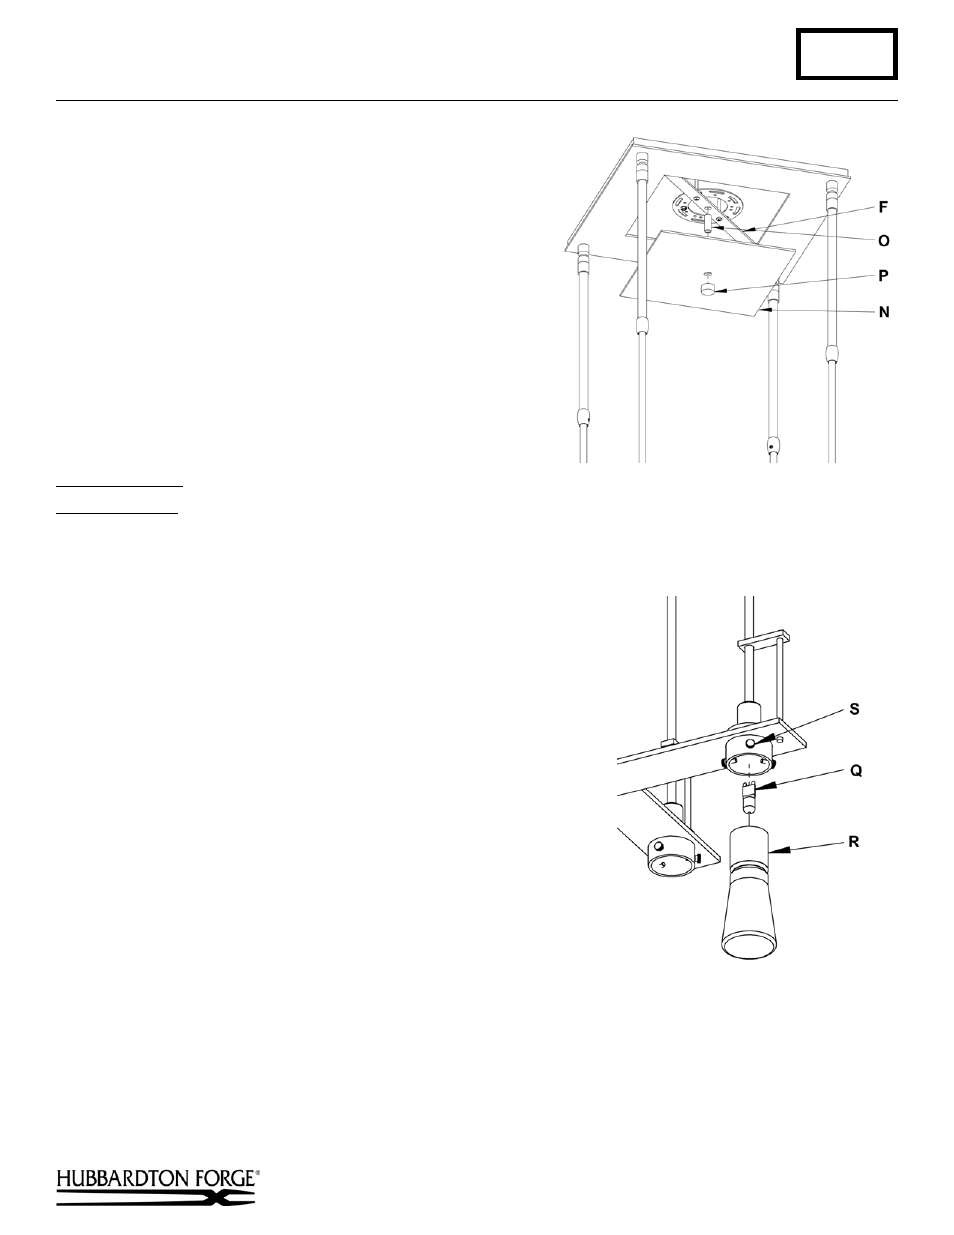
4. Install threaded tube (O) into center hole of ceiling
bracket (F).
5. Install the wireway cover (N) and secure with knob (P).
To Install Glass
(Figure 6)
Component Parts
Q Bulb
R Glass
S Thumb
Screw
1. Install bulb (Q). Be careful not to touch bulb with bare hands; oil
from the hands will dramatically reduce bulb life.
2. Loosen the three thumb screws (S). It is not necessary to remove them
from the fixture.
3. Raise glass (R) until groove is aligned with thumb screws (S).
4. Tighten the three thumb screws (S) equal amounts until snug with
glass (R). Be careful not to over tighten.
5. Repeat steps 1 thru 4 for all four lights.
6. Restore electricity at main breaker.
If you need further assistance, or find that you are missing any parts, please contact the dealer from which you purchased
this product. We hope you enjoy your fixture!
* Hubbardton Forge will not be liable for injury or damage caused by improper installation, lamping or use of this fixture.
(Figure 5)
(Figure 6)