A251, Assembly & installation instructions – Hubbardton Forge 134501 User Manual
Page 3
H U B B A R D T O N F O R G E . C O M
hand-forged, vermont-made lighting and accessories
154 RT. 30 SOUTH
•
CASTLETON, VERMONT 05735
All designs and images ©1989-2013 Hubbardton Forge
®
. All rights reserved.
24621 Rev A
Assembly & Installation Instructions
If you need further assistance, or find that you are missing any parts, please contact the dealer from which you purchased this product.
We hope you enjoy your fixture!
* Hubbardton Forge will not be liable for injury or damage caused by improper installation, lamping or use of this fixture.
(Figure 4)
(Figure 3)
To see a video on how to assemble the Mobius shade go to:
http://www.youtube.com/user/HubbardtonForge?v=ue3yX8f4iKc
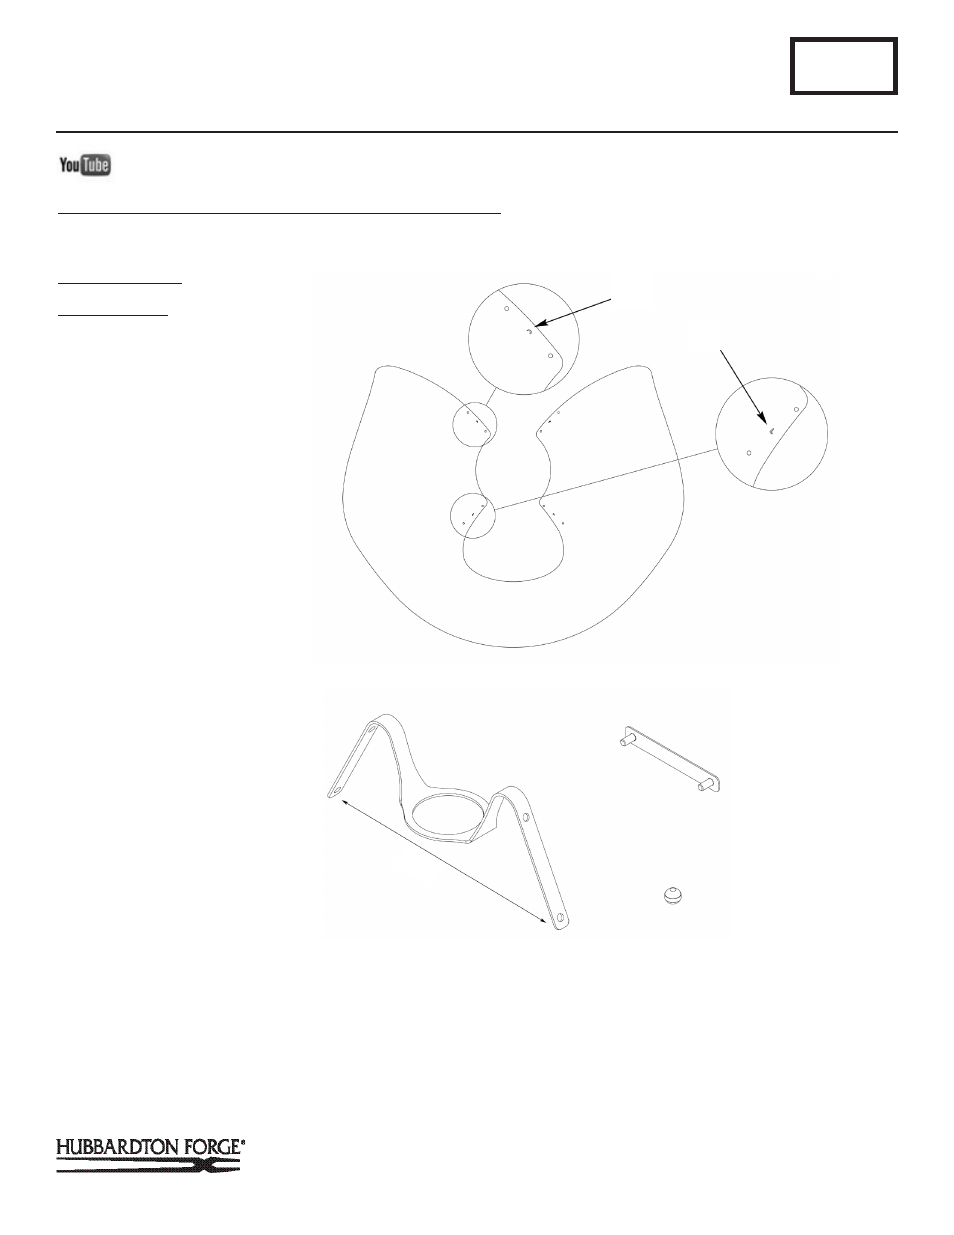
Assemble Shade
Component Parts
L Shade Spider
P Flat Shade Panel
Q Bracket with Studs (2)
R Knurled Balls (4)
1. Identify all parts needed.
A251
Adjustable Mobius Shade Pendant 13-4501
Page 3 of 6
(P)
FLAT SHADE PANEL
Note: It may be necessary to form shade spider to original width after shipment.
(L
) SHADE SPIDER
(Q)
BRACKET WITH STUDS (2)
(R)
KNURLED BALLS (4)
2-1/2"
"L"
"C"