B296, Installation instructions – Hubbardton Forge 206440 User Manual
Page 4
If you need further assistance, or find that you are missing any parts, please contact the dealer from which you purchased this product.
We hope you enjoy your fixture!
* Hubbardton Forge will not be liable for injury or damage caused by improper installation, lamping or use of this fixture.
H U B B A R D T O N F O R G E . C O M
hand-forged, vermont-made lighting and accessories
154 RT. 30 SOUTH
•
CASTLETON, VERMONT 05735
All designs and images ©1989-2013 Hubbardton Forge
®
. All rights reserved.
28808
Installation Instructions
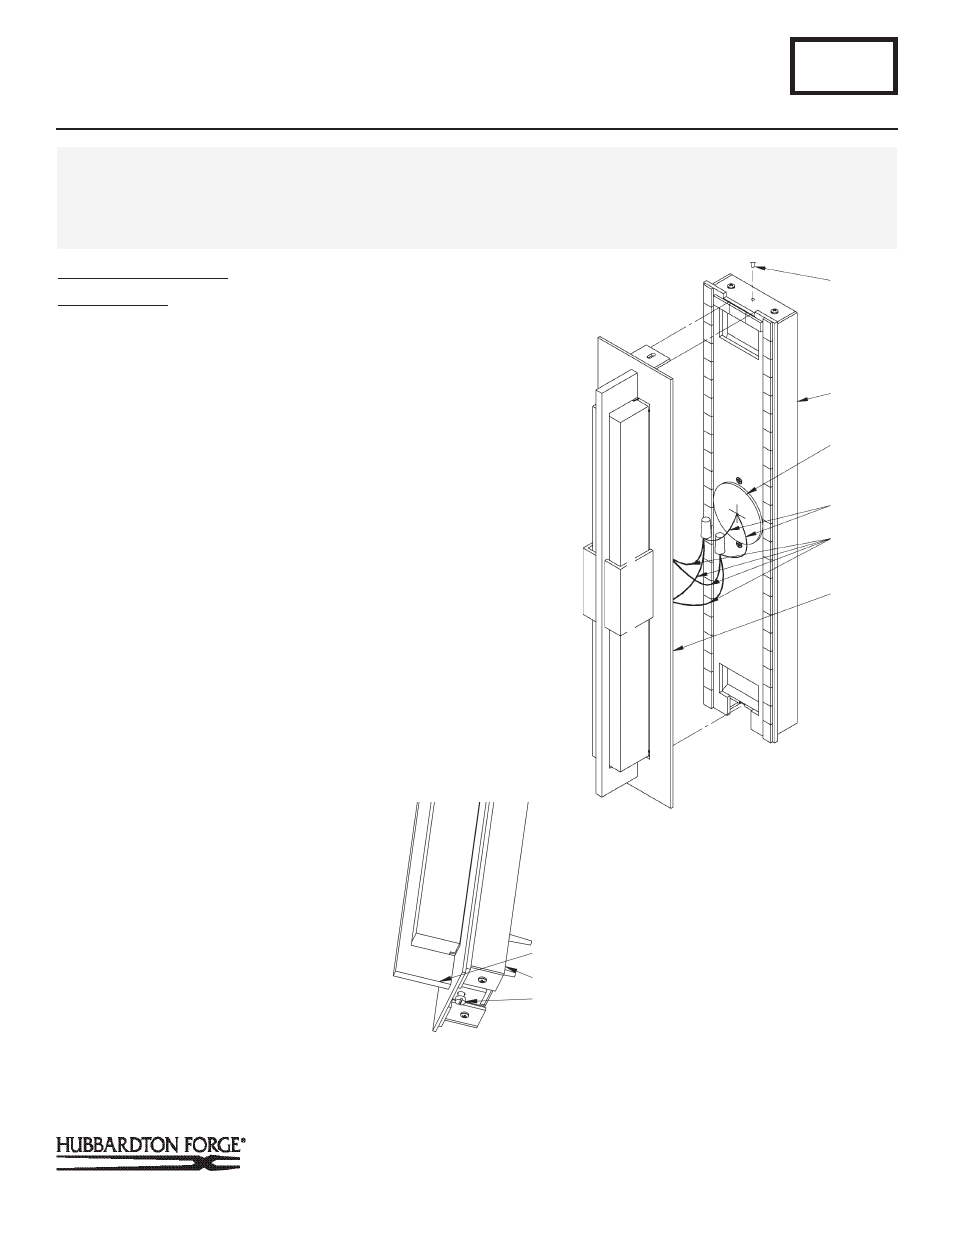
To Install Fixture Front
(Figures 7 & 8)
Component Parts
A Fixture Front
B Slotted Screw
C Fixture Back
D Screw
K Gasket
N Tape
U Wire Nuts (2)
1. Hold fixture front (A) close to fixture back (C) and using a
wire nut (U) provided, connect the red driver wire with the 2
red LED wires. Using the 2nd wire nut (U) provided, connect
the black driver wire to the 2 black LED wires. Twist wire
nuts (U) to secure wires. (Figures 8 & 9)
2. Gently push wire nuts (U) back through slits in the gasket (K)
on the fixture back (C).
3. Slip fixture front (A) onto fixture back (C). Gently press
fixture front (A) onto fixture back (C) to slightly compress
tape (N).
4. Thread screw (D) top of fixture back (C).
5. Tighten slotted screw (B) to lock fixture front (A) in place. Be
careful not to over tighten (Figure 10).
6. Restore electricity at the main breaker.
B296
Double Axis LED Sconce: 206440D
Page 4 of 4
CAUTION: FAILURE TO INSTALL THIS FIXTURE PROPERLY MAY RESULT IN SERIOUS PERSONAL INJURY OR DEATH AND
PROPERTY DAMAGE. We recommend installation by a licensed electrician. This product must be installed in accordance with
applicable installation code(s), by a person familiar with the construction and operation of the product and the hazards involved.*
Caution: Do not exceed maximum wattage noted on fixture. Use only recommended bulbs with fixture.
(Figure 7)
(Figure 8)
D
C
K
A
DRIVER WIRES
LED WIRES
A
C
B