B296, Installation instructions – Hubbardton Forge 206440 User Manual
Page 3
H U B B A R D T O N F O R G E . C O M
hand-forged, vermont-made lighting and accessories
154 RT. 30 SOUTH
•
CASTLETON, VERMONT 05735
All designs and images ©1989-2013 Hubbardton Forge
®
. All rights reserved.
28808
Installation Instructions
If you need further assistance, or find that you are missing any parts, please contact the dealer from which you purchased this product.
We hope you enjoy your fixture!
* Hubbardton Forge will not be liable for injury or damage caused by improper installation, lamping or use of this fixture.
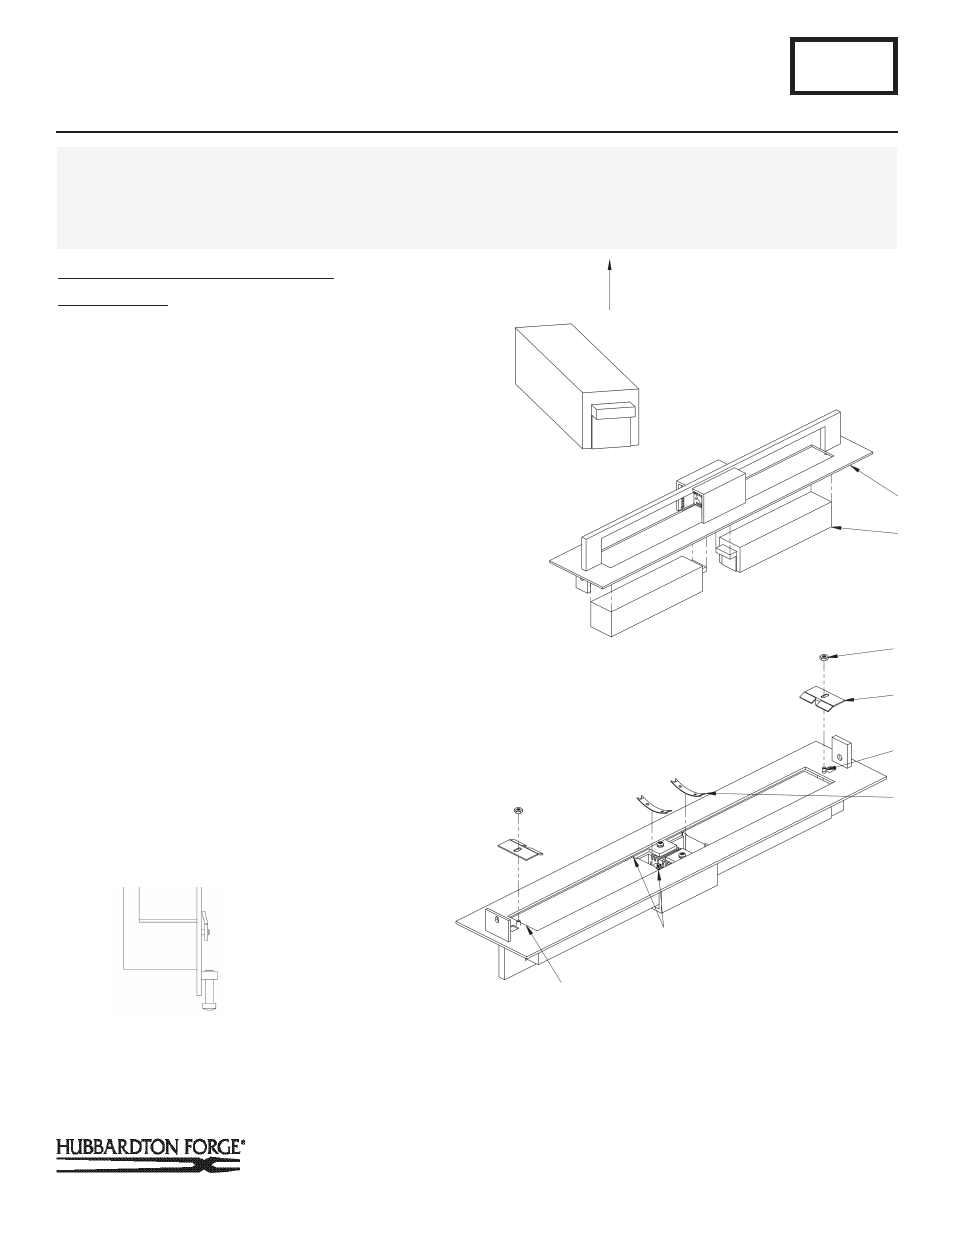
(Figure 2)
To Assemble Fixture Front and Glass
(Figures 3 - 6)
Component Parts
A Fixture Front
P Glass (2)
Q Hex Nut (2)
R Threaded Stud (2)
S Glass Bracket (2)
T Spring (2)
1. Place glass (P) on flat clean surface oriented as shown in
Figure 4.
2. Place fixture front (A) over glass (P) (Figure 5).
3. Holding fixture front (A) and glass (P) securely rotate them
both over so fixture front (A) rests on flat surface.
4. Remove hex nuts (Q) glass brackets (S) from threaded studs
(R).
5. Slide glass (P) towards the center of the fixture.
6. Install spring (T) at the top of the glass (P). Push spring
inside of fixture until it rests against the top ledge of glass
(P). Figure 6.
7. Slip glass brackets (S) on to threaded studs (R). See Figure
7 for orientation.
8. Thread hex nuts (Q) onto threaded studs (R) and tighten until
snug. Be careful not to over tighten.
9. Continue with installation instructions following to install
fixture front.
B296
Double Axis LED Sconce: 206440D
Page 3 of 4
CAUTION: FAILURE TO INSTALL THIS FIXTURE PROPERLY MAY RESULT IN SERIOUS PERSONAL INJURY OR DEATH AND
PROPERTY DAMAGE. We recommend installation by a licensed electrician. This product must be installed in accordance with
applicable installation code(s), by a person familiar with the construction and operation of the product and the hazards involved.*
Caution: Do not exceed maximum wattage noted on fixture. Use only recommended bulbs with fixture.
(Figure 3)
(Figure 4)
I
A
P
(Continued)
UP
(Figure 5)
Q
S
R
T
GLASS SHOULD TOUCH THIS AREA
SLIGHT GAP BETWEEN GLASS AND FRAME ON THIS END
(Figure 6)
(Figure 2A)