Campbell Scientific EC155 CO2 and H2O Closed-Path Gas Analyzer and EC100 Electronics with Optional CSAT3A 3D Sonic Anemometer User Manual
Page 45
EC155 CO
2
and H
2
O Closed-Path Gas Analyzer
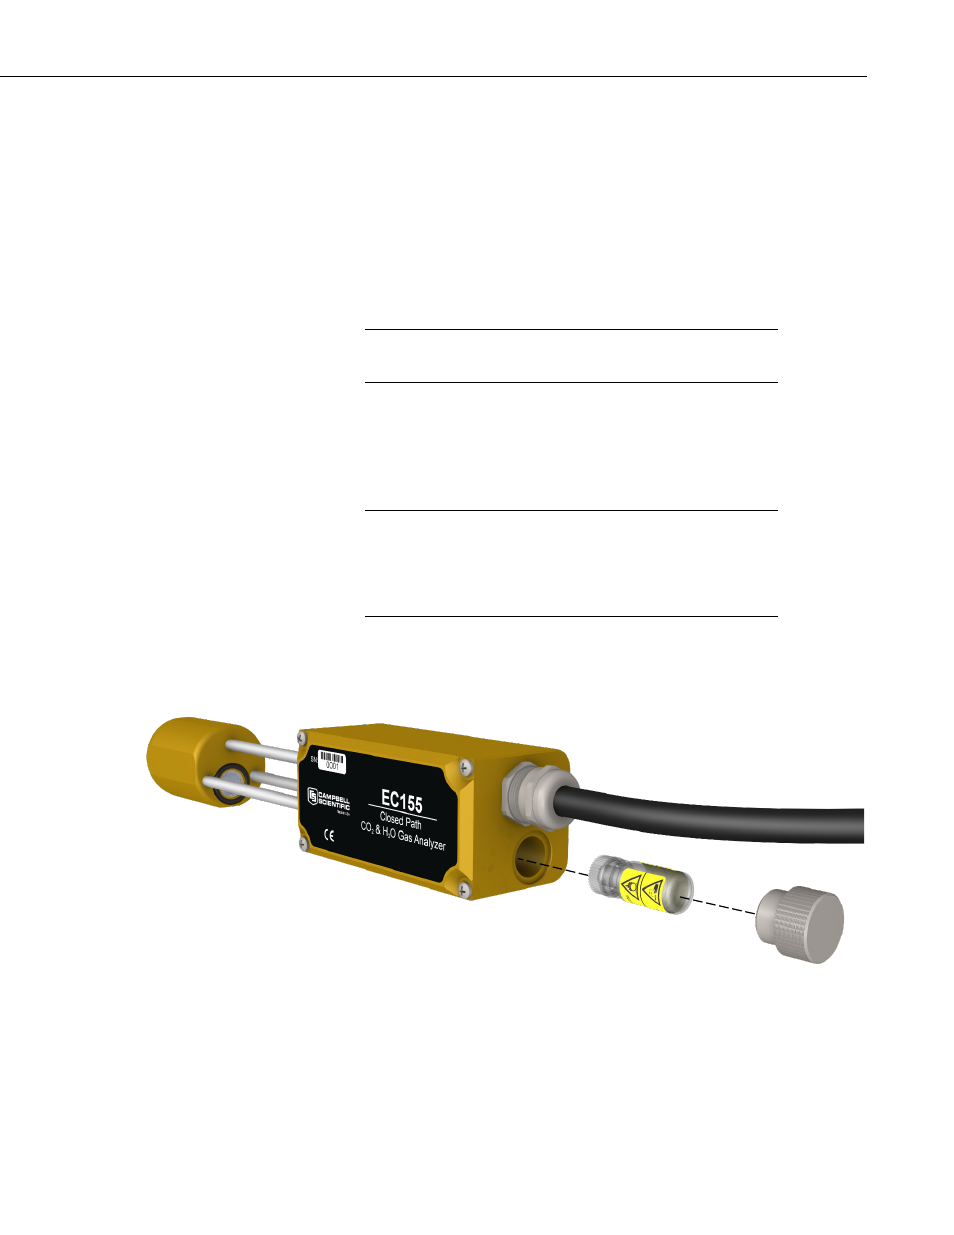
b. Unscrew the large metal plug found at the base of the analyzer next to the
analyzer cable; it should only be hand-tight (see FIGURE 9-7). Once the
plug is removed, tip the analyzer up so the desiccant/scrubber bottle falls
out. Insert a new bottle lid-first into the analyzer. Firmly screw the plug
back in place.
c. On the other end of the analyzer, remove the two seal-screws from the
metal cap (see FIGURE 9-8). Carefully pull the cap off. Tip the analyzer
up so the desiccant/scrubber bottle falls out. Insert a new bottle lid-first.
Push the cap back on, and use two new seal-screws (included with
replacement desiccant/scrubber bottles) to hold the cap in place.
While the metal cap is removed, avoid touching the detector
and its electronics.
d. Insert the analyzer back into place, making sure to latch the analyzer’s
struts down. Do not operate the analyzer for at least 24 hours (longer if in
humid environments) to give the chemicals time to purge the air inside the
analyzer. A zero-and-span procedure should then be performed before
resuming measurements.
The scrubber bottles contain strong oxidizing agents. Avoid
direct contact with the chemicals inside the bottles. Also
ensure your work area is well ventilated and free of any
reactive compounds, including liquid water. Store used
chemical bottles in a sealed container until disposal.
The chemical bottles should be disposed of according to local and federal
regulations. For more information, MSDS (Material Safety Data Sheet) forms
for the chemicals are included in Appendix D.
FIGURE 9-7. Replacing the source housing desiccant/scrubber bottle
CAUTION
CAUTION
35