JKS 9100 User Manual
Page 6
JKS9100
JKS Switchblade Swaybar Installation
6 Page
Using the supplied 1/2” Flanged Locking Nuts (J),
secure the lower end of Adjustable End Links to
the axle bracket. Make sure Rod Ends (I) are in
alignment with mounting brackets.
Rod End must be installed on inboard side of axle
bracket.
Once all adjustments are complete, fully tighten
the Jam Nuts (K) against the Gimbal Joint Assem-
bly (G) and Rod End (I) to prevent length of Adjust-
able End Links from changing.
Using a torque wrench with a 15mm socket, tight-
en the 1/2” Flanged Locking Nuts (J) to 40 ft-lbs.
HINT: Use a 14mm wrench on flat spot of Rod
Ends (I) to prevent mounting stud from spinning
when tightening 1/2” Flanged Locking Nut (J).
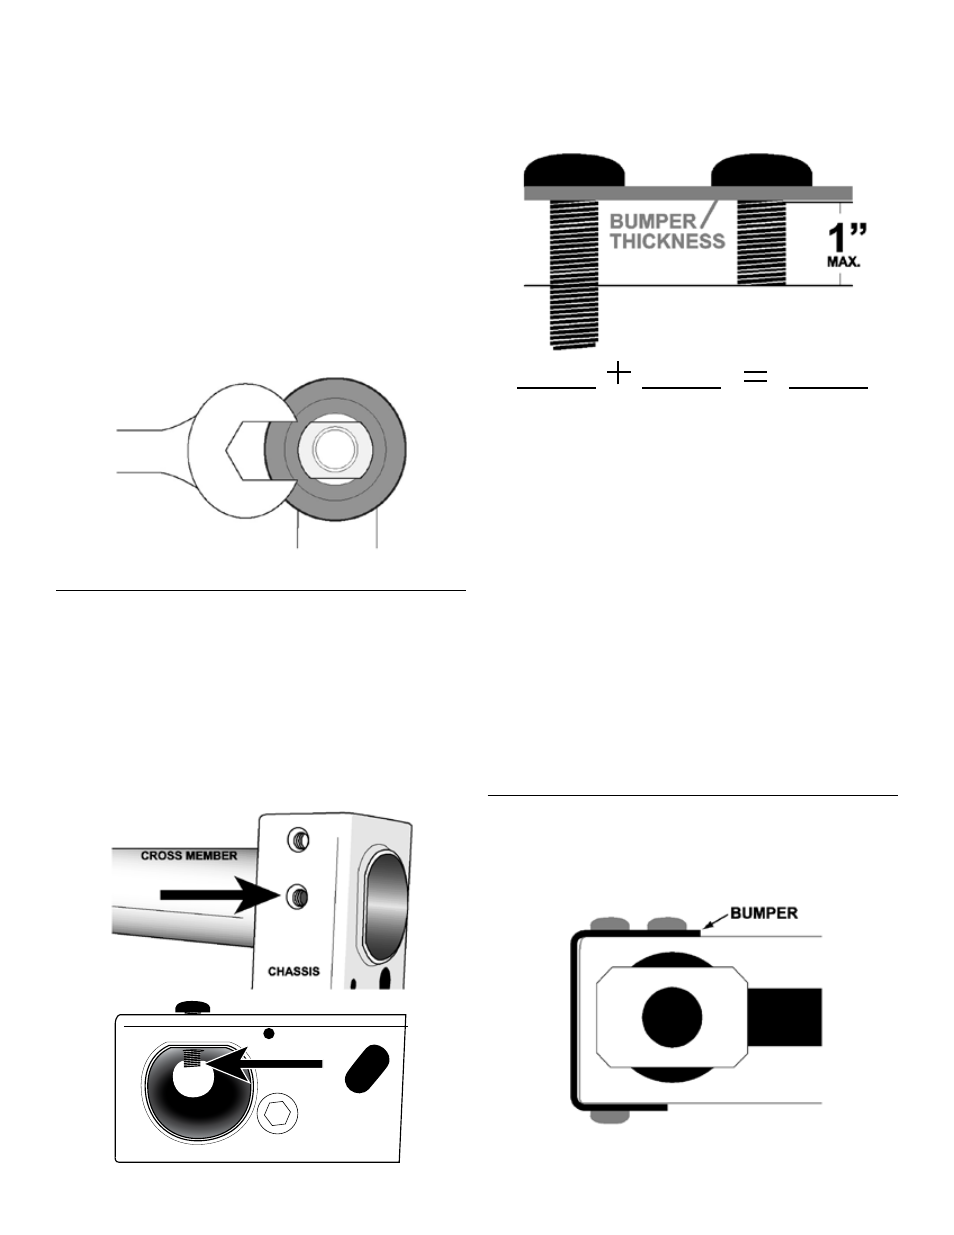
9. mODIFY FRONT BUmPER mOUNTING
BOLTS
If your bumper mounts to the chassis using the
factory mounting holes pictured below (arrow),
you must shorten or replace the mounting bolts
as described in this section to avoid damaging
the torsion bar bushings (not pictured).
HINT: If
bumper mounting bolt is too long it can protrude
into the crossmember and damage the torsion bar
bushing.
To determine the maximum bolt length for your
application, measure the thickness of your bum-
per (and any washers or other required hardware)
where it mounts to the chassis.
Hole Depth
Bumper
Thickness
Max. Bolt Shank
(Length)
1"
You must account for thickness of bumper and any
related hardware when determining maximum bolt
length.
Replace the two original bumper mounting bolts
with shorter bolts of the same exact size. Make
sure new bolt shank is no longer than the Maxi-
mum Bolt Length value above.
– OR –
Shorten the two original bumper mounting bolts
so that the shanks are no longer than the Maxi-
mum Bolt Length value above.
HINT: Carefully
cut bolts using a metal cutting tool capable of a
clean, square cut to ensure re-installation. It may
be necessary to repair any damaged threads with
a small file.
10. vERIFY BUmPER CLEARANCE
With the SwitchBlade Swaybar installed, slide
your front bumper into its mounting position on the
chassis and loosely install hardware.