Using the call home profile manager, Figure 41 call home profile manager dialog box, Using the call home profile editor – HP SN6000 Fibre Channel Switch User Manual
Page 86: 41 call home profile manager dialog box
86
Managing switches
Using the Call Home Profile Manager
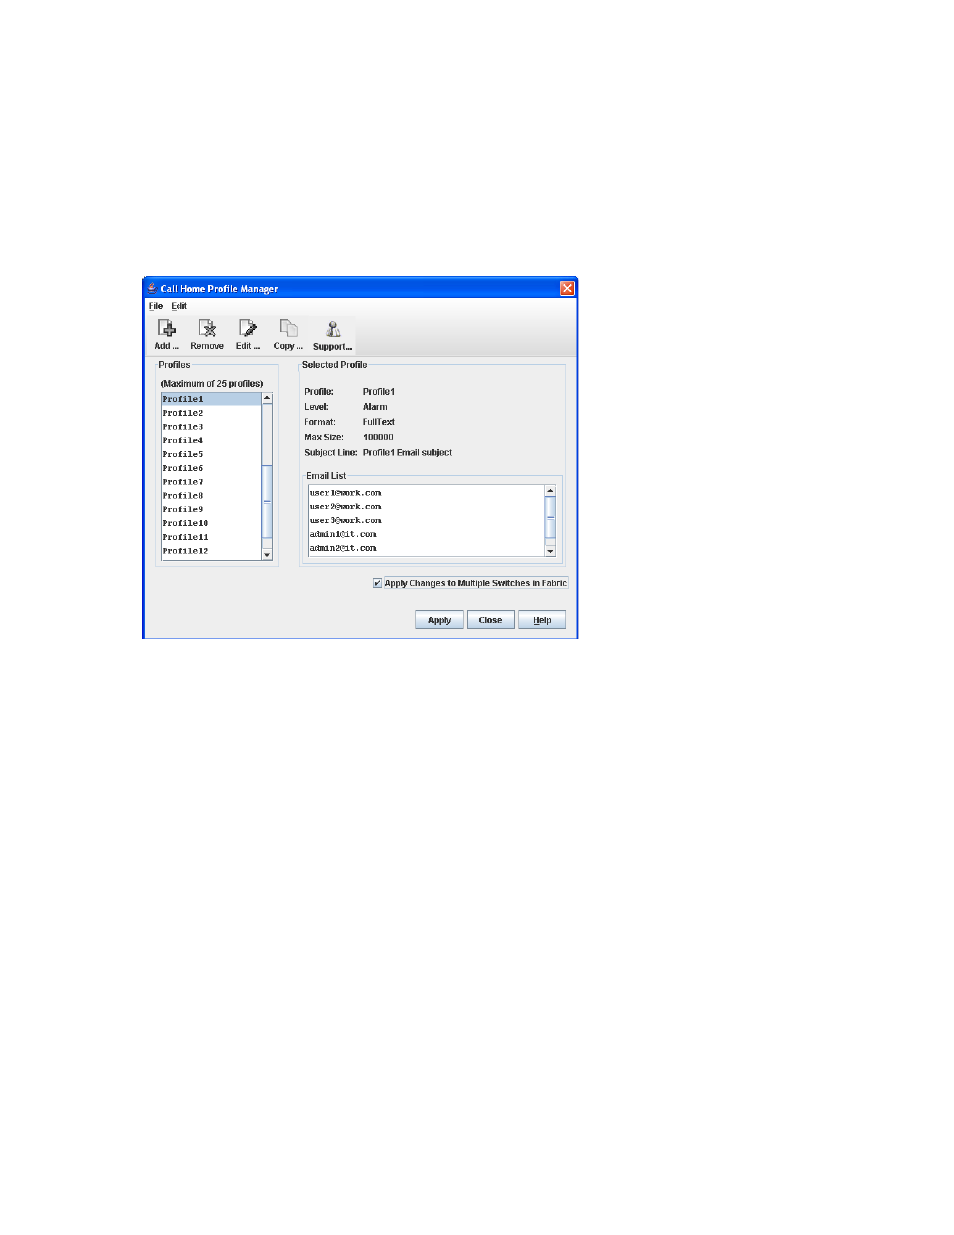
The Call Home Profile Manager is used to configure the type of events for which an email alert is sent, and
where the alerts are sent. Use the Call Home Profile Manager dialog box (
) to manage all
profiles on a switch. You can add new profiles, remove profiles, edit profiles, and make copies of existing
profiles.
To display the Call Home Profile Manager dialog box, select Switch > Call Home > Profile Manager. The
Profiles list shows all profiles on the switch. The Email List shows all email addresses associated with the
selected profile in the Profiles list. The Apply Changes to Multiple Switches in Fabric option enables you to
propagate all profiles on the switch to one or more switches in the fabric. See ”
” on page 90 for more information.
Figure 41
Call Home Profile Manager dialog box
Using the Call Home Profile Editor
Use the Call Home Profile Editor dialog box (
) when creating a new profile, or when editing or
copying an existing profile. The Call Home Profile Editor dialog box is displayed by clicking Add, Edit, or
Copy on the Call Home Profile Manager dialog box. Alternatively, you can open the Edit menu, and select
Add New Profile, Edit Profile, or Copy Profile. The name in the title bar changes to reflect the option
selected—adding a new profile, adding a new profile, making a copy of an existing profile, or editing an
existing profile.
To create a profile:
1.
Click Add (
) in the Call Home Profile Manager dialog box.
The Call Home Profile Editor dialog box appears (
2.
Enter a name for the profile.
3.
Select an event level threshold.
4.
Select a format type for the message text being sent (FullText or ShortText).
5.
Enter the maximum size of the message being sent.
6.
Enter the subject of the email.
7.
Enter the email address(es) of the recipients.
8.
Click Add to add the email address(es) to the list.
9.
Click OK to save the changes.