Case f: shared voice/fax line with voice mail – HP Officejet 7410 All-in-One Printer User Manual
Page 88
If you pick up the phone before the HP all-in-one and hear fax tones from a sending fax
machine, you will need to answer the fax call manually. For information, see
Case F: Shared voice/fax line with voice mail
If you receive both voice calls and fax calls at the same phone number, and you also
subscribe to a voice mail service through your telephone company, connect your
HP all-in-one as described in this section.
Note
You cannot receive faxes automatically if you have a voice mail service at the
same phone number you use for fax calls. You must receive faxes manually; this
means you must be available to respond in person to incoming fax calls. If you
want to receive faxes automatically instead, contact your telephone company to
subscribe to a distinctive ring service, or to obtain a separate phone line for
faxing.
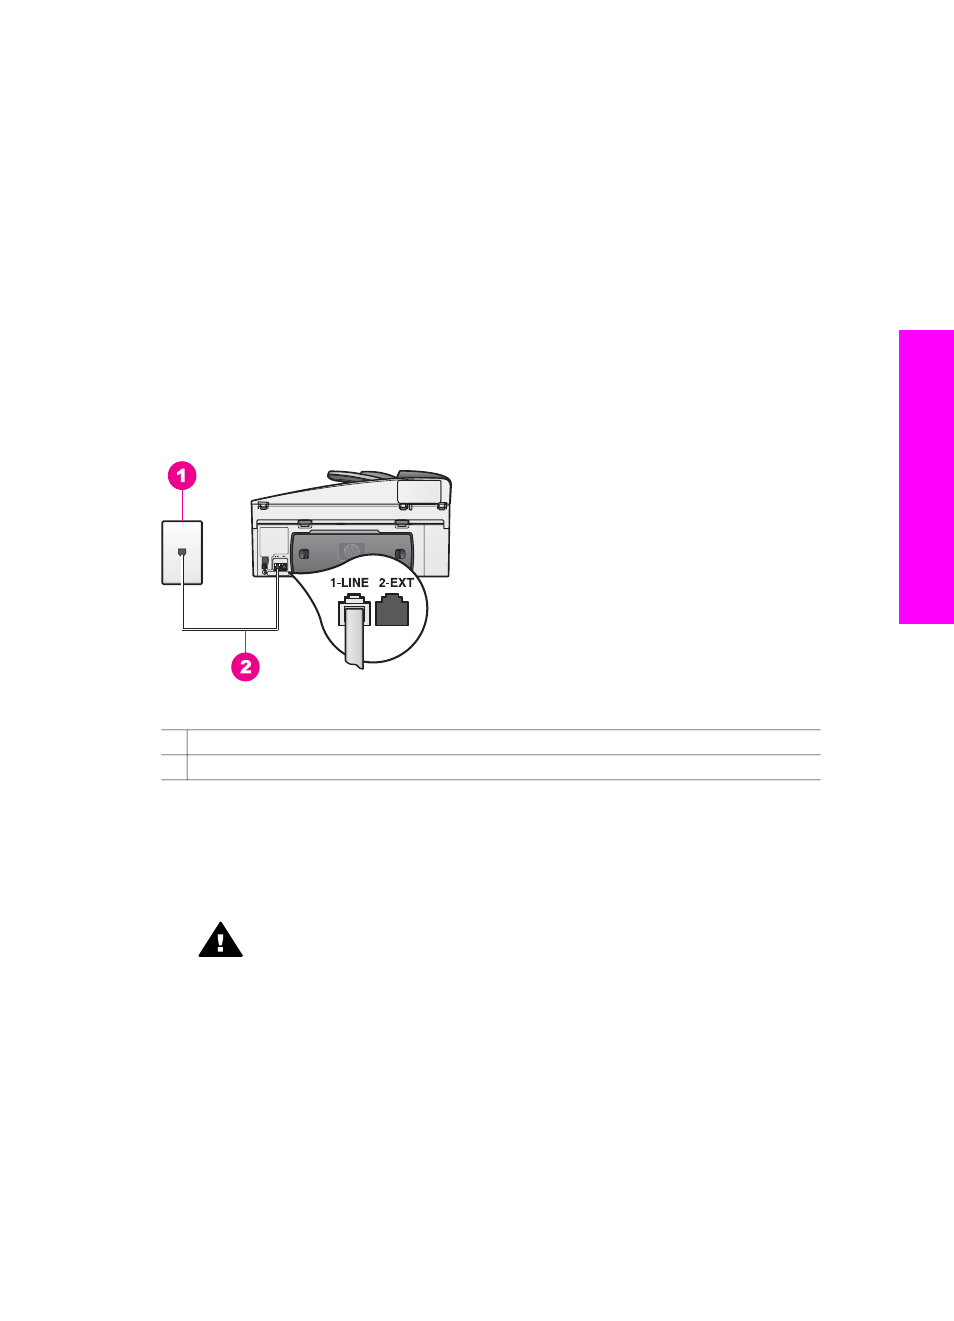
Back view of the HP all-in-one
1 Telephone wall jack
2 Phone cord supplied in the box with your HP all-in-one connected to the "1-LINE" port
To set up your HP all-in-one with voice mail
1
Using the phone cord supplied in the box with your HP all-in-one, connect one end
to your telephone wall jack, then connect the other end to the port labeled "1-LINE"
on the back of your HP all-in-one.
Caution
If you do not use the supplied cord to connect from the telephone
wall jack to your HP all-in-one, you might not be able to fax successfully.
This special phone cord is different from the phone cords you might already
have in your home or office. If the supplied phone cord is too short, see
phone cord that came with my HP all-in-one is not long enough
information on extending it.
2
Set up the HP all-in-one to answer incoming calls manually. Press the
Auto
Answer
button until the light is off.
3
Run a fax test. For information, see
You must be available to respond in person to incoming fax calls, or your HP all-in-one
cannot receive faxes. For information on receiving faxes manually, see
.
User Guide
85
Fax setup