Setting the system value – AMX NetLinx Master-Ethernet Card/Module NXC-ME260 User Manual
Page 27
Communication and Firmware Update
21
NXC-ME260 NetLinx Master-Ethernet Card/Module
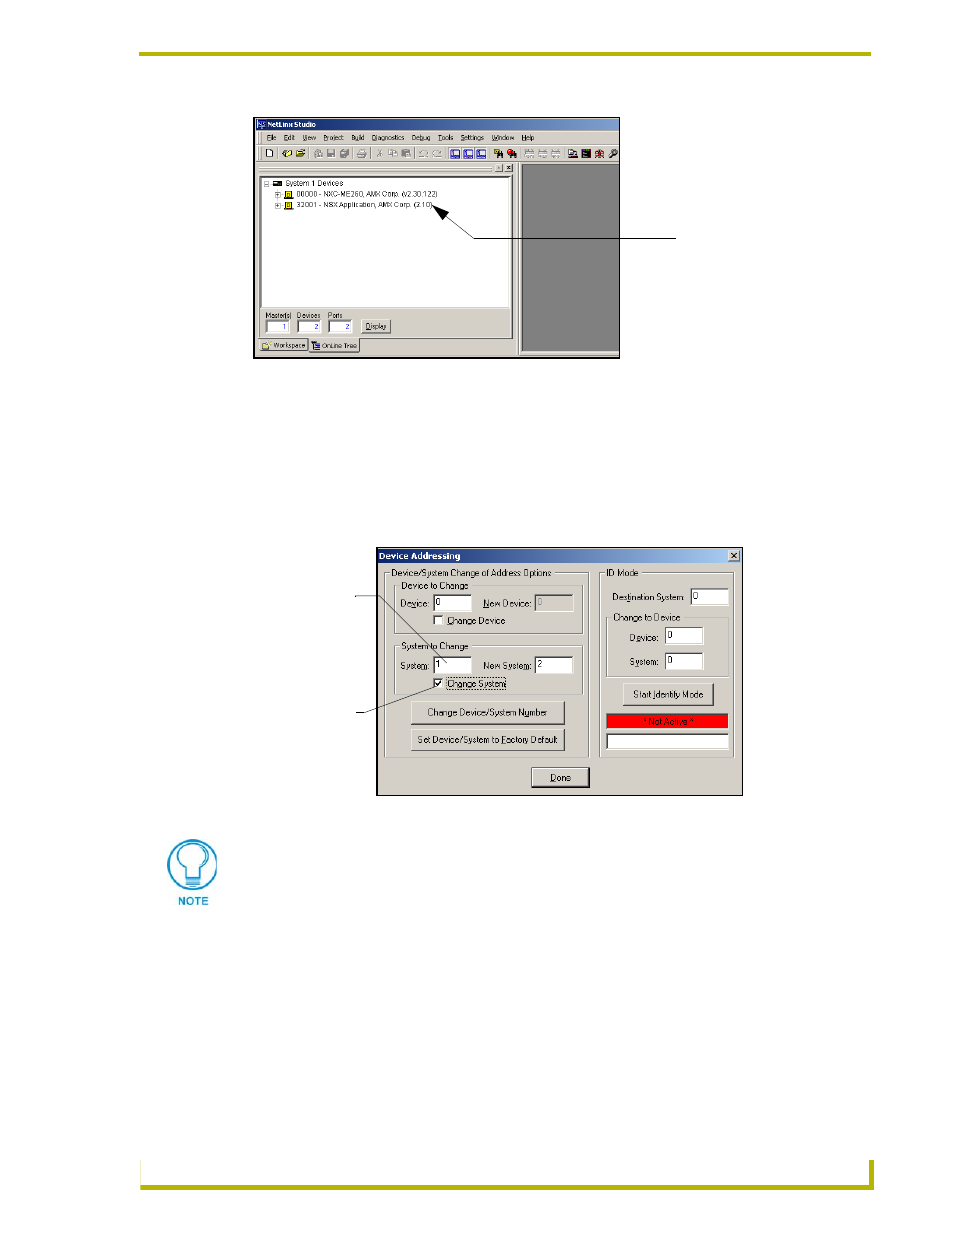
Setting the System Value
1.
Access/open the Device Addressing dialog (FIG. 18) by either one of these two methods:
Right-click on any System item listed in the OnLine Tree tab of the Workspace and
select Device Addressing (from the pop-up list).
Select Diagnostics > Device Addressing from the Main menu.
2.
Select the Change System selection box, from the System to Change section.
3.
Enter both the current and new system address values (this example uses 2).
4.
Click the Change Device/System Number button. This configures the Master to accept the
new value and incorporate the information. The system information (in the OnLine Tree tab of
the Workspace window) refreshes and then displays the new information.
5.
Click Done to close the Device Addressing dialog and return to the main program.
6.
Select Tools > Reboot the Master Controller to access the Reboot the Master dialog, then
click Continue to reboot the Master and incorporate any changes. Allow 20 - 30 seconds for
FIG. 17 Initial NetLinx Workspace window (showing the OnLine Tree tab)
FIG. 18 Device Addressing tab (changing the system value)
Showing the current
version of the
NetLinx Studio
System Address
(default for initial
system is 1)
Check-Off to
verify change
This tab represents the only way to change the System Number associated to the
active Master.