Replacing the mainboard – Acer 4330 User Manual
Page 122
112
Chapter 3
Replacing the Mainboard
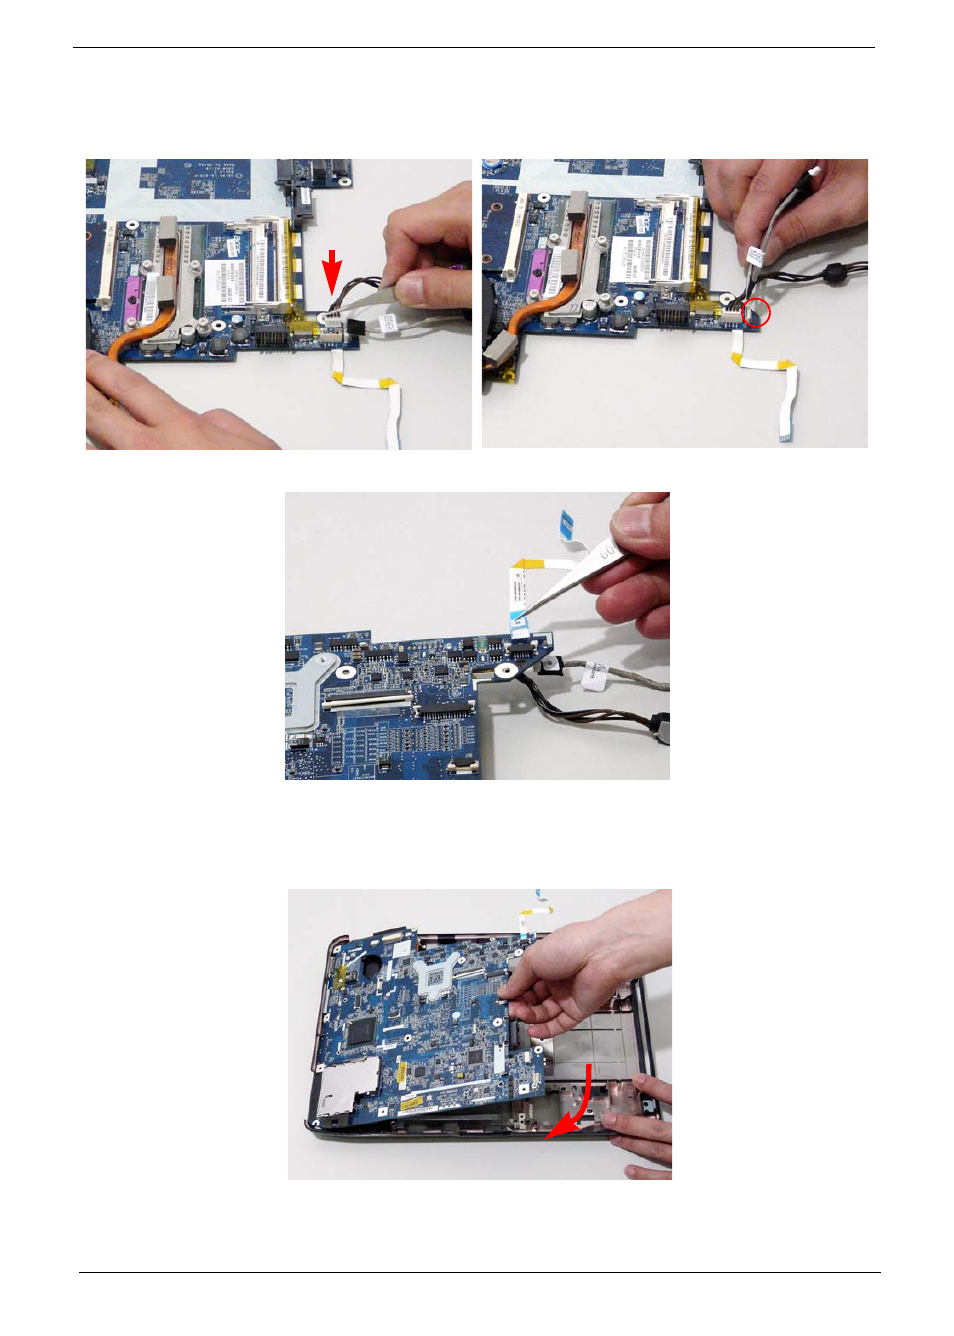
1. Turn the Mainboard over. Connect the DC IN Cable
to the Mainboard.
2. Connect the I/O Cable to the Mainboard.
3. Replace the Switch Cover FFC and lock the securing latches in place.
4. Ensure that the Mainboard is face up (the Heatsink and CPU are not visible). Place the Mainboard in the
chassis, rear edge first, and press down to install. Replace the two securing screws as shown.
NOTE: Make sure the I/O ports are positioned correctly through the lower cover, and the screw sockets are
visible through the mainboard.