Setra System Model 869 User Manual
Page 18
18
6.4 PROFILE: General
Setting up Test Profiles Database (Diagram 11):
1. Profiles are pressure settings used during testing.
2. Program has capability of creating additional test profiles besides the
default test profiles that are installed.
3. If a new profile setup is required tap the PROFILE tab.
4. Select NEW button
5. Type new PROFILE ID in box.
6. Select PROFILE to copy, (if desired) from drop down list, and press ‘OK’.
7. Once you’ve entered your new PROFILE ID, select the number
of data points box, highlight the number and change it.
8. Go to PROFILE TYPE drop down window, press down arrow
and select from the list of Ascending, Descending, Both, or Custom.
Note: When using both, the number of data points MUST be odd, it cannot be even.
9. If leak test is required, check PERFORM LEAK TEST box.
10. To save, press SAVE button.
Note: Save will be ‘grayed out’ when data has been saved.
11. To delete a profile, select PROFILE from list, and push DELETE button.
12. Custom test point profiles can be created. To adjust a custom test
point via the Custom Profile Editor Page (Diagram 12), tap the test point
number in the ‘TP #’ column of the profile display window.
13. Ascending, Descending, and Both will set up a profile with evenly
spaced points in the direction implied by the type. For custom point spac-
ing, see the Custom Profile Editor Page.
Diagram 11
Profile
Type
Perform
Leak Test
Target
Output
Profile ID
Number of
Test Points
Test
Point
Target
Pressure
%FS Target
39
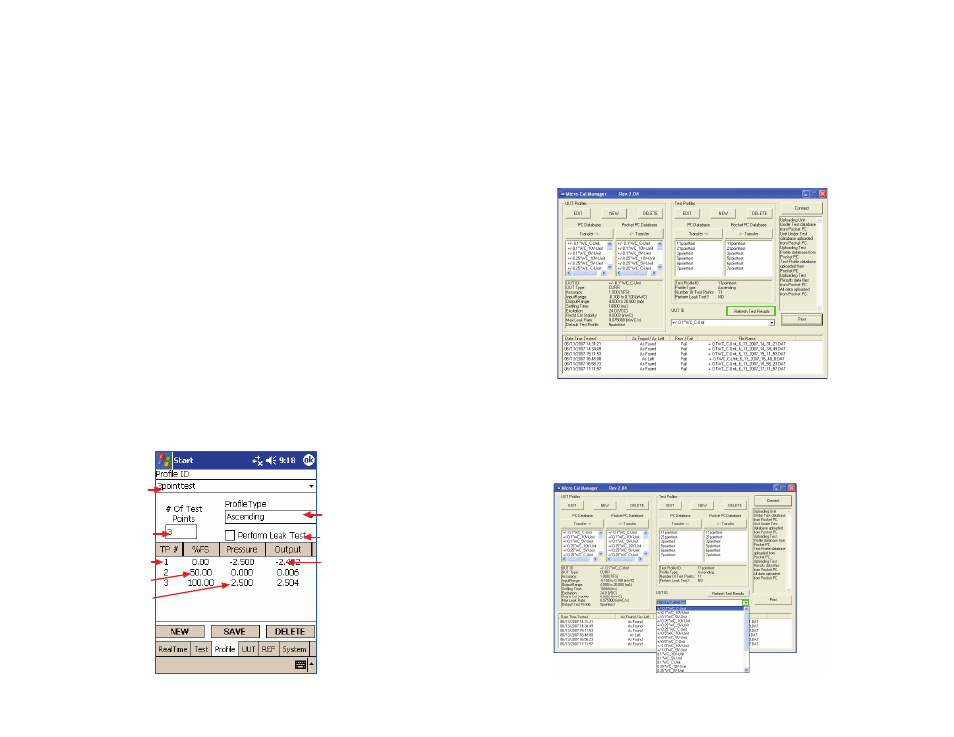
9.3 TEST RESULTS DATA
1. At bottom of screen, there is a list box showing all the test results data
files stored in memory.
2. On connect, all the data files from the Pocket PC are copied to the main
PC database. If a file already exists with the same name, the file will not
be copied.
3. If a new data file is created while connected, the new files can be up-
loaded by pressing the ‘Refresh Test Results’ button. This will repeat the
file upload procedure performed on connect. (See Diagram 34)
Screen Shot with tests listed.
Diagram 34
To review a particular test (See Diagram 35):
1. Select the ID of the Unit Under Test from the dropdown list above the
test results list (just below the ‘Refresh Test Results’ button).
2. Press dropdown arrow at the right of the ID box.
3. Click on ID in box.
Screen Shot with Test Results list activated.
Diagram 35