Installation, 1 installing the actuator – IAI America NS User Manual
Page 44
30
8. Installation
8.
Installation
How to install the actuator is explained based on a single-axis configuration.
8.1
Installing the Actuator
The surface on which to install the actuator shall be a machined surface or a flat surface having
equivalent accuracy.
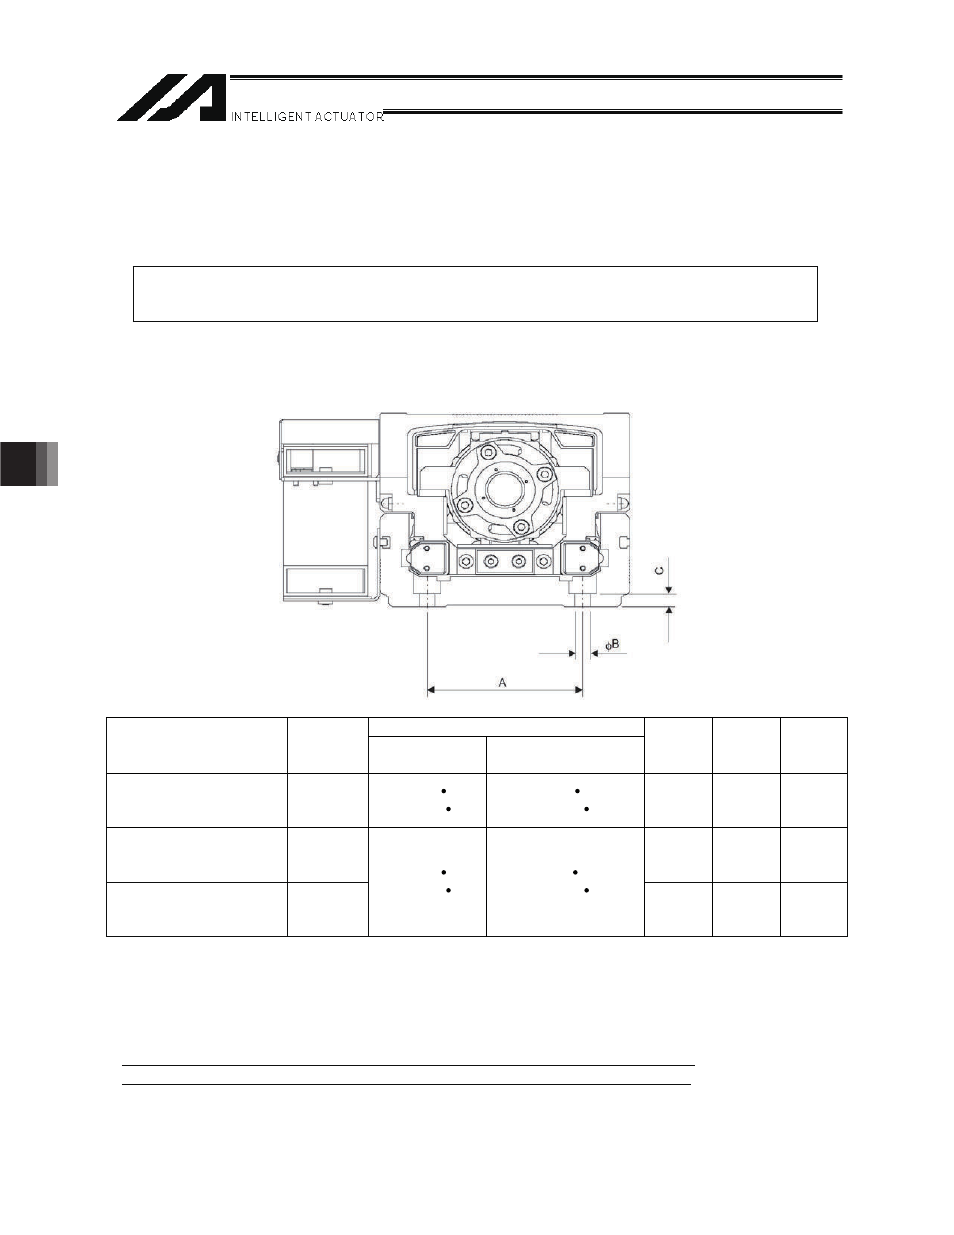
x Mounting holes are provided in the actuator base, so use these holes to install the actuator. Use M8
bolts conforming to strength category 10.9 or above, together with the dedicated washers that came with
the actuator (to prevent buckling).
Tightening torque
Applicable
bolt
Bolt bearing
surface is steel
Bolt bearing surface
is aluminum
Dimension
A
Dimension
B
Dimension
C
Small type
SXMS, SXMM, SZMS,
SZMM
M6
12.3 N m
(1.26 kgf m)
5.4 N m
(0.55 kgf m)
50
7
6
Medium type
MXMS, MXMM,
MXMXS, MZMS, MZMM
5
9
0
7
8
M
Large type
LXMS, LXMM, LXMXS,
LZMS, LZMM
M8
31.3 N m
(3.19 kgf m)
14 N m
(1.43 kgf m)
90
9
8
About tightening screws
x Use hexagonal socket head bolts as the male threads with which to install the actuator base.
x Use of high-strength bolts conforming to ISO 10.9 or above is recommended.
x The effective engagement length between the bolt and female thread shall be at least the value
specified below:
When the male thread is made of steel
o Same as the nominal diameter
When the male thread is made of aluminum
o 1.8 times of nominal diameter
x If the bolt bearing surface is made of aluminum, also use a dedicated washer for high-strength bolt. (If
the bolt is applied without an appropriate washer, the bearing surface may buckle.)