Ransburg, Fluid tip removal / replacement – Ransburg RMA-560 Single_Dual Purge Direct A13364 User Manual
Page 59
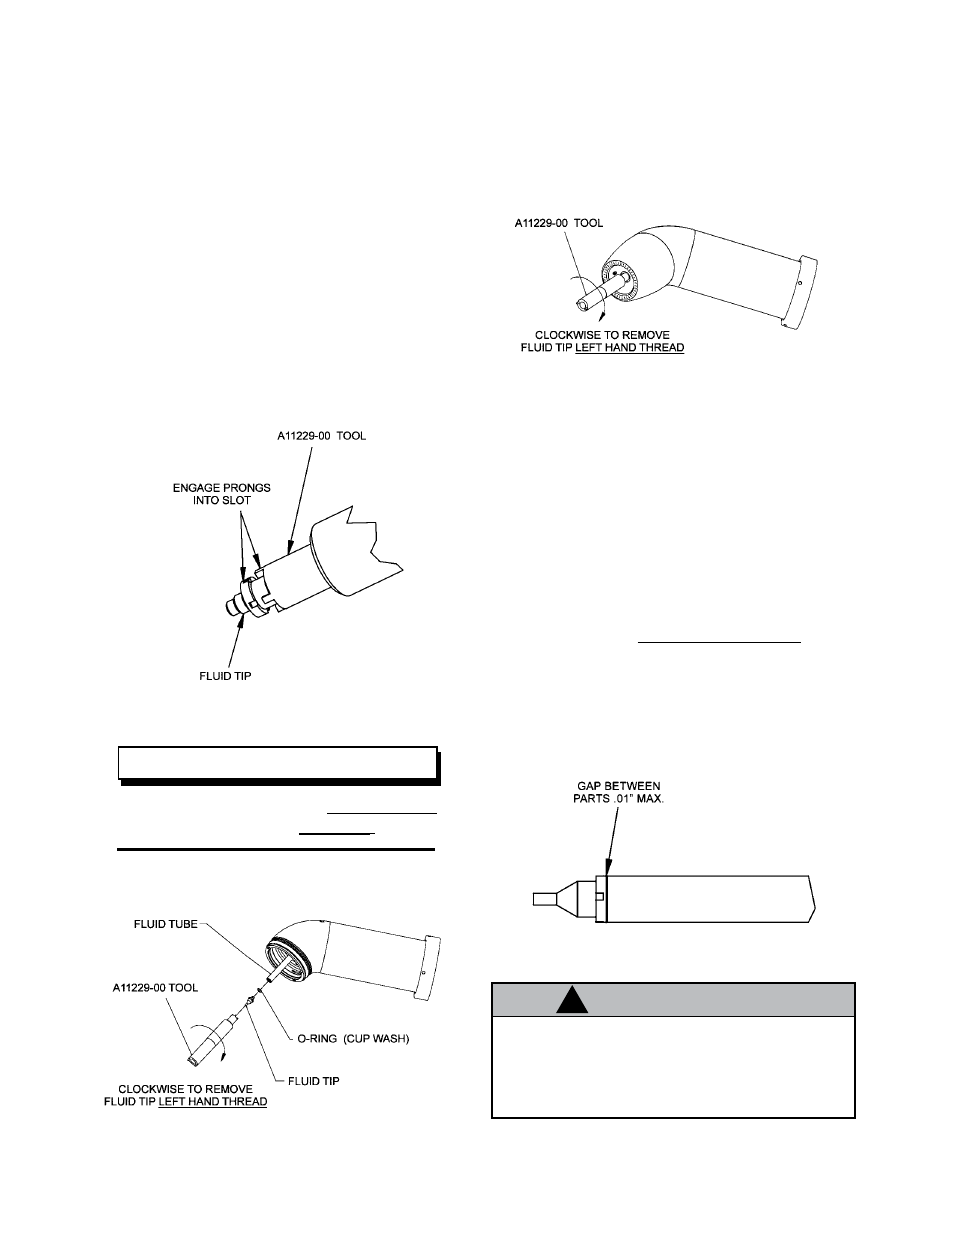
Fluid Tip Removal
Fluid Tip
The fluid tip may be removed either with the turbine
in place, or the turbine off the unit. “Fluid Tip” figure
shows removing the tip with the turbine in place.
Fluid Tip Removal
This allows removal and replacement of the fluid
tip while the applicator is on-line.
Replacement
Ensure the tip openings are fully open and clean.
Apply an O-ring lubricant to the O-ring to help hold
it in place on the fluid tip. Insert the O-ring into the
undercut groove on the tip. Place the tip on the
tool and tighten in a
counter-clockwise direction
into the fluid tube.
Do not over-tighten. There
will be a small gap between the flange of the fluid
tip and the fluid tube (see “Fluid Tip/Tube Gap”
figure). Ensure the O-ring is properly positioned
when complete. Tighten to 25-30 lbs•in (2.83-3.4
Nm) torque.
NOTE
To remove, turn the tip
CLOCKWISE.
The thread on the tip is
left hand.
If fluid tube is centered, the turbine is fully seated.
If not, check tightness with spanner wrench. If
tube is not centered, again remove turbine and
check for causes, such as an O-ring fell off, fiber
optic not fully installed, foreign material on seating
surface, etc. Reinstall and recheck tube centering.
Fluid Tip Removal / Replacement
Removal
To remove the fluid tips, use the tip/tube removal
tool (A11229-00). Insert the tool over the tip and
engage the four (4) prongs of the tool into the four
(4) slots in the tips (see “Fluid Tip Removal” figure).
Fluid Tip / Tube Gap
C A U T I O N
!
When removing fluid tip while turbine is
still installed, make sure to clean paint or flu-
id that may leak and run onto the shaft or
threads.
RMA-560 Single/Dual Purge Direct Charge - Maintenance
Ransburg
LN-9278-13
56