Ransburg, Bell cup removal tool, Splash plate removal (all bell cups) – Ransburg RMA-560 Single_Dual Purge Direct A13364 User Manual
Page 56
Bell Cup Removal Tool
(65mm Bell Cups Only) A11247-00
(Optional Accessory)
This tool is meant to aid in the removal of bell
cups that are abnormally tight on the spindle
shaft. Typically, bell cups are easily removed by
hand with the aid of the standard bell cup wrench
(A12061-00). To prevent bell cups from becoming
difficult to remove, care should be taken to remove
wet or old dried paint from shaft and bell cup taper
and threads before bell cups are assembled to
the atomizer.
Before using the bell cup removal tool, clean the
exterior of the bell cup with clean solvent and dry
it. This will improve the tool’s ability to grip the
cups surface.
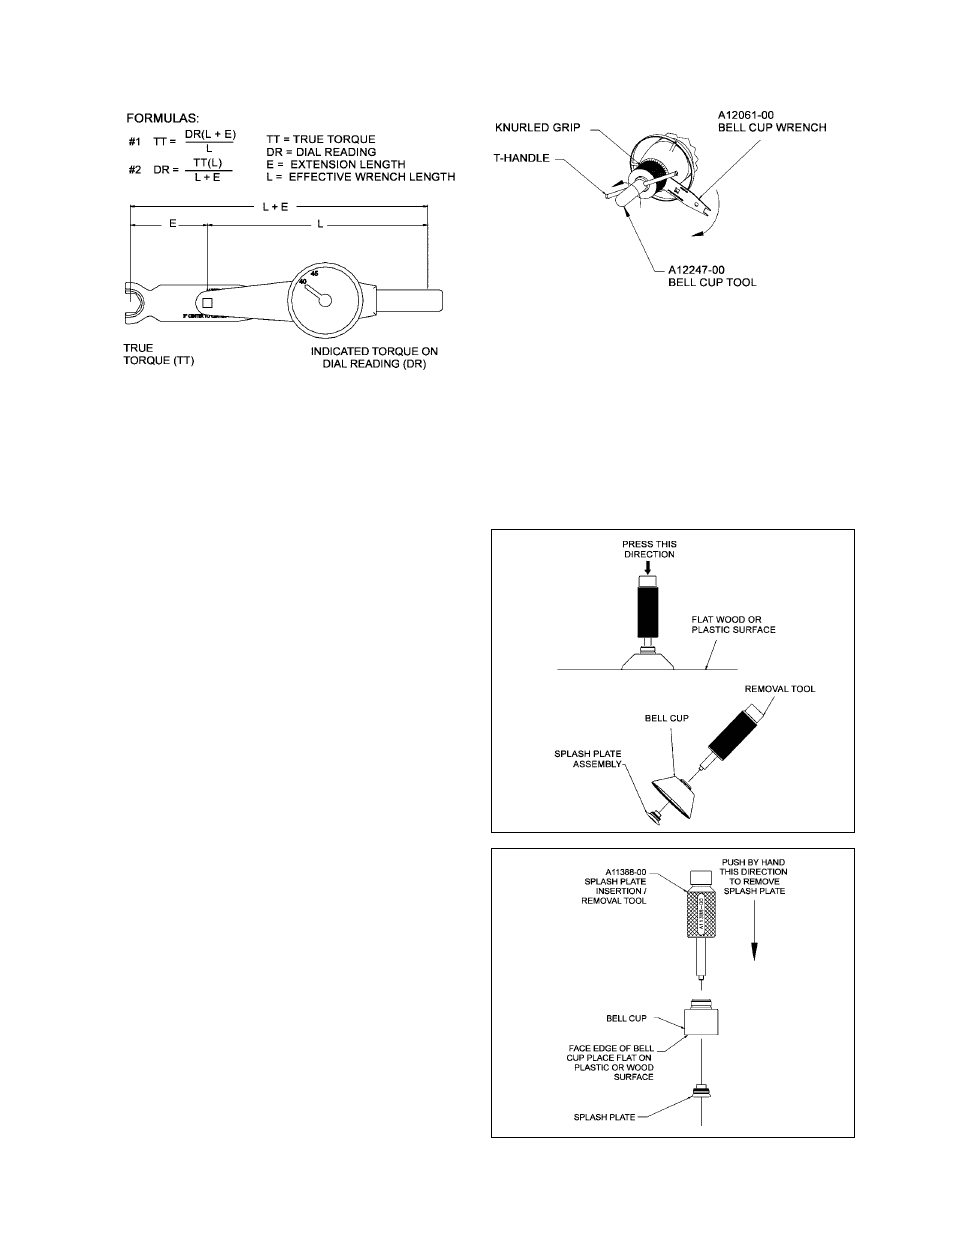
To install the tool, first engage the bell cup wrench
(A12061-00) to the shaft hex behind the bell cup.
Place the bell cup tool (A12247-00) over the front
of the bell cup and tighten the knurled portion in
a counter-clockwise direction until very tight (left
hand thread). (See “Bell Cup Removal Tool” fig-
ure for proper engagement of tool on bell cup.)
While holding the bell cup wrench on the spindle
shaft, grasp the T-handle on the bell cup tool and
turn in a counter-clockwise direction until bell cup
is loosened. If tool rotates or slips, tighten tool
further and retry.
Bell Cup Removal Tool
Effective Length Torque Wrench
Splash Plate Removal (All Bell Cups)
After removing the bell cup from the applicator, put
it on a plastic or wood surface to prevent damage
to the edge of the cup. Using the splash plate
removal tool (A11388-00), insert the small end of
the tool into the end of the splash plate assembly.
Press the splash plate out. It may be necessary
to tap lightly with a hammer.
Splash Plate Removal
RMA-560 Single/Dual Purge Direct Charge - Maintenance
Ransburg
LN-9278-13
53