Cleaning shaping air holes, Ransburg – Ransburg RMA-560 Single_Dual Purge Direct A13364 User Manual
Page 52
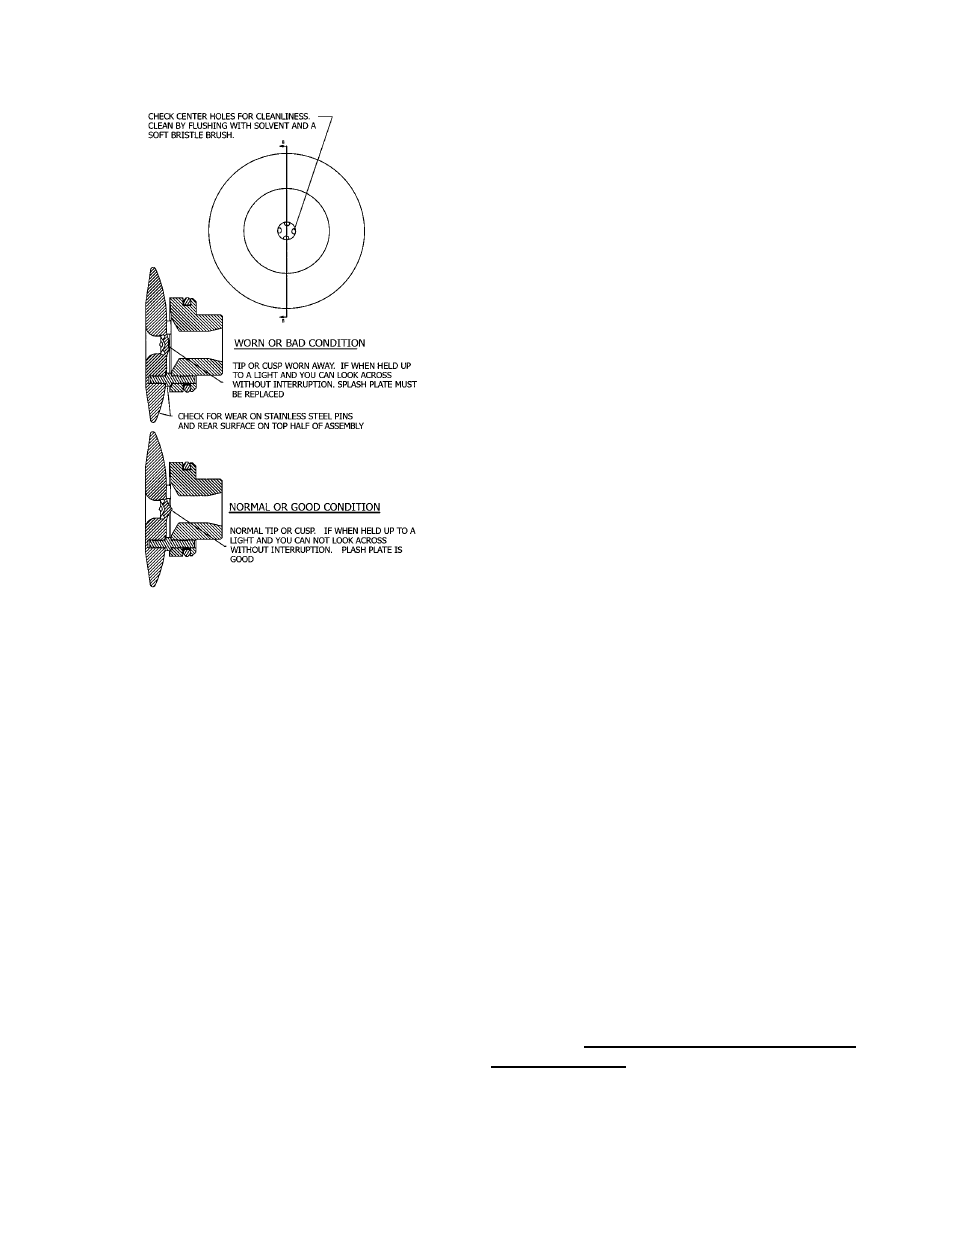
Also, check the three (3) pins between the
front and rear splash plate halves. If worn,
replace entire assembly.
6. Check the center holes of the splash plate
for wear. Hold splash plate up to a light
source and look straight into the holes. If
light is clearly seen, the angled holes are
worn and the splash plate must be re-
placed.
7. Splash plate assemblies may be soaked for
a short time, under 2 hours, to loosen dried
material. Clean with a soft bristle brush.
Blow out center holes to dislodge material.
Never use any kind of pick instrument to
clean these holes.
8. Soaking the bell in solvent may aid in loos-
ening or removing paint build-up. It is
recommended that the splash plate be re-
moved and cleaned separately.
9. Use a soft bristle brush dipped in solvent
to remove paint build-up from the serration
cuts, paint feed holes or slots, and exter-
nal and internal surfaces of the bell.
Inspection of Bell Cups
CLEANING SHAPING AIR HOLES
In order to maintain uniform pattern control, the
shaping air holes of the inner ring and the shaping
air cap must be clean and free of any blockage.
It is best to leave the shaping air supply ON
during normal production break cleaning periods.
Shaping air can be reduced to 70 slpm during this
time. This will help stop material from entering
the passage ways.
Periodically (weekly) the outer shaping air cap and
the inner shaping air ring should be removed and
thoroughly cleaned. Use of an ultrasonic cleaner
would make cleaning of hole diameters easier.
Inspect all holes for blockage. Blow holes clear
with compressed air after some time of soaking
in solvent.
DO NOT use any type of pick to
clear the holes. Damage may result to parts
and could affect performance of the equipment.
If holes are damaged (oversized holes, blockage,
and gauges) it must be replaced.
10. A soft, lint free rag dampened with solvent
may be used to remove any paint residue
from the external and internal surfaces of
the bell.
11. After removing all paint build-up or residue,
rinse the bell in clean solvent and blow dry.
12. Before reinstalling the bell on the shaft,
check the mating surfaces of the thread
and taper for any paint build-up or residue.
Also, check the fluid tip, fluid tube outside
diameter, and the shaft for any further paint
build-up. These surfaces should be cleaned
before installing the bell.
13. It is recommended that extra bell cups be
purchased. The cups can then be cleaned
off line in an automated cup cleaner.
14. Reinstall cups to proper torque 50-70 lbs•in
(5.65-7.91 Nm).
s
RMA-560 Single/Dual Purge Direct Charge - Maintenance
Ransburg
LN-9278-13
49