General meter setup, Basic meter setup – E-Mon E-PS-A-RTU-N User Manual
Page 60
Chapter 4 Power
S O F T W A R E
G E N E R A L M E T E R S E T U P
60
PowerSmart+ Advanced Power Quality Meter
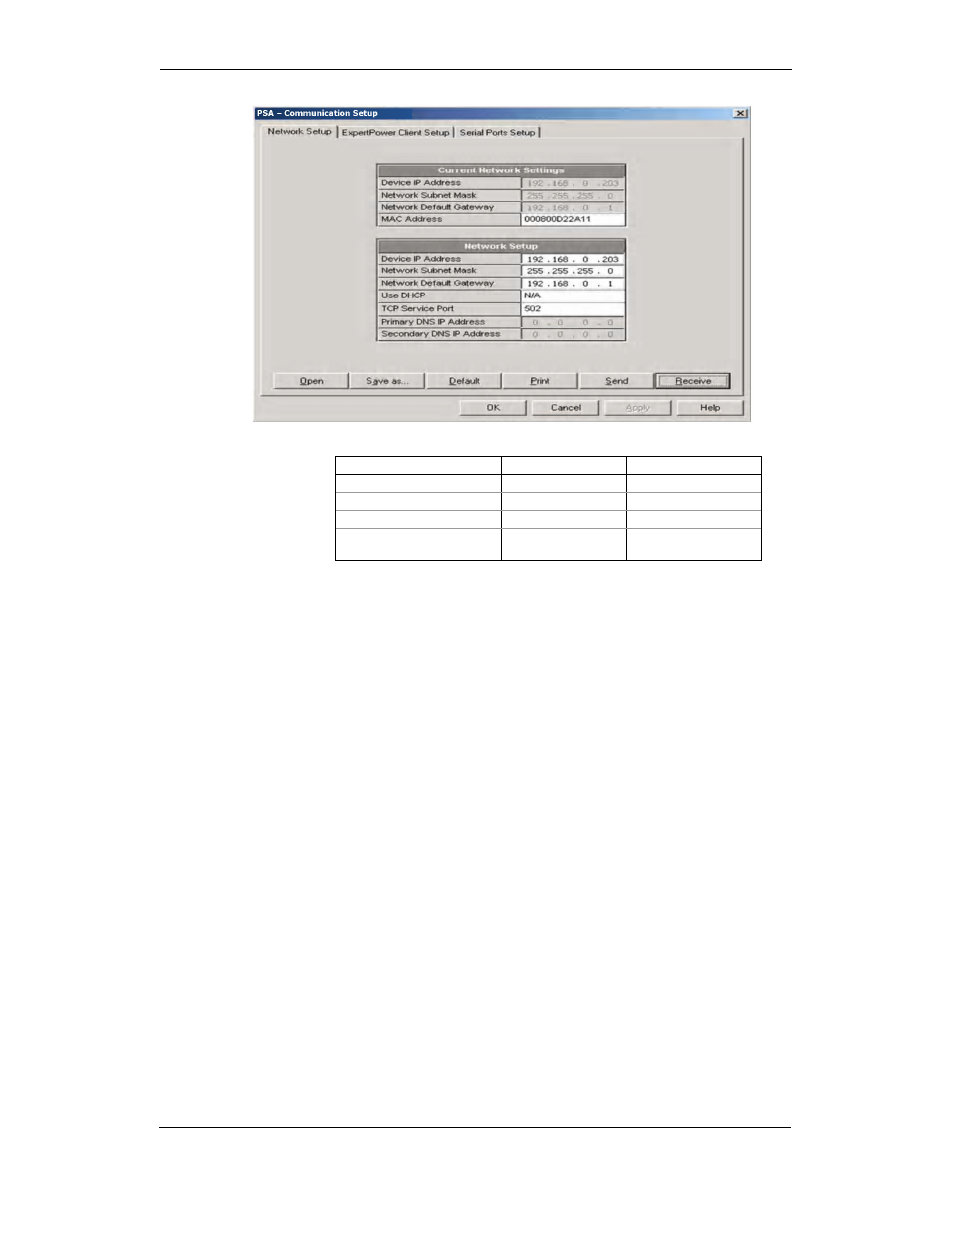
The following table lists available network options.
Parameter
Options
Default
Device IP Address
192.168.0.203
Network Subnet Mask
255.255.255.0
Network Default Gateway
192.168.0.1
TCP Service Port
502 = Modbus/TCP
20000 = DNP3/TCP
502
The TCP service port can also be changed trough the COM1 serial port setup:
changing the protocol for the port automatically changes the TCP port for the Ethernet.
To change the Ethernet settings in your meter, select desired parameters, and then click
Send.
NOTES
The meter provides the permanent Modbus TCP server on port 502. Selecting the DNP3
TCP service port launches the DNP3 TCP server in addition to the Modbus server allowing
simultaneous connections on both ports. Selecting the Modbus TCP port disables the
DNP3 TCP server.
When you change the device network settings through the Ethernet port, the device port
restarts so communication will be temporarily lost. You may need to wait some additional
time until Power Software restores a connection with your device.
General Meter Setup
This section describes how to configure the PowerSmart+ Advanced PQM for your
particular environment and application using Power Software.
Basic Meter Setup
Basic Meter Setup
Basic Meter Setup
Basic Meter Setup
Before operating your meter, provide the device with basic information about your
electrical network.
To enter the Setup dialog, select the device site from the list box on the Power
Software toolbar, and then select General Setup from the Meter Setup menu.