Network address, Counters setup – E-Mon E-PS-A-RTU-N User Manual
Page 46
Chapter 3 Display
O P E R A T I O N S
M E N U O P E R A T I O N S
46
PowerSmart+ Advanced Power Quality Meter
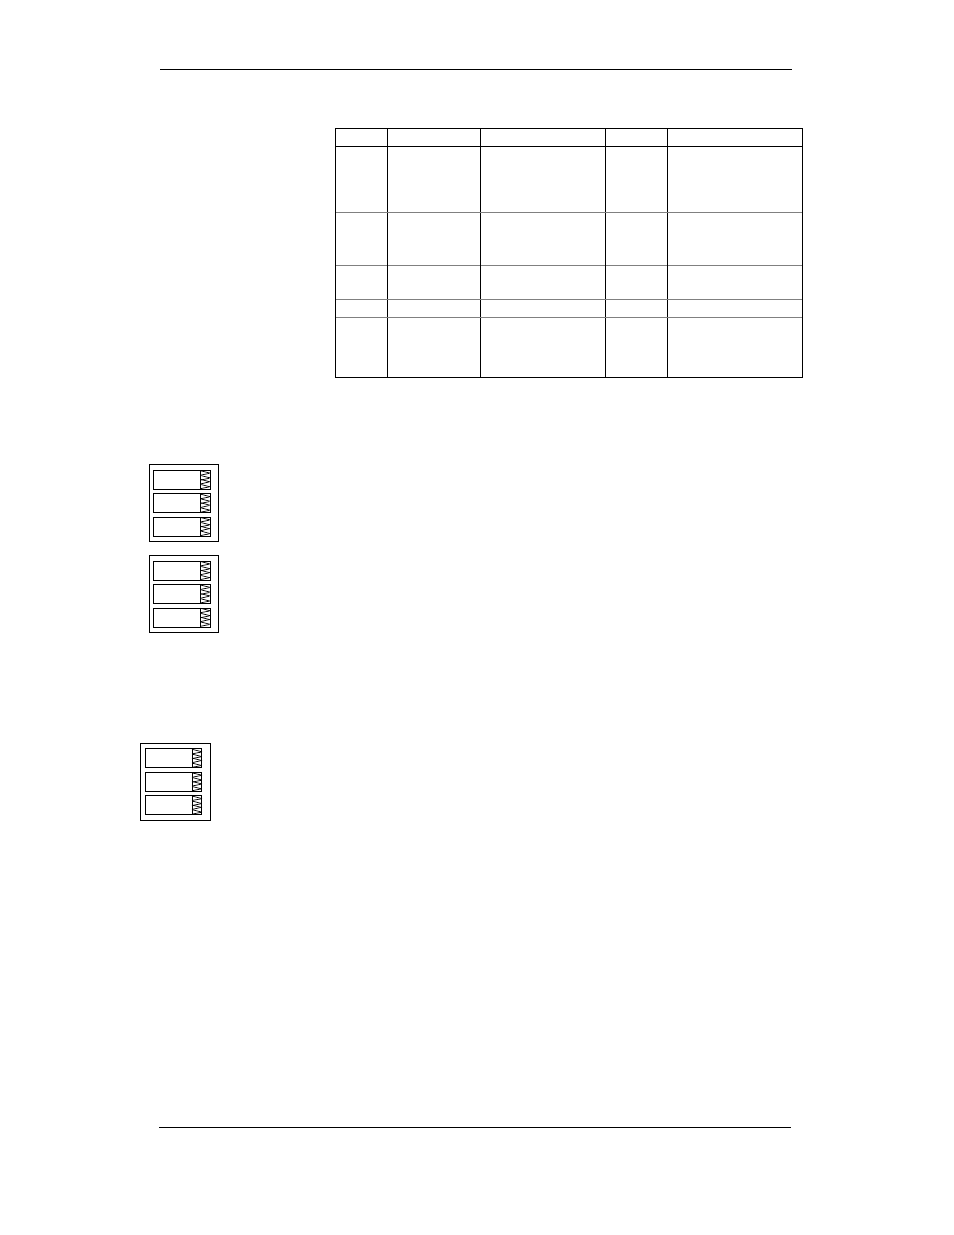
COM2 Settings
Label
Parameter
Options
Default
Description
Prot
Communications
protocol
rtu = Modbus RTU
ASCII = Modbus
ASCII
dnP3 = DNP3
Modbus
RTU
The communications
protocol supported by
the port
rS
Port interface
485 = RS-485
422 = RS-422
RS-485
Addr
Device address
Modbus: 1-247
DNP3: 0–65532
1
Device network address
bAud
Baud rate
300-115200 bps
19200 bps The port baud rate
dAtA
Data format and
parity
7E, 8N, 8E
8N
7E data format should
not be used with the
Modbus RTU and DNP3
protocols
Network Address
Network Address
Network Address
Network Address
This menu allows you to configure the device IP address and the default gateway
address for the Ethernet port. To enter the menu, select “nEt” from the main menu,
and then press the ENTER button.
To change the IP Address and Default Gateway:
To change the device IP address, select the “A” entry in the upper window with the UP and
DOWN arrow buttons. To change the default gateway address, select the “G” entry.
Press the SELECT button to activate the first address digit.
Use the UP and DOWN arrow buttons to adjust the digit.
Press the SELECT button to advance to the next digit.
Adjust the remaining address digits.
Press ENTER to confirm your new setting, or press ESC to discard changes.
To exit the menu, press ESC.
Counters Setup
Counters Setup
Counters Setup
Counters Setup
The PowerSmart+ Advanced PQM has four six-digit counters that can count pulses
delivered through the device digital inputs with a programmable scale factor, or events that
trigger setpoint operations. This menu allows you to link digital inputs to the counters and
define a pulse multiplier for each counter. To enter the menu, select the “Cnt” entry from
the main menu and press the ENTER button.
The menu uses three entries:
The upper window indicates a counter number.
The middle window selects a digital input to be linked to the counter.
The lower window defines a counter multiplier.
Use the UP and DOWN arrow buttons to scroll to the desired counter.
To change the counter options:
Press the SELECT button to activate the middle window.
Use the UP and DOWN arrow buttons to link a digital input to the counter or to disable the
counter input.
Press the SELECT button to activate the lower window.
Cnt.1
1
Inp.1
A
.
000.203
G
.
000.001