Parts of the power amplifier, Set-up – PASCO PS-2006 GLX Power Amplifier User Manual
Page 6
®
P S - 2 0 0 6 G L X P o w e r A m p l i f i e r
P a r t s o f th e P o w e r A m p l i f i e r
4
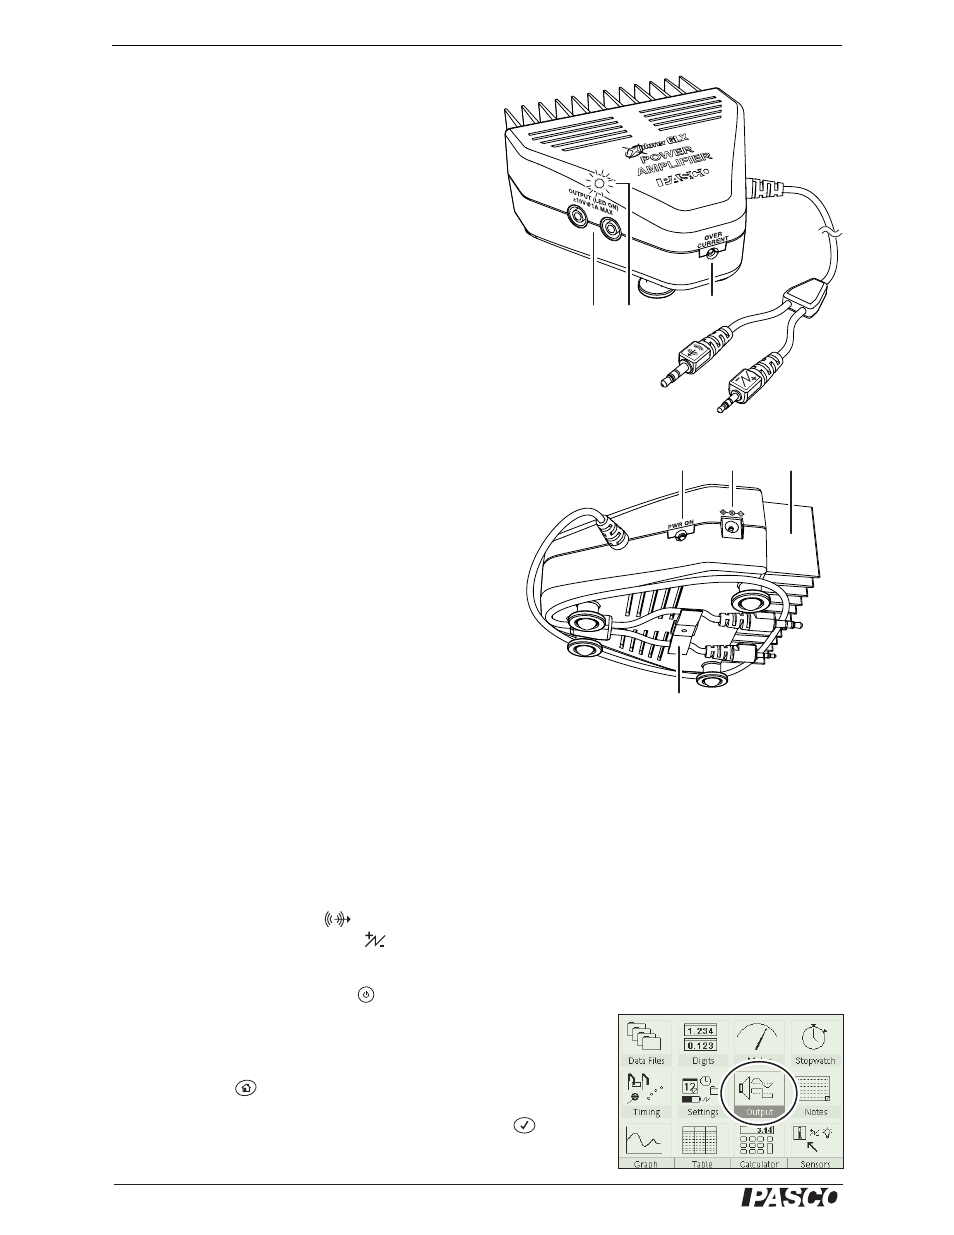
Parts of the Power Amplifier
1.
Output jacks:
Accept 4 mm banana plugs
(shielded or unshielded) to connect a device to the
Power Amplifier.
2.
Output-on indicator:
Lights to indicate that the
output is switched on.
3.
Over-current indicator:
Lights to indicate that
the output voltage may be clipped or distorted.
4.
Signal leads:
Connect to the Xplorer GLX.
They transmit the signal from the GLX to be amplified
and return information about the output current to the
GLX.
5.
Power indicator:
Lights when the Power
Amplifier is connected to and powered by the AC
adapter.
6.
AC adapter port:
Connects to the included AC
Adapter
7.
Heat sink:
Dissipates waste heat. The heat sink
may get hot (up to about 60° C). Ensure that the fins are
vertical and that the flow of air around the Power Ampli-
fier is not impeded.
8.
Cord clip:
Holds the signal leads for storage.
Set-up
1.
Connect the AC adapter to a wall outlet and to the power input port
of the Power Amplifier
2.
Connect the Power Amplifier's signal leads to the GLX. Connect
the larger plug (with the
icon) to the GLX's Signal Output
port; connect the smaller plug (
) to the Voltage Port on the side
of the GLX.
3.
Turn on the GLX by pressing
or plugging in the GLX's AC
adapter.
4.
Go to the Output screen and set Output Device to Power Amplifier:
a.
Press
to go to the Home Screen.
b.
Use the arrow keys to highlight Output and press
. The
Output screen opens.