Liquid Controls SP3850 User Manual
Page 54
SP3850 Flow Computer
50
Sub-menus
Display
Notes
ALL UNITS ARE CALIBRATED AT THE FACTORY PRIOR TO SHIPMENT
CAUTION:
This unit must be calibrated using precision and calibrated equipment.
Equipment needed is as follows: Frequency Generator, Digital Multimeter,
Precision Current/Voltage Source, Oscilloscope, Frequency Counter.
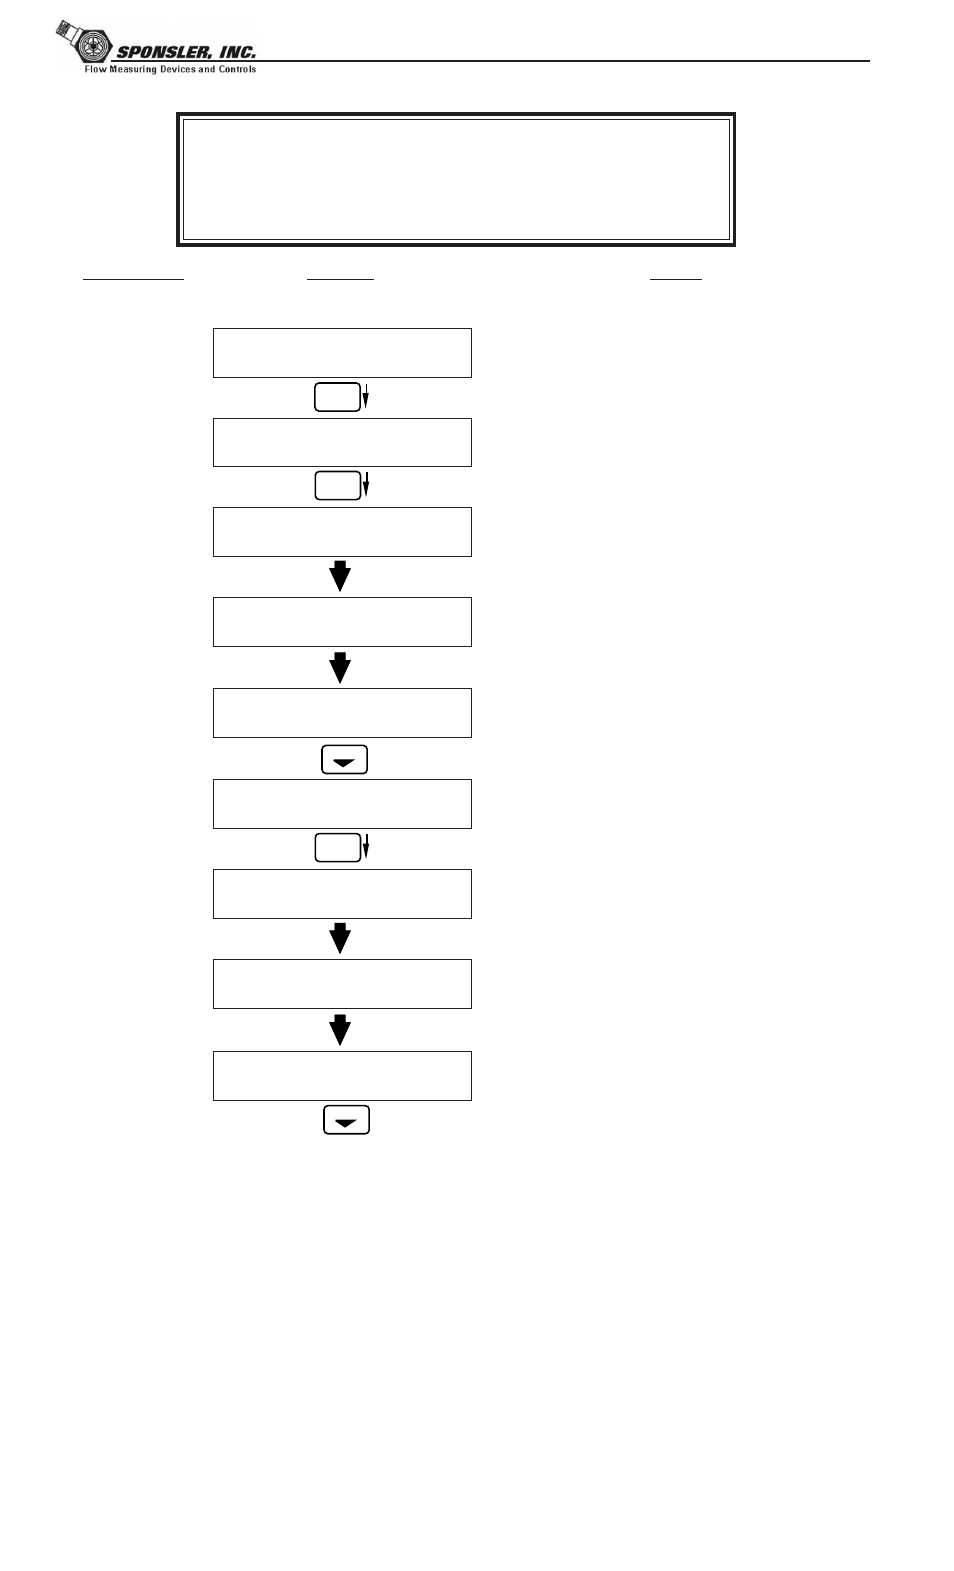
Calibrate
Calibrate Aux1: 0mA
Iin=TB1-7 GND=TB1-4
Calibrate Aux1: 0mA
CALIBRATING ——
Calibrate Aux1: 0mA
*** DONE ***
Calibrate Aux1: 0mA
Iin=TB1-7 GND=TB1-4
Calibrate Aux1: 20mA
Iin=TB1-7 GND=TB1-4
Calibrate Aux1: 20mA
0 CALIBRATING ——
Calibrate Aux1: 20mA
*** DONE ***
Calibrate Aux1: 20mA
Iin=TB1-7 GND=TB1-4
Advance to
Calibrate Aux2: 0mA
Calibration
Submenu Group
8.2.6
Calibrate Aux1: 0mA
Submenu Group
Press Enter to begin the calibration routine.
(Please note the caution above)
Connect Current Source (+) TB1-7, (-) TB1-4.
Input 0mA and press Enter.
This message is displayed during calibration.
This message is displayed when the 0mA
calibration is finished.
The display will automatically return to the
Calibrate Aux1 0mA submenu. Press the
Down arrow key to advance to the Aux1 20mA
calibration.
Connect Current Source (+) TB1-7, (-) TB1-4.
Input 20mA and press Enter.
This message is displayed during calibration.
This message is displayed when the 20mA
calibration is finished.
The display will automatically return to the
Calibrate Aux1 20mA submenu. Press the
Down arrow key to advance to the Aux2 0mA
calibration.
ENTER
ENTER
STOP
8.2.7
Calibrate Aux1: 20mA
Submenu Group
ENTER
STOP