Smart touch set up – Controlled Products Systems Group HRG 220-A ST User Manual
Page 37
Installation and Maintenance Manual
23
Smart Touch Set Up
Basics of Using the Smart Touch Controller
Read this page if you are unfamiliar with using the Smart Touch Controller.
The installation and commissioning of any HySecurity Gate Operator requires the setting of 1 or more
menu settings within the Smart Touch Controller before an installation can be completed. Many other
control settings or function changes can be made to configure the operator for your specific needs.
Until a new operator has been configured, the controls are not functional and the display is
locked in the menu mode until the User Class 1-4, has been selected. See the next page for
instructions on how make this setting.
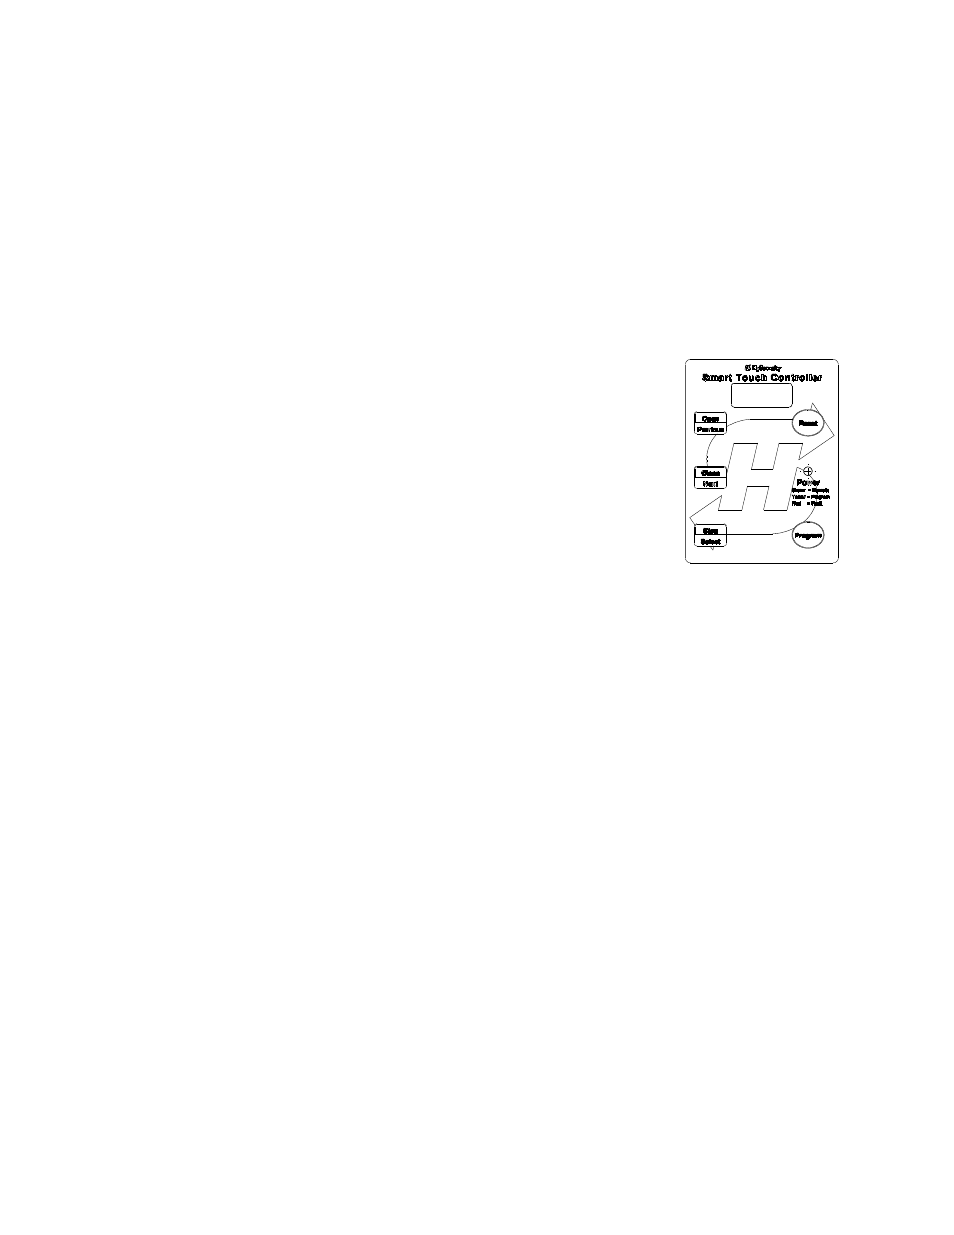
1. There are five buttons on the membrane switch pad that provide
operational control for testing, plus programming capability during
set-up. Normally, the Open, Close and Stop buttons serve as a
three-button control station, but in the Menu Mode, they become
Previous, Next and Select buttons. The Program Menu button is
used to both enter and exit the Menu Mode. The Reset button
clears all Errors or Faults that may occur and returns the control
to its normal functioning state.
2. When in a Menu Mode, changes to be made to a Menu setting
are accomplished by pressing the Previous, Next and Select
buttons in the following sequence:
a. Press the Next button to move forward through the list of menu items that are available or
press the previous button to move back to an item that you recently passed.
b. Press the Select button if you wish to make a setting change to a menu item. The menu
item will flash to indicate that its setting is ready to be changed.
c. Press Next to move forward or Previous to go back to an earlier setting choice.
d. When you have located the setting that you want to use, press the Select button and the
program will accept the change and stop blinking.
e. The Program Menu button does not allow an exit to Run Mode while a selection is still
blinking. Press the Select button to stop the blinking, then you may exit to Run Mode.
f. Pressing the Next or Previous buttons when the menu item is not blinking will move to the
next or previous menu item.
g. When done, press Program Menu to exit to the Run Mode.
3. Once configured, the operator will be in the Run Mode. From the Run Mode, to gain access the
User Menu or the Installer Menu, follow these steps:
a. Note that the Program Menu button will not function unless the gate is at rest and no open
or close inputs are active. Verify system status by pressing the LED button to disclose
any active inputs. There also must not be any Alerts, Faults or Errors. Press the Reset
button to clear the system if necessary.