Alpha Technologies APX Series User Manual
Page 19
19
016-030-B0-005, Rev. C
2.0 Installation,
continued
2.3
Pedestal Mount Installations, continued
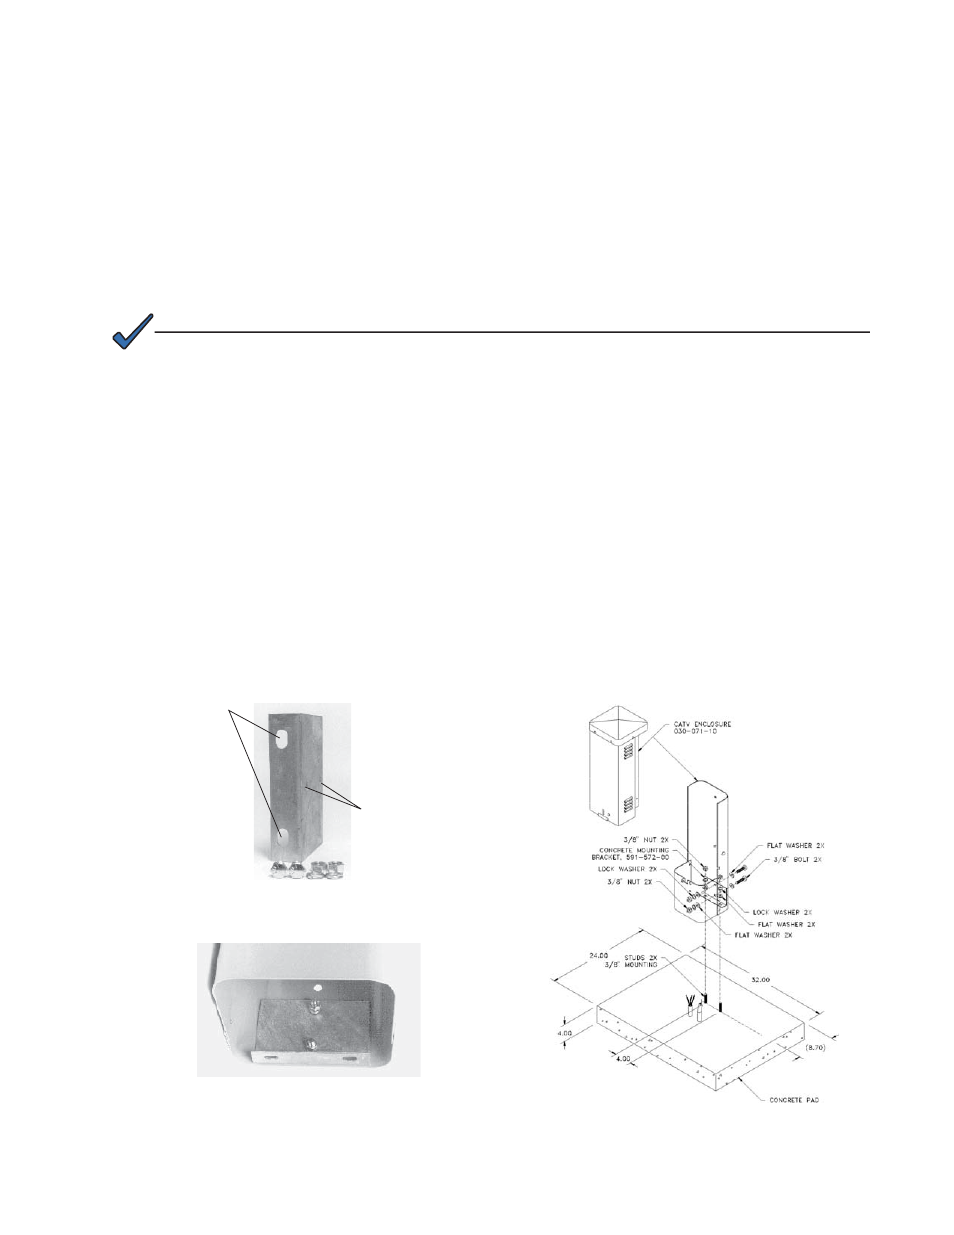
You can mount the PED enclosure to a concrete pad using the optional mounting bracket.
The bracket mounts inside the rear of the enclosure using two hex bolts and washers. There
are two 0.5" oblong mounting holes in the bracket to mount the enclosure to the concrete
pad.
Place two (2) 3/8" J-bolts in the pad as specifi ed and center two conduits (utility and cable
output) in front of these bolts. If required, place an 8' dedicated ground rod near the utility
conduit. To mount the enclosure to the pad, use a 3/8" lock washer and nut on each mounting
bolt.
Procedure:
(Concrete Mount)
Before proceeding, remove both the MTA (if installed) and universal bracket (UB1) from the
PED.
Install the concrete mounting bracket on the enclosure using the included bolts,
washers and nuts. Insert the bolts from the outside of the enclosure.
Center the enclosure over the utility and cable conduits. Align the oblong holes in the
mounting bracket with the 3/8” J-bolts. Secure the enclosure with a lock washer and
nut.
Reinstall the UB1 bracket and place the MTA on the bracket. Tighten the captive screw
on the bottom of the UB1 to secure the MTA (see Section 2.6 Connecting Utility Power,
and 2.8 Modular Transformer Assembly).
1.
2.
3.
NOTE:
To prevent damage, you must mount the enclosure on a fl ush smooth surface. Do not over-torque.
Alpha Technologies is not responsible for damages incurred to the enclosure by improper mounting on
uneven surfaces.
PED Mounting Holes
Pad Mounting
Slots
Concrete Mounting
Bracket and Hardware
Concrete Mounting Bracket
Installed in Unit
Fig. 2-6, Concrete Pad Mounting