Pr eliminary pr eliminary, Packaging for shipment, cont’d, Hsa 822 co mpu ter inp ut sel ect au dio – Extron Electronics HSA 822MS User’s Manual User Manual
Page 31
HSA 822MS • Packaging for Shipment
Packaging for Shipment, Cont’d
HSA 822MS • Packaging for Shipment
Pr
eliminary
Pr
eliminary
Remove panel.
Remove two
screws ea. side.
HSA 822
CO
MPU
TER
INP
UT
SEL
ECT
AU
DIO
Replacement Face Plate
Screws (4) under Enclosure
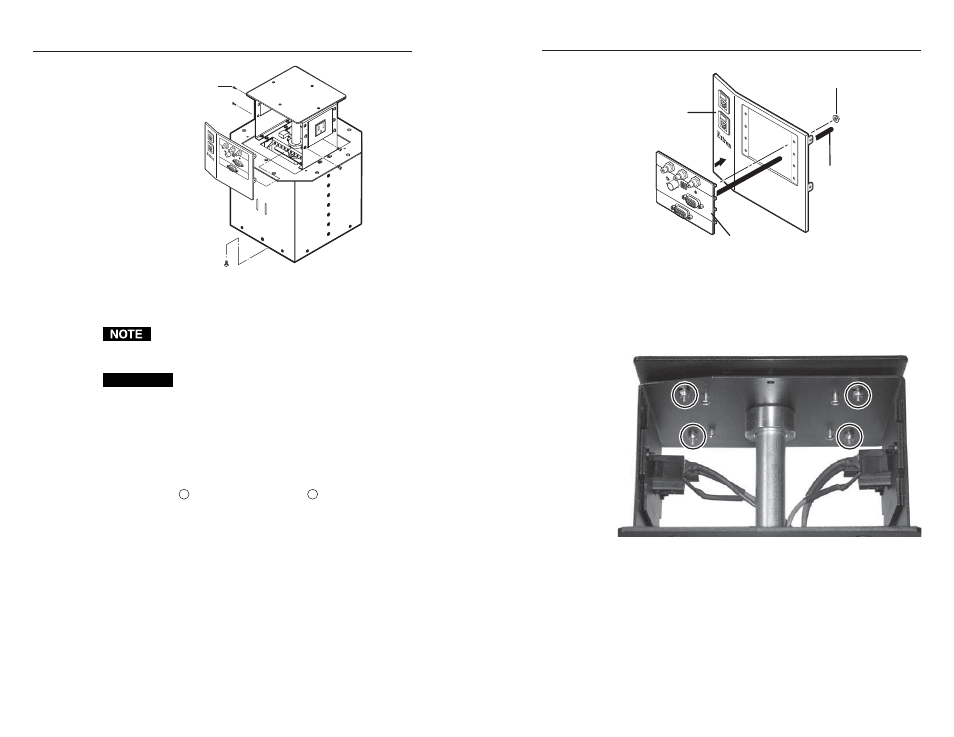
Figure B-3 — Removing the AAP/RJ-45 panel
The center screws on each side of the AAP/RJ-45 panel
do not fasten the AAP/RJ-45 panel in place. They secure
the AC power outlet.
CAUTION
Ensure that the edges of the AAP/RJ-45 panels do
not scratch the finish of the furniture in which the
HSA 822MS is installed when removing the panels.
d
.
Remove the two bolts and washers that secure the
tray to the underside of the HSA and remove the tray.
e
.
Disconnect any cables from the rear of the existing
AAPs. From the underside of the enclosure, reach
into the cable access holes (figure 3-1 on page 3-2,
item
3
), and cut the tie wraps (
5
shows the tie-
downs) that route the AAP cables inside the
enclosure. Carefully pull the cables through and out
the bottom of the HSA.
f
.
Remove the AAP(s) that you intend to keep from the
AAP/RJ-45 panels by unscrewing the nuts on the
rear of the AAP/RJ-45 panels that secure the AAPs in
place (figure B-4).
B-5
B-4
#4-40 Nut w/ Captive
Washer
Cable
AAP/RJ-45
Panel
HSA 822MS
RGB 580xi SI AAP
COMPUTER
INPUT
SELECT
AU
DIO
Figure B-4 — Mounting an AAP device
g
.
Use the two bolts and washers that you removed in
step d to reinstall the tray to the underside of HSA.
h
.
Remove and retain the four 1/4" nuts that secure the
top plate to the lifting plate (figure B-5) and remove
the plate.
Figure B-5 — Location of the top plate nuts