Pr eliminary pr eliminary, Installation, cont’d, Mounting the hsa – Extron Electronics HSA 822MS User’s Manual User Manual
Page 11: Mounting the table surface
HSA 822MS • Installation
HSA 822MS • Installation
Installation, cont’d
Pr
eliminary
Pr
eliminary
2-8
11
.
Remove the two bolts and washers that secure the tray to
the underside of the HSA and remove the tray.
Mounting the HSA
1
.
Place the HSA upside-down over the table. Using the
eight provided #8-32 wood screws and #8 washers, secure
the HSA to the underside of the table (figure 2-7). Leave
the screws slightly loosened for adjustment.
Figure 2-7 — Securing the HSA to the table
2
.
Turn the table right-side-up and place it in a level location,
preferably in the final installation location.
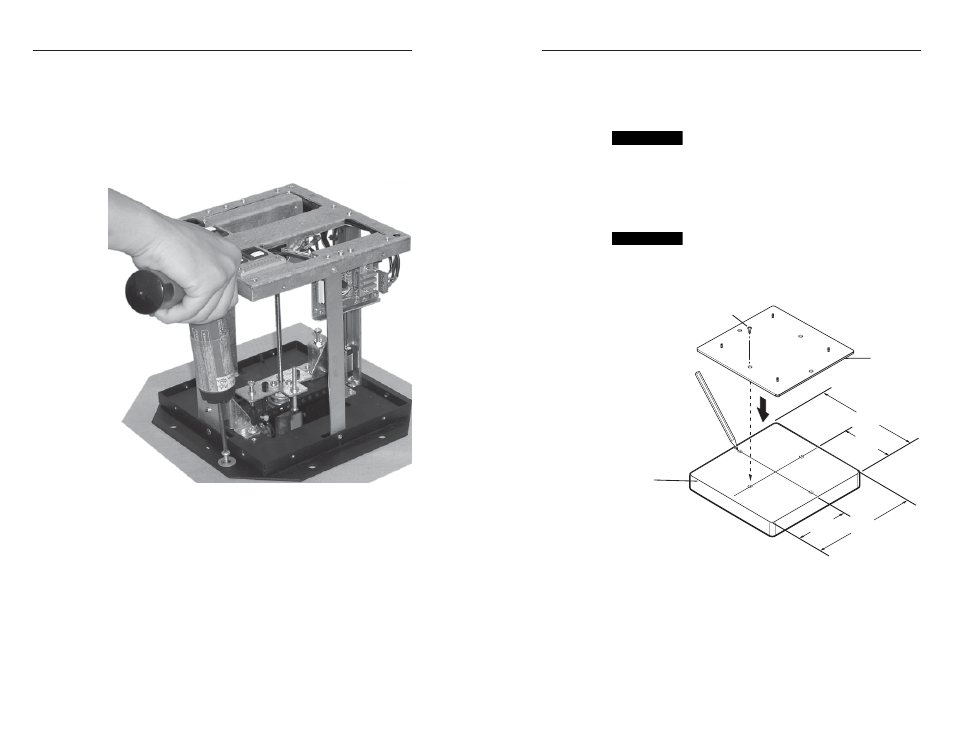
Mounting the Table Surface
1
.
Place the piece of table material (the surface block) that
you will use as the top of the HSA upside-down on a
protected surface.
CAUTION
Protect the block’s finished surface.
2
.
Measure and draw centerlines (figure 2-8) at:
•
3.21" (8.15 cm) (or one half the length) along the 6.42"
(16.31 cm) length of the surface block
•
3.07" (7.8 cm) (or one half the width) along the 6.14"
(15.6 cm) length of the surface block
CAUTION
It is crucial that you place the top plate over the
surface block as closely centered as possible and
that the long edge of the surface block is parallel to
the long end of the top plate. The plate has only a
minimal adjustment capability.
HSA 822MS
Top Plate
Surface
Cutout
Mark Center
Lines
Width
Length
Mounting Screws (4)
3.07"
(7.8 cm)
3.21"
(8.1 cm)
6.14"
(15.6 cm)
6.42"
(16.3 cm)
Figure 2-8 — Centering the plate over the surface
block
3
.
Place the top plate on top of the surface block, screw side
up. Align the long edge of the plate with the long edge of
the surface block. Position the plate so that the centerlines
that you drew in step 2 cut through the center of each of
the four screw holes in the plate (figure 2-8).
2-9