Pr eliminary pr eliminary, Installation, cont’d, Cabling and installing the aaps – Extron Electronics HSA 822MS User’s Manual User Manual
Page 14
HSA 822MS • Installation
HSA 822MS • Installation
Installation, cont’d
Pr
eliminary
Pr
eliminary
2-14
8
.
Press on the surface block to raise and lower the platform.
Double check that the surface block is centered in the cut-
out hole. If necessary, loosen the top plate nuts and repeat
step 6.
9
.
Double check that the surface block is flush with the table
surface. If necessary, repeat step 5.
10
.
Double check that the surface block is horizontal and not
tipped to one side or the other. If necessary, repeat step 4.
11
.
On the underside of the HSA, disconnect AC power.
12
.
When you are satisfied that the HSA is centered, flush, and
horizontal, reinstall the two shroud halves to the enclosure
frame with the eight screws per shroud half (four per side)
that you removed in Preparing the HSA, step 3. Orient the
shroud halves such that the vertical column of center holes
align with the column of screw inserts on the vertical
slides.
Cabling and Installing the AAPs
Extron’s various single space and double space AAP devices,
including the various RGB 580xi AAPs, can be mounted to the
HSA 822MS. See appendix A, Reference Information, for
RGB 580xi AAP part numbers.
The screws for installing an AAP are built into its AAP/RJ-45
panel, so no additional screws are needed.
Ensure that AC power is disconnected before
servicing the HSA unit.
1
.
Cable the rear of the AAPs before fastening the AAPs to
the AAP/RJ-45 panel. Route the cables through the hole in
the underside of the surface mount enclosure and connect
them to the rear of the AAPs. If applicable, refer to the
cabling information in the documentation for the AAP.
2
.
Remove the blank AAPs in the HSA AAP/RJ-45 panel by
removing the four #4-40 nuts and captive washers.
3
.
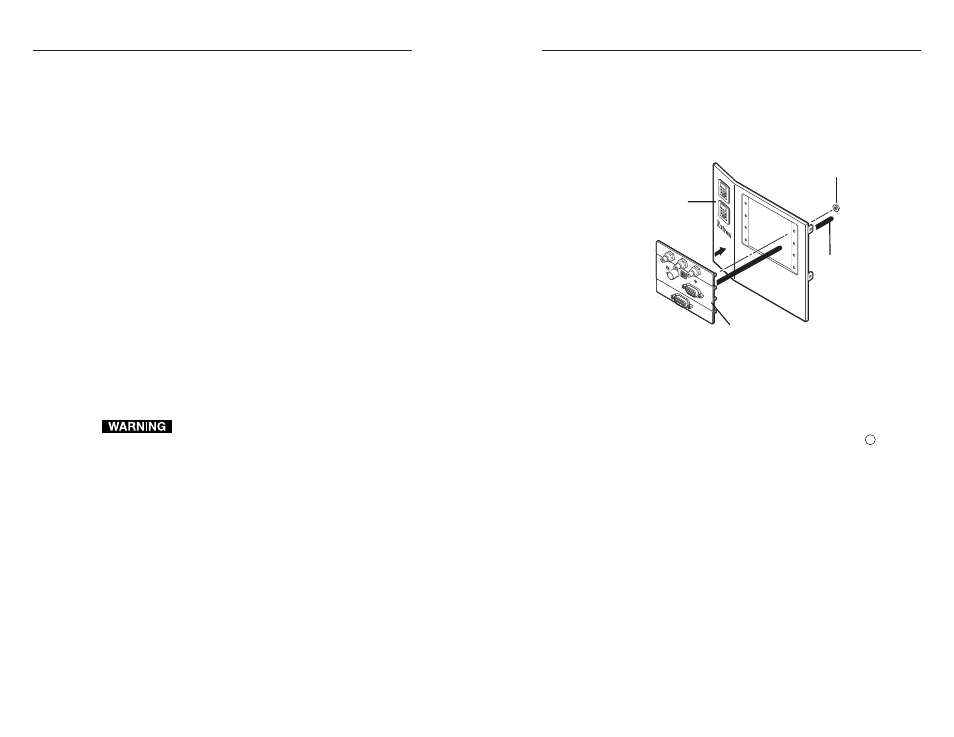
Insert each of the AAP’s screws through the holes in the
AAP opening of the HSA AAP/RJ-45 panel. Secure each
AAP to the panel with the provided captive washers and
#4-40 nuts (figure 2-13).
#4-40 Nut w/ Captive
Washer
Cable
AAP/RJ-45
Panel
HSA 822MS
RGB 580xi SI AAP
COMPUTER
INPUT
SELECT
AU
DIO
Figure 2-13 — Mounting an AAP on the AAP/RJ-45
panel
4
.
Replace the AAP/RJ-45 panel in the surface mount
enclosure and secure it in place with the screws removed
in Preparing the HSA, step 6. If you lose an AAP/RJ-45
panel screw, four spare screws are stored in the underside
of the enclosure (figure 2-15 on page 2-18, item
5
).
2-15