8 set-up of a capacitive electrode ek, 1 configure sensor – VEGA VVO VEGA Visual Operating User Manual
Page 22
22
VEGA Visual Operating
Set-up of a capacitive electrode EK
8 Set-up of a capacitive electrode EK
8.1 Configure sensor
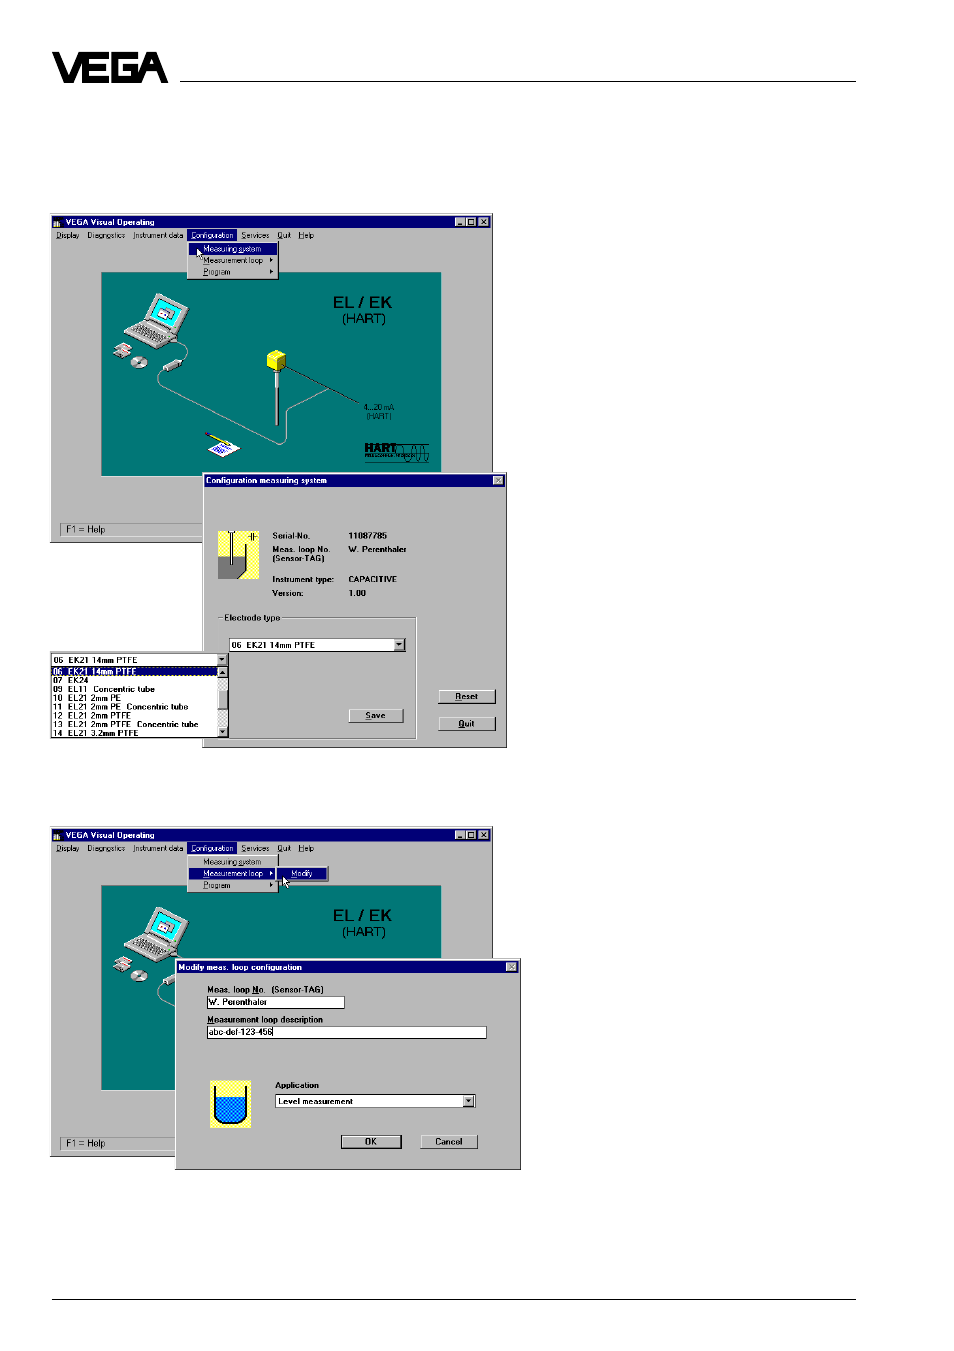
Connect the sensor by means of
VEGACONNECT 2 to the PC (as de-
scribed under "3.2 VVO directly on the
sensor“). Then start VVO. When the
sensor has been connected with al-
ready started VVO, push the function
key
F8 on the PC. Then your monitor
should show this picture. First click to
Configuration and then to Measuring
system to configure the sensor.
In this window you see the serial
number, the measurement loop
number (Sensor-TAG) and the type
designation of the sensor. Below you
see the field for the electrode choice.
Choose the electrode stated on the
type plate. Should your electrode not
be included in your list, choose "not
configured“. Click to
Save, when you
have chosen the electrode. With
Quit
you return to the window "VEGA Visual
Operating“.
To change the measurement loop des-
ignation, click first of all to C
onfigura-
tion, point to Measurement loop and
click to
Modify.
In the appropriate fields you can
modify the Sensor-TAG (16 digits)
and the measurement loop descrip-
tion (70 digits). Save the new names
with
OK.