Garmin NavTalk Pilot User Manual
Page 25
11
Section 2
Getting
Started
Tour
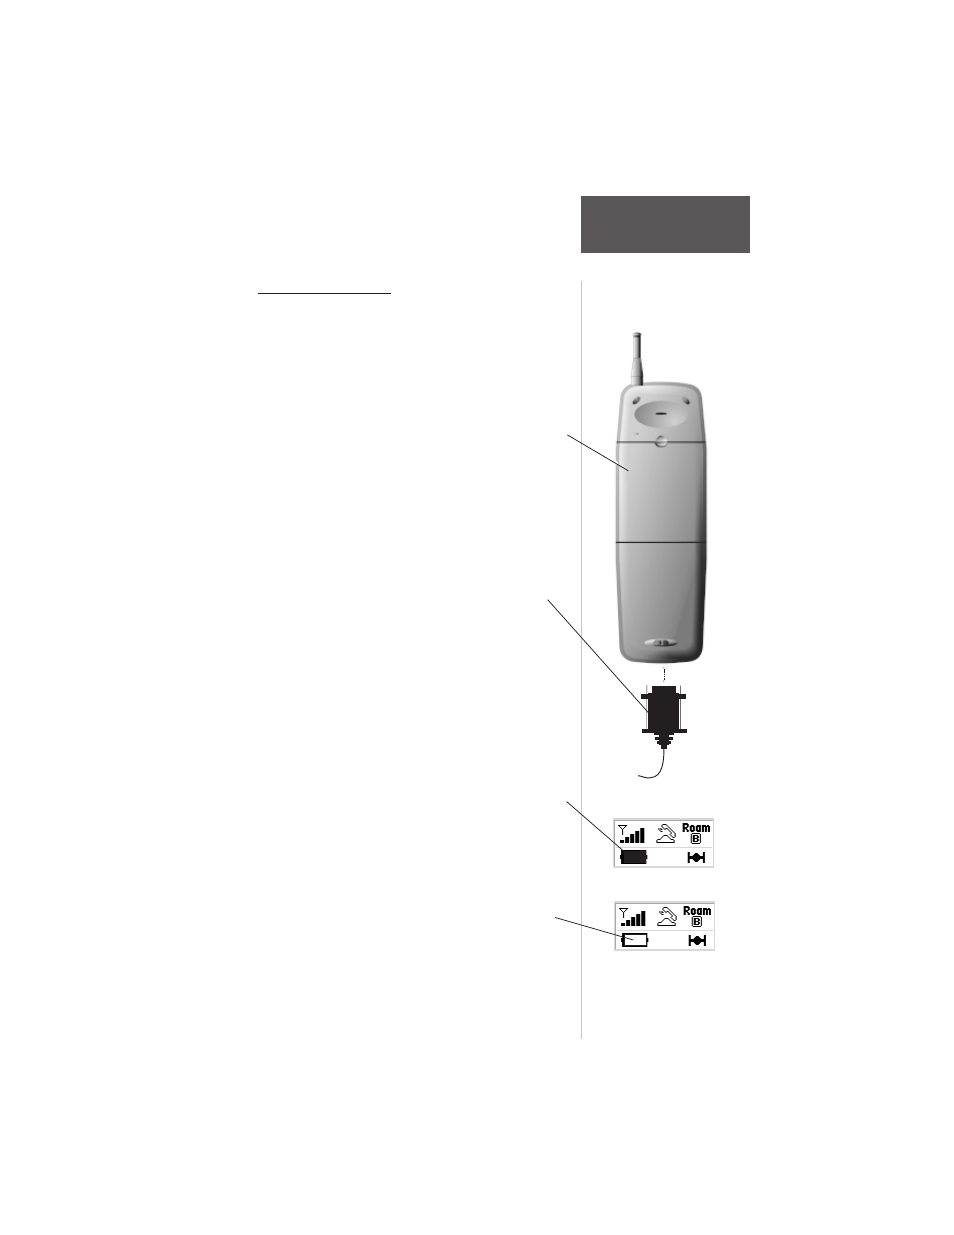
Battery Installation:
Before you can begin to explore the features and
operational characteristics of the NavTalk Pilot, you must
first install the NiMH Battery Pack and charge it for 14 to
16 hours (Trickle Charger).
1. Make certain the Battery Pack is securely in place in
the cavity on the back of the NavTalk Pilot by
aligning the two tabs of the base of the battery
pack with the two small slots at the base of the
cavity. Press the top portion of the battery pack in
place until it clicks into position.
2. Place the plug end of the charger assembly into the
power connection slot at the bottom of the NavTalk
Pilot, (the plug is indexed to fit only in one
direction). Insert the transformer portion of the
charger into a 120VAC wall outlet.
3. Allow 14 to 16 hours for the initial charging of the
Battery Pack. NiMH batteries require conditioning
during the first charging to establish maximum
charge capacity.
4. To determine if the battery pack has been fully
charged, turn on the NavTalk Pilot and observe the
battery icon in the status bar at the bottom of the
display. The battery symbol should show solid black
when fully charged.
5. Indications that the battery pack requires recharging
are: the battery status symbol will appear “empty”,
a “Low Battery” message will appear and a short
intermittent warning tone will be heard. If no
image appears on the screen when the power
button is pressed, the battery may be fully
discharged or the contrast set too light.