1 ip alias setup, Figure 8 ip alias network example – ZyXEL Communications P-870MH-C1 User Manual
Page 29
Chapter 3 Configuration Using the SMT
P-870MH-C1 User’s Guide
29
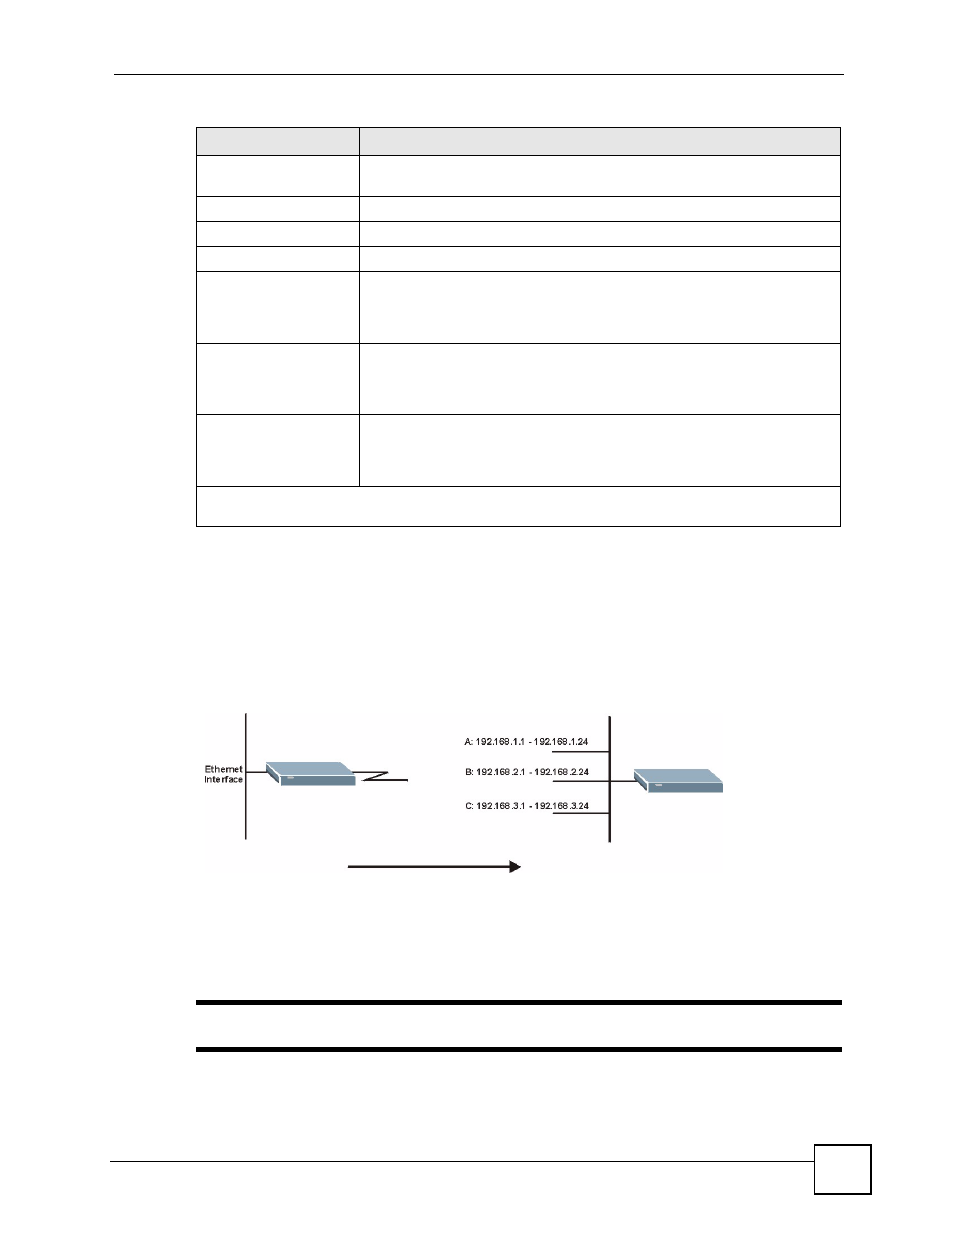
3.3.1 IP Alias Setup
IP alias allows you to partition a physical network into different logical networks over the
same Ethernet interface. The P-870MH-C1 supports three logical LAN interfaces via its single
physical Ethernet interface with the P-870MH-C1 itself as the gateway for each LAN network.
The following figure shows a LAN divided into subnets A, B, and C.
Figure 8 IP Alias Network Example
In Menu 3.2, you configure the first network. Move the cursor to Edit IP Alias field and press
[SPACEBAR] to choose Yes and press [ENTER] to display Menu 3.2.1 — IP Alias Setup as
shown next. Use Menu 3.2.1 to configure the second and third network.
"
Make sure that the subnets of the logical networks do not overlap.
Starting Address
This field specifies the first of the contiguous addresses in the IP address
pool.
Size of Client IP Pool This field specifies the size or count of the IP address pool.
TCP/IP Setup
IP Address
Enter the (LAN) IP address of your P-870MH-C1 in dotted decimal notation
IP Subnet Mask
Your P-870MH-C1 will automatically calculate the subnet mask based on the
IP address that you assign. Unless you are implementing subnetting, use the
subnet mask computed by the P-870MH-C1 (refer to the appendices for
more information).
Multicast
IGMP (Internet Group Multicast Protocol) is a network-layer protocol used to
establish membership in a Multicast group. The P-870MH-C1 supports both
IGMP version 1 (IGMP-v1) and version 2 (IGMP-v2). Press the [
SPACE
BAR]
to enable IP Multicasting or select None to disable it.
Edit IP Alias
The P-870MH-C1 supports three logical LAN interfaces via its single
physical Ethernet interface with the P-870MH-C1 itself as the gateway for
each LAN network. Press [
SPACE BAR
] to change No to Yes and press
[
ENTER
] to display Menu 3.2.1.
When you have completed this menu, press [ENTER] at the prompt “
Press ENTER to Confirm
or ESC to Cancel:
” to save your configuration, or press [ESC] at any time to cancel.
Table 6 Menu 3.2 TCP/IP and DHCP Ethernet Setup (continued)
FIELD
DESCRIPTION