Konica Minolta 7235 User Manual
Page 150
6-1. Selecting the Destination
141
III Scanner
Chapter 6 Using the Scanner Functions
3
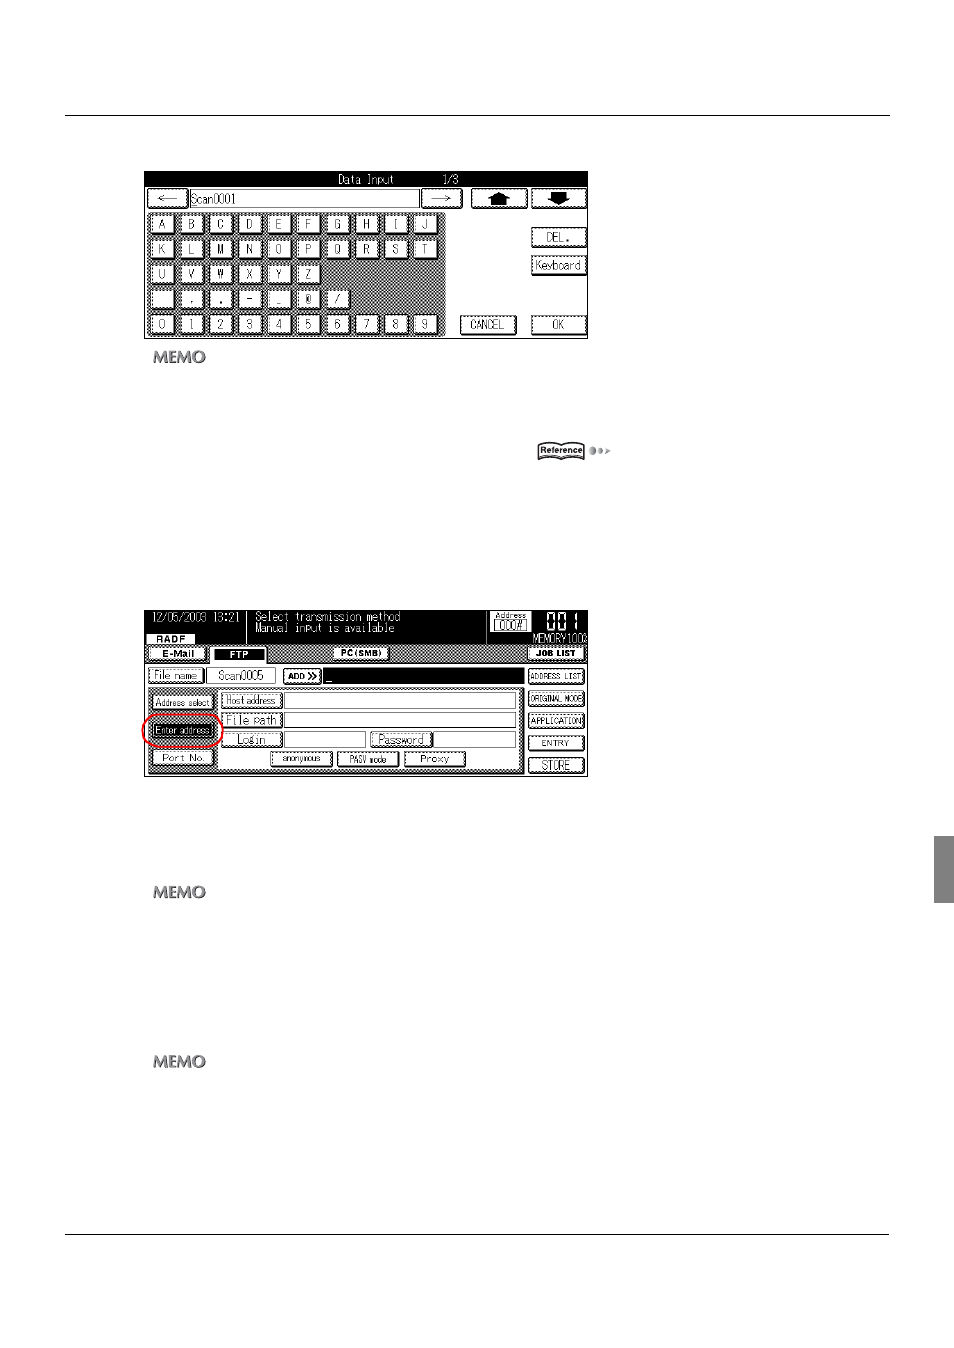
Input the file name for the scan data.
z
The default file name is Scan****.
On the actual display, the asterix (****) will be replaced by the total number of scans (0001-9999) performed since the
machine has been turned on.
z
Up to 26 alphanumerics can be input for the file name.
For details on character input, refer to [3-1. Inputting Text] (
Page 16).
z
The filename extension [.tif] or [.pdf] is added automatically to the filename.
4
Touch the [OK] key.
→ The display returns to the [Scanner mode basic] screen.
5
Touch the [Enter address] key.
→ The [FTP registration/edit] screen is displayed.
6
Touch the [Host address] key, then input the IP address of the FTP server to send the data
to or the URL.
z
Up to 63 alphanumerics and symbols can be input as the [Host address].
7
Touch the [OK] key.
→ The display returns to the [FTP registration/edit] screen.
8
Touch the [File path] key and input the FTP server file storage location.
z
Up to 127 alphanumerics and symbols can be input as the [File path].
9
Touch the [OK] key.
→ The display returns to the [FTP registration/edit] screen.