Simplified remote controller – Sanyo DHX4852 User Manual
Page 109
1
2
3
4
5
6
7
8
1
2
3
4
5
6
7
8
3-61
Control of W-2WAY ECO-i SYSTEM
1
2
3
4
5
6
7
8
1
2
3
4
5
6
7
8
5. Simplified Remote Controller
Parts Supplied with Simplified Remote Controller
Simplified Remote Controller Installation Guide-
lines
Place of installation
Mount the simplified remote controller at a height of 3.3
to 5.5 ft above the floor where it can sense the average
temperature of the room.
Do not mount the simplified remote controller in a place
exposed to direct sunlight or a place exposed to outside
air such as near a window.
Do not mount the simplified remote controller behind an
object so that it is separated from the air circulation of the
room.
Mount the simplified remote controller within the room be-
ing air conditioned.
The simplified remote controller must be mounted on the
wall or other surface vertically.
SWITCHING THE ROOM TEMPERATURE SENSOR
The room temperature sensor is placed both in the indoor unit
and the simplified remote controller respectively. Either sensor
can be used to sense the room temperature. The indoor unit
sensor is usually used.
If you use the simplified remote controller to sense the room
temperature, switch the remote controller sensor switch (RCU.
SNS) on the P.C.B. of the simplified remote controller from
OFF to
ON. See the diagram below.
switch is switched from OFF to ON, the sub-
remote controller cannot detect the room
temperature.
< NOTE 2 > The standard remote controller cannot detect the
room temperature.
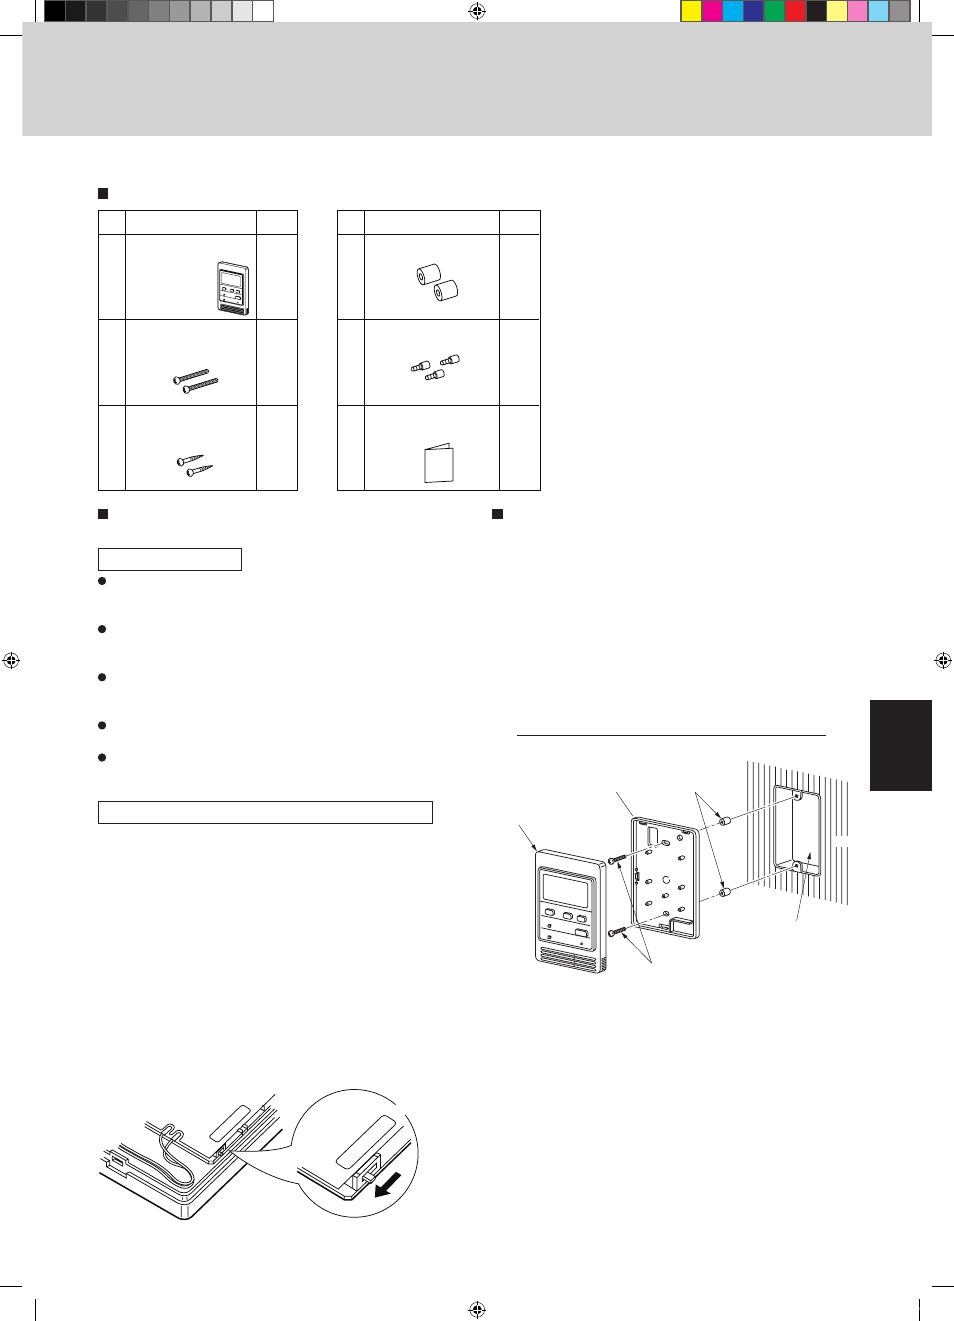
No.
Qty
1
2
2
3
2
Machine screws
M4
×
25 or 5/32”
×
1”
No.
Qty
4
2
5
5
6
1
Spacers
Wire joints
Simplified remote
controller
Wood screws
Installation manual
(comes with
7-7/8” wire)
Supplied parts
Supplied parts
Fig. 3-36
RC
U. SNS
OF
F
ON
RCU. SNS
SW11
OFF
ON
Simplified remote controller
Under case (back case)
Spacer
Machine screws
M4
Ч
Ч
25
or 5/32”
1”
Electric junction box
for one box (no cover)
Wall
Fig. 3-37
How to Install the Simplified Remote Controller
< NOTE 1 > Do not twist the simplified remote controller wir-
ing with the power wiring or run it in the same
metal conduit, because this may cause malfunc-
tion.
< NOTE 2 > Install the simplified remote controller away from
sources of electrical noise.
< NOTE 3 > Install a noise filter or take other appropriate
action if electrical noise affects the power supply
circuit of the unit.
*
Use an electric junction box (supplied locally) (Fig. 3-37)
for flush mounting of the simplified remote controller.
TD831138-02_W-2WAY.indb 61
2007/07/26 14:32:00