Creating realistic sound fields, Select and play software you like, Press surround on/off to activate surround mode – JVC LVT0858-001A User Manual
Page 40: Press adjust, Appears, Pl ii indicator lights up on the display, The control buttons now work for sound adjustments
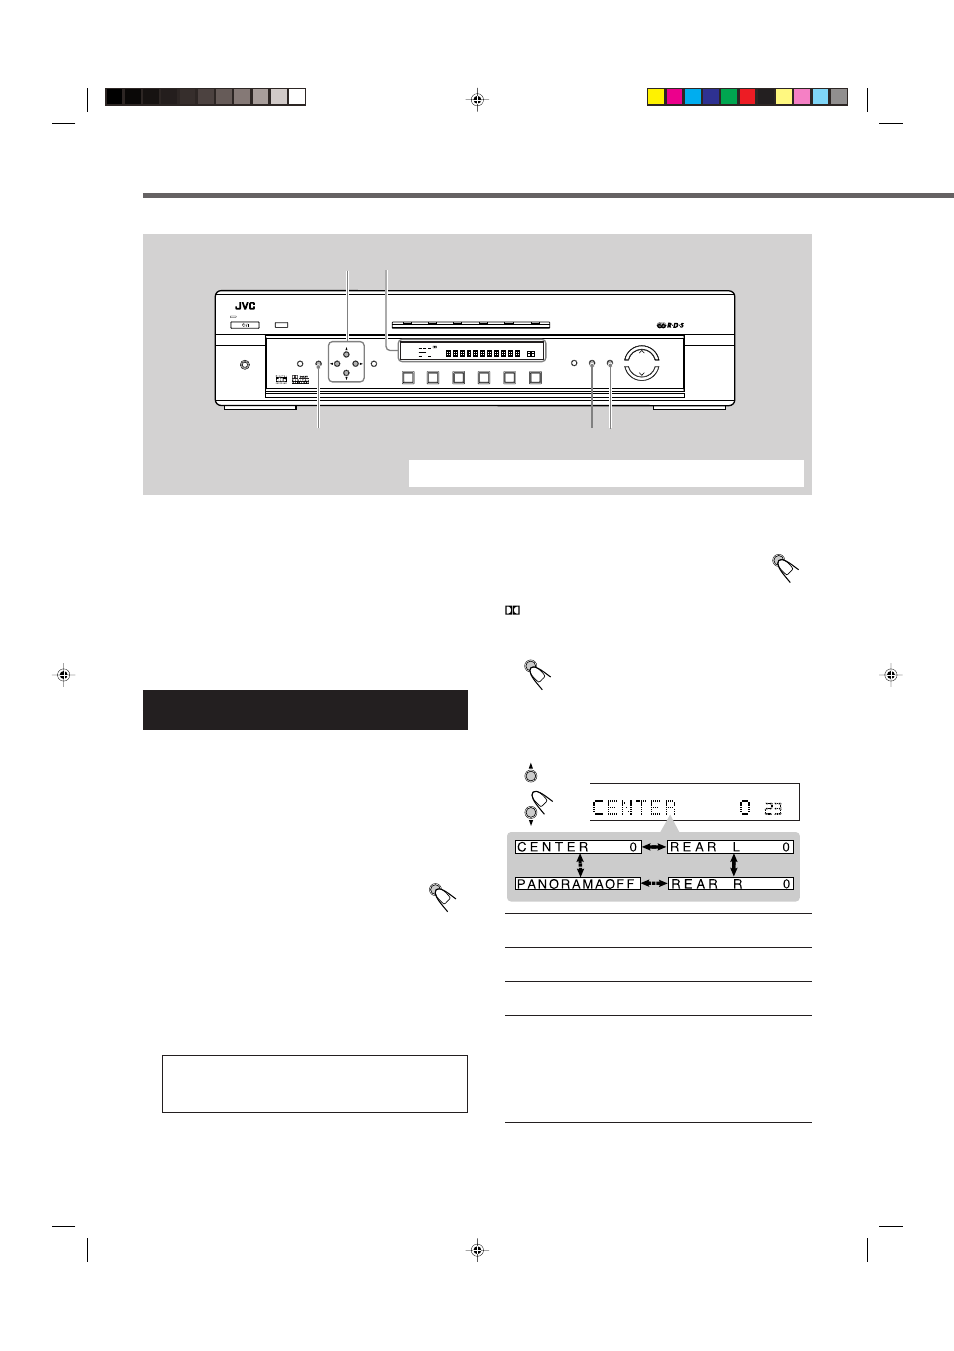
36
Creating Realistic Sound Fields
ADJUST
When using the remote control for Surround operations, see pages 33 to 35.
Display
CONTROL
5/∞/3/2
SURROUND
ON/OFF
SURROUND
MODE
STB
VCR
TV
TAPE
FM/AM
TV DIRECT
DVD
MEMORY
CONTROL
ADJUST
SETTING
STANDBY
INPUT
ANALOG/DIGITAL
INPUT ATT
MASTER VOLUME
SURROUND
ON/OFF
SURROUND
MODE
ANALOG
PL
ΙΙ
SUBWFR LFE
SLEEP
MODE TA
ST
TUNED
INFO
HEWS
AUTO MUTING
MH
Z
KH
Z
VOL
AUTO
AUTO SR
INPUT ATT
DSP
L
C
R
LS
S
RS
LPCM
DOLBY D
DTS
DVD
STB
VCR
TV
TAPE
FM/AM
HOME CINEMA CONTROL CENTER
STANDBY/ON
PHONES
RDS
HP
Before you start, remember...
• Make sure that you have set the speaker information correctly
(see page 15).
• You cannot adjust the center speaker output level when you have
set “CNTR SP” to “NO.”
• You cannot adjust the rear speaker output levels when you have set
“REAR SP” to “NO.”
• Remember not to change the speaker setting while using any
Surround modes; otherwise, it may be canceled when you
deactivate the speakers required for the Surround mode.
Using Dolby Pro Logic II, Dolby Digital and
DTS Digital Surround (Front Panel)
Once you have adjusted the Surround modes, the adjustment is
memorized for each source.
• When playing back digital multichannel software (Dolby
Digital 5.1-channel or DTS Digital Surround), the
SURROUND MODE button does not work.
• No test tone is available when using the buttons on the front panel.
1
Select and play software you like.
2
Press SURROUND ON/OFF to activate
Surround mode.
Each time you press the button, Surround mode turns
on and off alternately.
• If you are playing back digital multichannel software such as
Dolby Digital 5.1-channel and DTS Digital Surround through
the digital input terminal, the appropriate multichannel
Surround mode is activated (“DOLBY D” or “DTS”).
→ Go to step 4.
• If you are playing back any software other than above, you
can activate Pro Logic II.
→ Go to step 3.
If “AUTO SR (Auto Surround)” is set to “ON”
Playing a digital source automatically activates an appropriate
Surround mode. (See pages 18 and 19.)
→ Go to step 4.
SURROUND
ON/OFF
3
Except for the digital multichannel
software: Press SURROUND MODE
repeatedly to select “PL II MOVIE” or
“PL II MUSIC” according to a playing source.
PL II indicator lights up on the display.
4
Press ADJUST.
The CONTROL buttons now work for sound
adjustments.
5
Press CONTROL
∞ (or 5) repeatedly until one
of the following indications (with the current
setting)
*
appears.
CENTER
: To adjust the center speaker output level
(from –10 to +10).
REAR L
: To adjust the left rear speaker output level
(from –10 to +10).
REAR R
: To adjust the right rear speaker output level
(from –10 to +10).
PANORAMA control
: Selectable only when “PL II MUSIC” is
selected:
• Select “ON” when you like to enjoy
“wraparound” sound effect with side-wall image.
• Select “OFF” when you like to enjoy
originally recorded sound.
* “0” is the initial setting for the speaker output levels, and
“OFF” for Panorama control.
If you have already changed the setting, another setting will be
shown.
SURROUND
MODE
ADJUST
ANALOG
PR
ΙΙ
SUBWFR LFE
VOL
AUTO SR
INPUT ATT
DSP
L
C
R
LS
S
RS
LPCM
DOLBY D
DTS
CONTROL
EN30-37.RX-E111&112RSL[B]_f
02.1.17, 9:21 AM
36