Sound adjustments, Appears on the display, Attenuating the input signal – JVC LVT0858-001A User Manual
Page 24: Adjusting the front speakers output balance, Press adjust, The control buttons now work for sound adjustments, Display control 5/∞/3/2 input att adjust, Remote not
20
Sound Adjustments
You can also use the remote control for some sound adjustments.
• When using the remote control, see also “Mastering Remote Operations” on page 38.
2
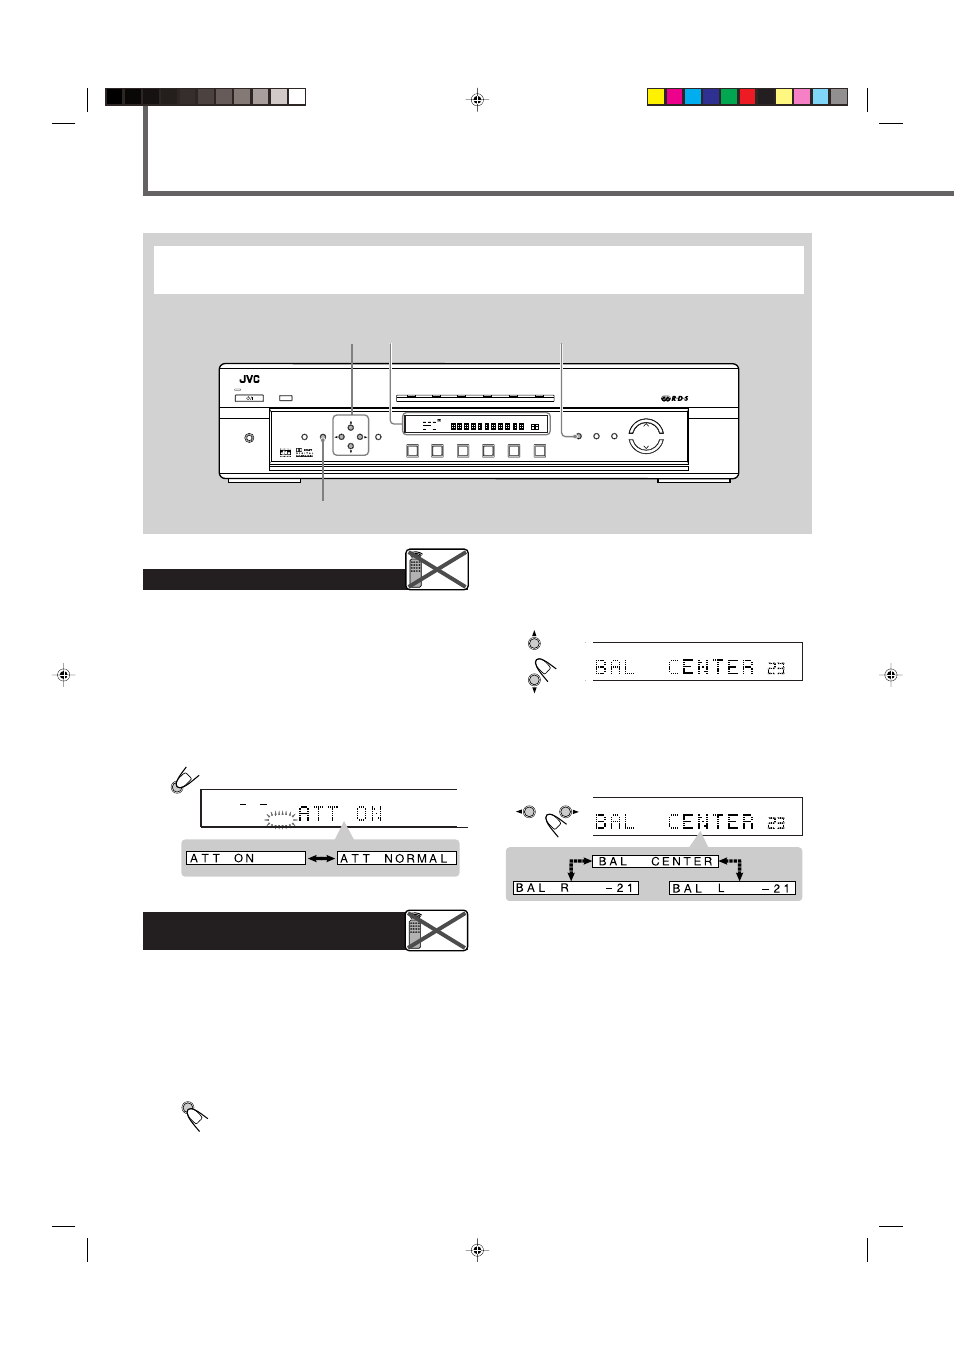
Press CONTROL
∞ (or 5) repeatedly until
“BAL (Balance)” (with the current setting)
*
appears on the display.
* “CENTER” is the initial setting. If you have already changed
the setting, another setting will be shown.
3
Press CONTROL
3 (or 2) to adjust the front
speaker balance.
• Pressing CONTROL
3 decreases the left channel output
(from CENTER to L –21).
• Pressing CONTROL
2 decreases the right channel output
(from CENTER to R –21).
STB
VCR
TV
TAPE
FM/AM
TV DIRECT
DVD
MEMORY
CONTROL
ADJUST
SETTING
STANDBY
INPUT
ANALOG/DIGITAL
INPUT ATT
MASTER VOLUME
SURROUND
ON/OFF
SURROUND
MODE
ANALOG
PL
ΙΙ
SUBWFR LFE
SLEEP
MODE TA
ST
TUNED
INFO
HEWS
AUTO MUTING
MH
Z
KH
Z
VOL
AUTO
AUTO SR
INPUT ATT
DSP
L
C
R
LS
S
RS
LPCM
DOLBY D
DTS
DVD
STB
VCR
TV
TAPE
FM/AM
HOME CINEMA CONTROL CENTER
STANDBY/ON
PHONES
RDS
HP
Attenuating the Input Signal
When the input level of the analogue source is too high, the sounds
will be distorted. If this happens, you need to attenuate the input
signal level to prevent the sound distortion.
• You have to make this adjustment for each analogue source.
Press and hold INPUT ATT (INPUT ANALOG/
DIGITAL) so that the INPUT ATT indicator lights
up on the display.
• Each time you press and hold the button, the Input Attenuator
turns on (“ATT ON”) or off (“ATT NORMAL”).
Adjusting the Front Speakers
Output Balance
If the sounds you hear from the front right and left speakers are
unequal, you can adjust the speakers output balance.
• You have to make this adjustment for each source.
Before you start, remember...
There is a time limit in doing the following steps. If the setting is
canceled before you finish, start from step
1 again.
1
Press ADJUST.
The CONTROL buttons now work for sound
adjustments.
Remote
NOT
VOL
R
T
ANALOG
PR
ΙΙ
SUBWFR LFE
VOL
AUTO SR
INPUT ATT
DSP
L
C
R
LS
S
RS
LPCM
DOLBY D
DTS
CONTROL
Display
CONTROL
5/∞/3/2
INPUT ATT
ADJUST
ANALOG
VOL
INPUT ATT
L
R
INPUT
ANALOG/DIGITAL
INPUT ATT
Remote
NOT
ADJUST
CONTROL
EN20-22.RX-E111&112RSL[B]_f
02.1.17, 9:19 AM
20