Installing amputee attachments, Note: for this procedure, refer to figure 9.4, Note the position of the axle mounting plate – Invacare XtraTM 1026793 User Manual
Page 59: Washer, Figure 9.4 installing amputee attachments
SECTION 9—WHEEL LOCKS/ANTI-TIPPERS
Part No 1026793
59
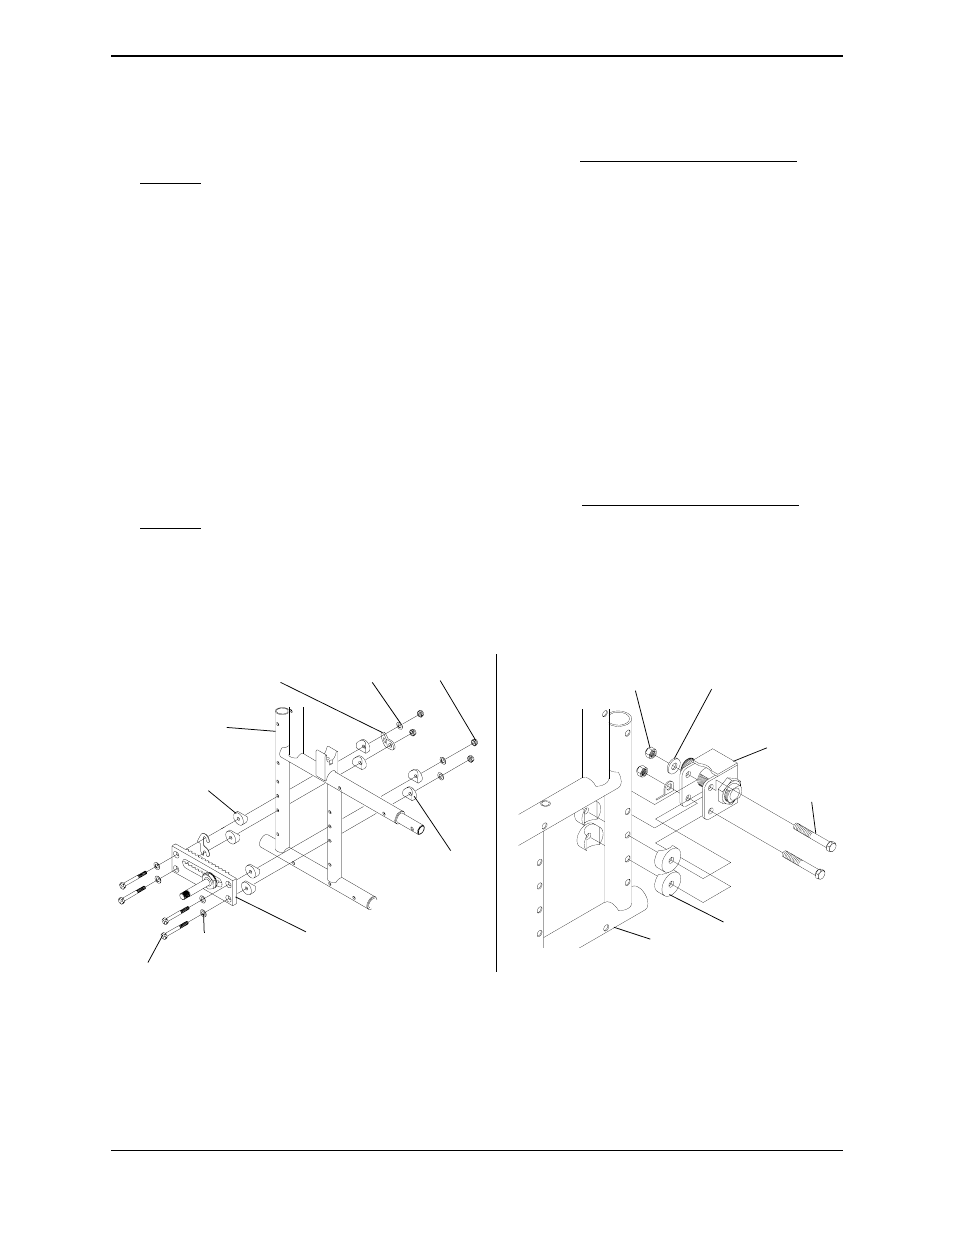
Installing Amputee Attachments
NOTE: For this procedure, refer to FIGURE 9.4.
1. Remove the rear wheel from the wheelchair. Refer to Removing/Installing Rear
2. Note the position of the axle mounting plate.
NOTE: This will maintain the current rear seat to floor height.
3. Remove the hex screws, locknuts, washers and camber washers (if any) that secure the
existing axle mounting plate and tie down tab to the wheelchair frame.
4. Position the coved washers and amputee attachment on the wheelchair at the position
noted in STEP 2.
5. Install the hex screws through the amputee attachment coved washers and wheelchair
frame.
6. Install the washer and tie down onto two (2) hex screws. (FIGURE 9.4).
7. Install the locknuts onto the hex screws and tighten securely.
8. Reinstall the rear wheel onto the wheelchair. Refer to Removing/Installing Rear
9. Repeat STEPS 1-8 for the opposite side of the wheelchair.
NOTE: Make sure the two (2) amputee attachments are at the same height. This will help avoid a
"3-wheeling" situation.
FIGURE 9.4 Installing Amputee Attachments
Washer
Tie Down Tab
Wheelchair
Frame
Washer
Axle Mounting Plate
Hex Screws
Locknut
Coved Washer
Coved
Washer
Locknut
Washer
Amputee
Attachment
Hex
Screws
Coved Washer
Wheelchair Frame
Removing the Axle Mounting Plate
Installing Amputee Attachment