Installing/removing the chest positioning strap, Note: for this procedure, refer to figure 5.3, Do one (1) of the following – Invacare XtraTM 1026793 User Manual
Page 36: Chest positioning strap half
SECTION 5—BACK
36
Part No 1026793
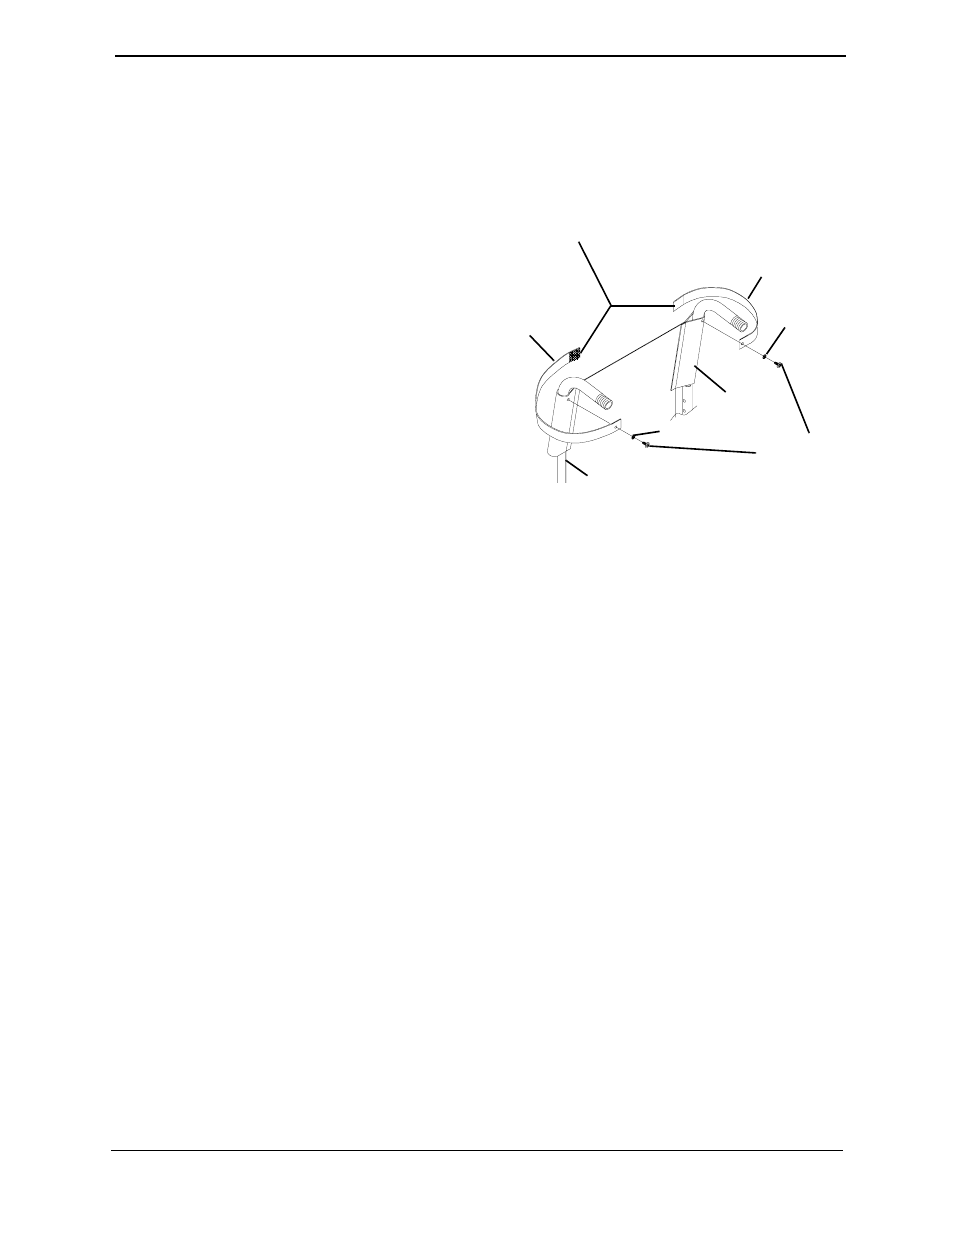
Installing/Removing the Chest Positioning Strap
NOTE: For this procedure, refer to FIGURE 5.3.
1. Remove the two (2) mounting screws and washers securing the back upholstery to the
back cane.
2. Do one (1) of the following:
A. To install the chest positioning
strap, proceed to STEP 3.
B. Remove the two (2) existing chest
positioning strap halves from the
back upholstery.
3. Secure the two (2) halves of the new
chest positioning strap together.
4. Align the mounting hole on one (1) end
of the NEW chest positioning strap
with the mounting hole on the back
upholstery and back cane.
5. Secure the new chest positioning strap
and back upholstery to the back cane
with one (1) mounting screw and
washer. Torque to 20-25 in./lbs.
NOTE: Only Hook and Loop style chest
positioning strap shown. Auto style chest
positioning strap attaches the same way.
FIGURE 5.3 Installing/Removing the Chest
NOTE: Ensure strap is oriented properly and not twisted when installing.
6. Repeat STEPS 4-5 for opposite side of new chest positioning strap.
NOTE: Only hook and loop style chest positioning strap shown. Auto style chest positioning strap
attaches the same way.
Chest
Positioning
Strap Half
Chest Positioning Strap Half
Washer
Back Cane
Mounting
Screws
Back
Upholstery
Washer
Secure these ends together