M warning, Keep locking pins clean, Permanent axles – Invacare XtraTM 1026793 User Manual
Page 52: Remove the rear wheel, Repeat step 1-2 for the opposite rear wheel, Permanent axle, Figure 8.1 removing/installing rear wheels, Ƽ warning
SECTION 8—WHEELS
52
Part No 1026793
ƽ WARNING
Make sure the detent pin and locking pins of the quick/quad-release axle are fully
released BEFORE operating the wheelchair.
The locking pins MUST be protruding past the inside of the rear wheel axle bushing
for a positive lock.
Keep locking pins clean.
5. If the locking pins are not protruding past the inside of the axle bushing or there is too
much movement of the rear wheel assembly in a back and forth position, refer to
Adjusting Quick-Release Axles on page 53 or Adjusting Quad-Release Handles on
page 55.
NOTE: During contact activities, Invacare recommends inserting quick-release axles with the
head end to the inside of the wheelchair to prevent accidental release.
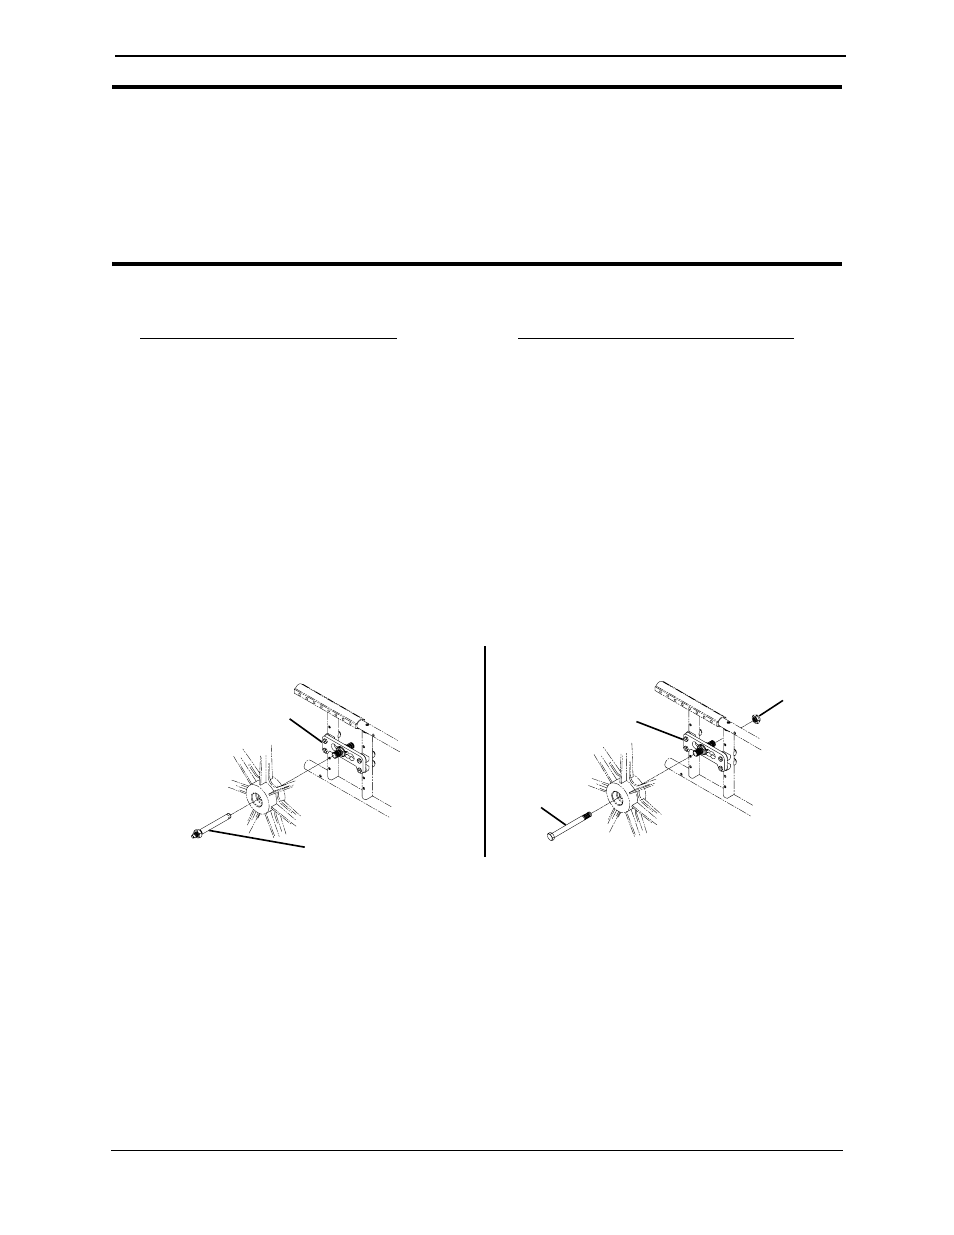
Permanent Axles
1. Remove the hex screw and locknut that secure the rear wheel to the axle mounting
plate.
2. Remove the rear wheel.
3. Repeat STEP 1-2 for the opposite rear wheel.
4. To reinstall the rear wheel onto the axle mounting plate, reverse STEPS 1-3.
FIGURE 8.1 Removing/Installing Rear Wheels
Permanent Axle
Quick-Release Axle
Axle Mounting Plate
Hex Screw
Locknut
Axle Mounting Plate
Quick Release Axle