Heel loop replacement, Note: for this procedure, refer to figure 4.8, Remove the lower footrest assembly – Invacare XtraTM 1026793 User Manual
Page 33: Replace heel loop, Reverse steps 1-5 to reassemble, Hex screw/coved washer, Figure 4.8 heel loop replacement, Installing impact guards/calf strap, Note: for this procedure, refer to figure 4.9, Secure the impact guards to the footrest frame
SECTION 4—FRONT RIGGINGS
Part No 1026793
33
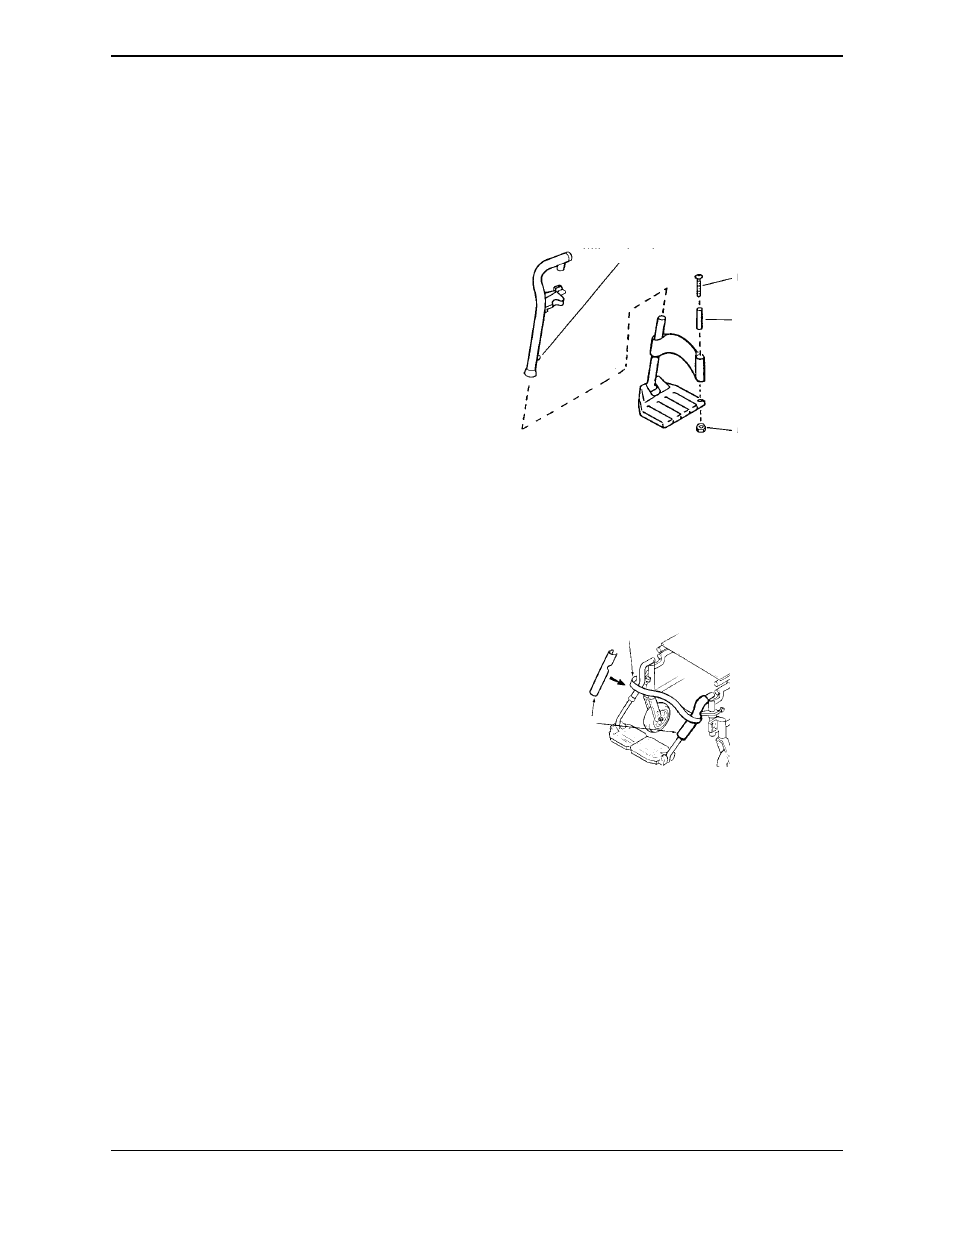
Heel Loop Replacement
NOTE: For this procedure, refer to FIGURE 4.8.
1. Remove the hex screw and coved washer that secures the lower half of the footrest to
the swingaway footrest assembly.
2. Remove the lower footrest assembly.
3. Remove the phillips screw and locknut
that secure the heel loop to the footrest.
4. Slide heel loop over slide tube of
footrest assembly.
5. Replace heel loop.
6. Reverse STEPS 1-5 to reassemble.
NOTE: When securing the heel loop to the
footrest assembly, tighten the phillips screw
and locknut until the spacer is secure.
FIGURE 4.8 Heel Loop Replacement
Installing Impact Guards/Calf Strap
NOTE: For this procedure, refer to FIGURE 4.9.
1. Remove impact guard/calf strap from
packaged container if not already
secured to the footrest.
2. Secure the impact guards to the footrest
frame.
3. Secure the optional calf strap around
the footrest frame (with the impact
guards attached).
FIGURE 4.9 Installing Impact Guards/Calf
Hex Screw/Coved Washer
Phillips Screw
Spacer
Locknut
Composite/Aluminum/Tubular Footplates
Swingaway Front Frame
Calf Strap
Impact
Guard