Gateway 7250R User Manual
Page 38
Drives
31
3
For easier access to the CD drive, remove the cables to the diskette drive
as described in “Replacing the diskette drive” on page 24. Note the
orientation of the cables so you can replace them later.
4
Remove the power and data cables from the back of the CD drive, noting
their locations and orientations. (You will reconnect these cables after you
install the new drive.)
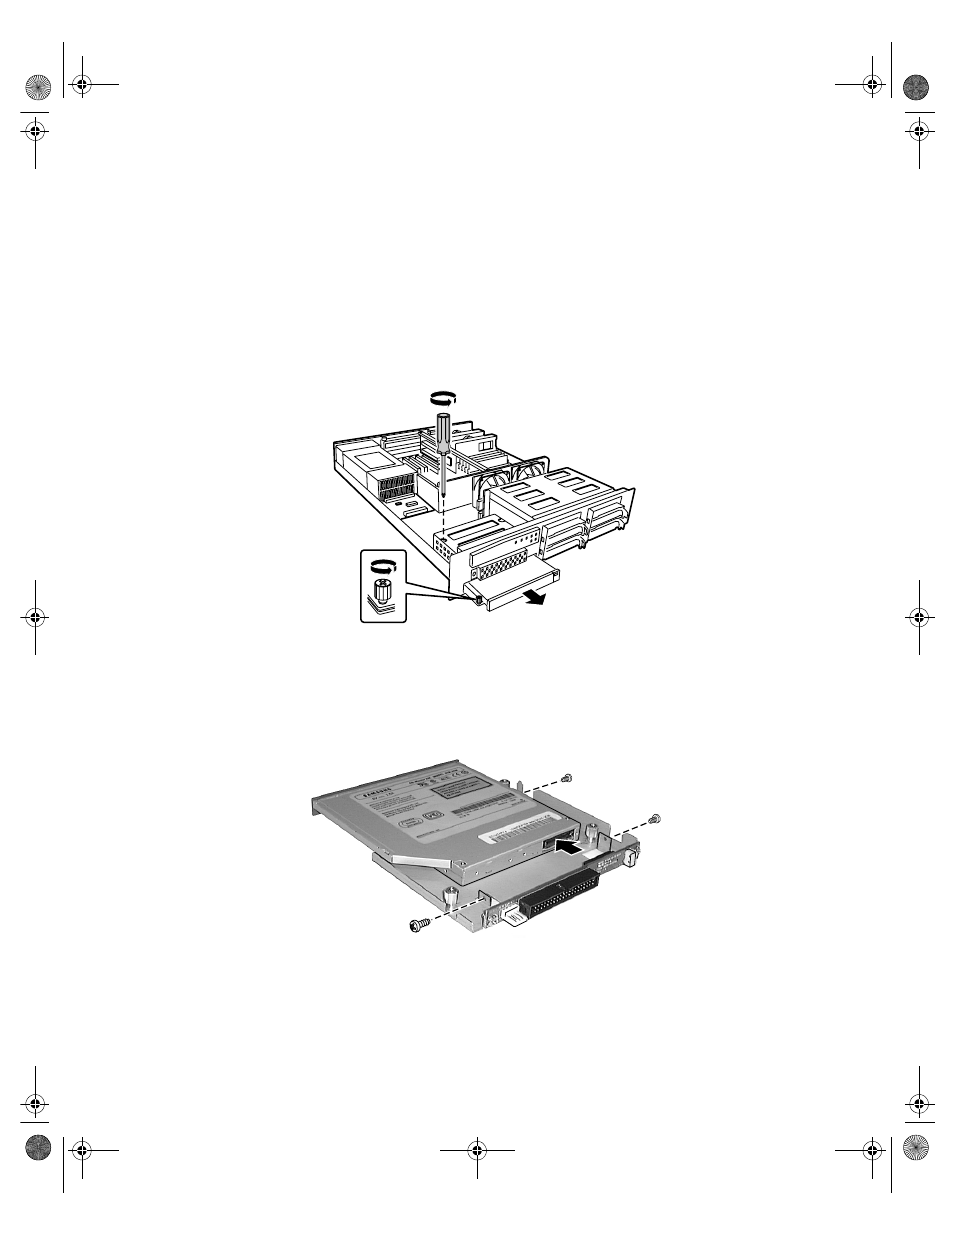
5
Loosen the three captive thumbscrews that secure the CD drive tray to
the chassis.
6
Slide the CD drive tray out of the front of the chassis.
7
Remove the CD drive from the tray by removing the three screws that
secure the drive to the tray and disconnecting the drive connector at the
back of the tray.
8
Place the new drive on the tray, connecting the drive to the tray
connector and replacing the three screws you removed in Step 7.
8506162.book Page 31 Wednesday, May 10, 2000 10:21 AM
- E-2300 (134 pages)
- E-4100 (144 pages)
- ALR 7300 (138 pages)
- E-4650 (134 pages)
- E-6300 (136 pages)
- E-9232T (96 pages)
- 610 (108 pages)
- ProfileTM 5 (292 pages)
- Profile 6 (130 pages)
- E SERIES E-6000 (190 pages)
- SZSL95IN0XXXXXXXX (132 pages)
- 8400 (34 pages)
- DX4800 (94 pages)
- GR380 F1 (17 pages)
- MAN FX510 (150 pages)
- GM5688E (140 pages)
- GR585 F1 (14 pages)
- 6400 (148 pages)
- GM5478 (2 pages)
- 7400 (156 pages)
- E-5250 (46 pages)
- FX6710 (1 page)
- E-9425R (118 pages)
- ALR 7200 (134 pages)
- FX542X (154 pages)
- 7250R (26 pages)
- DX430X (96 pages)
- 8450R (4 pages)
- 8450R (172 pages)
- 7450R (124 pages)
- E-5400 (130 pages)
- E-5200 (46 pages)
- PC (110 pages)
- GR160 F1 (14 pages)
- ALR 8300 (128 pages)
- eMachine 3 (96 pages)
- 9415 (188 pages)
- 980 (131 pages)
- 9210 (106 pages)
- E1400 (136 pages)
- FX542XT (94 pages)
- E3400 (126 pages)
- Media Center (28 pages)
- MT-6733 (3 pages)