Step 4 – Gateway 7450R User Manual
Page 34
26
Gateway 7450R Server System Manual
4
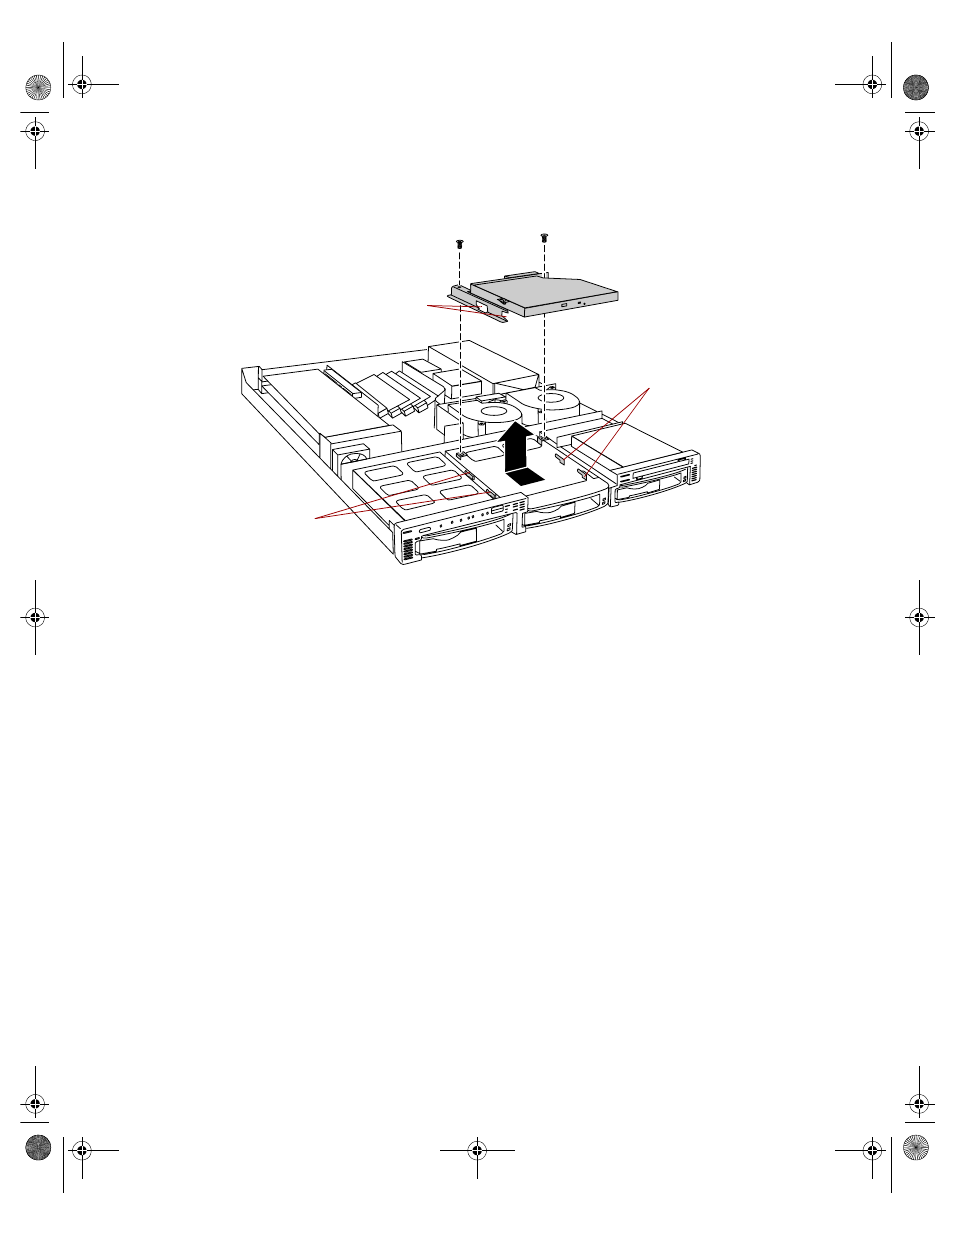
Remove the two screws that secure the CD drive assembly to the chassis.
5
Slide the drive assembly back slightly to disengage the hooks on the drive
bay from the slots on the CD drive bracket, then pull the drive assembly
out of the chassis.
6
If necessary, set any jumpers on the replacement drive. (See your drive
documentation for proper drive jumper settings and cable orientation.)
7
Place the new CD drive and bracket in the chassis. Make sure the hooks
extend through the slots on the new bracket, then slide the CD drive
forward.
8
Secure the CD drive with the two screws you removed in Step 4.
9
Connect the power and data cables, making sure the cables are in their
original positions.
10
Close the case. See “Closing the case” on page 20.
11
Reconnect the power cord and all other external peripheral devices, then
turn on the system.
Hooks
Slots
Hooks
8507328.book Page 26 Thursday, February 15, 2001 11:28 AM