FOCUS Enhancements Bridge/Router MX-4DV User Manual
Page 79
F
UNCTIONS
E
XAMPLE
: C
HANGING
THE
R
OUTING
75
4
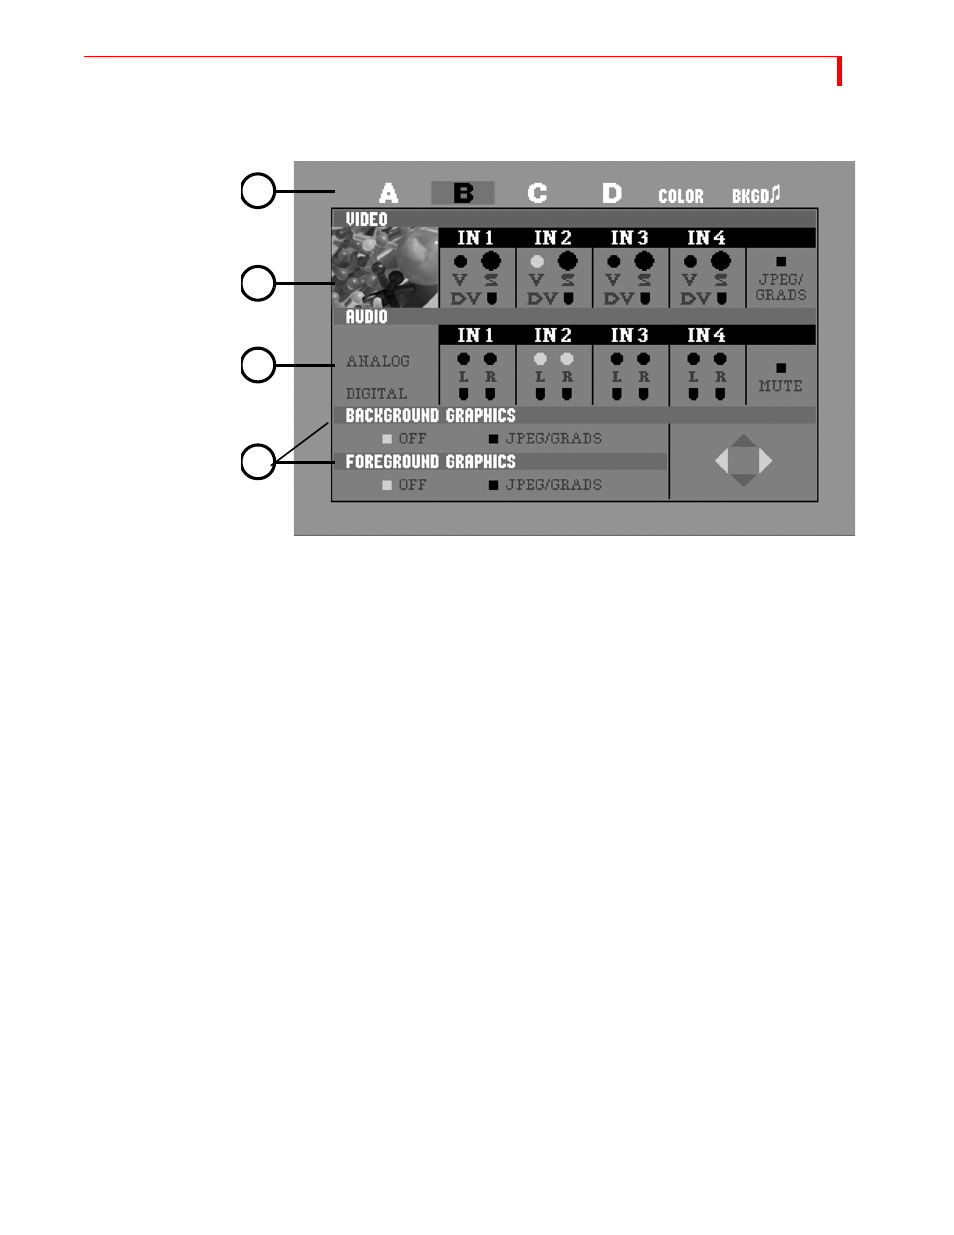
Select the Audio source to use with your selected channel. Use the
DOWN
ARROW
key to high-
light the Audio row, then use the
LEFT
ARROW
/
RIGHT
ARROW
keys to select an audio source.
a
Audio can be a stereo pair of inputs from a DV source IN1-4 or from analog inputs IN1-4
b
Audio is available to output on DV audio channels 1 and 2 or on analog outputs L1 and
R1, if you select 2-channel 48kHz audio output in the Setup Menu.
c
IN1, IN2, IN3 and IN4 can be either mono or stereo sources: you can select the left chan-
nel, the right channel, or both.
d
DV sources can have two or four channels of audio inputs. If you use 4-channel sources
and select 4-channel output in the Setup Menu, you can either select channel 1 and 2 or 3
and 4, but not both at the same time. Note that while using 4-channel audio output DV will
only run in 32kHz and not allow mixing and matching. If you select 2-channel audio out-
put in the Setup Menu, it will run at 48kHz on channels 1 and 2.
e
Select
MUTE
if you do not want audio routed to this channel.
f
Press
SHIFT
+
NEXT
/
BACKGROUND
to route to the Background Audio channel.
g
Press
OK
or
ROUTE
to exit the Route Menu.
5
You can select a foreground and/or a background graphic. Once you select this feature, press
OK
and the MX-4 DV will guide you into either the foreground or background graphics menu
to select the imported graphic of your choice. When you make the selection, press
ROUTE
to
return to the Route menu. Note that you can apply four layer video effects, that can include a
background, foreground and two jpeg inputs all at the same time.
Example: Changing the Routing
In this example, you will change the Routing for Channel C, make video come from DV IN1, and
make Audio come from L1 and R1 or DV IN1 using 2-channel input a 48kHz.
1
Press
ROUTE
to display the Route menu.
2
3
4
5