ITC VerifyNow System Platelet Reactivity Test User Manual
Page 69
Page 65
14439.C 03/2013
Cleaning and Maintenance - 9
VerifyNow System User Manual |
USA
Procedure
Use a recommended cleaning solution on the exterior surfaces according to the following procedure:
1.
Solutions may be applied by moistening a soft, lint-free cloth, and/or a cotton swab. Do not to allow
liquids to flow freely or be sprayed on the instrument.
2.
After cleaning with one of the solutions listed above, a cloth moistened with fresh water should be
used to dilute and remove all of the residual cleaning solution from the instrument’s surfaces.
3.
Wipe the EQC device with a damp cloth moistened with isopropyl alcohol.
CAUTION:
Do not spray or pour cleaning fluids near the test device port
or other openings. Introduction of fluids into the interior can damage the
VerifyNow instrument.
CAUTION:
Do not steam-sterilize or autoclave the instrument. Do not
immerse the instrument in any solution. Do not clean the instrument with
acetone or any other plastic solvent or abrasive cleaner.
CAUTION:
Prolonged exposure to alcohol or other strong cleansers
can result in damage or discoloration to the instrument’s case materials.
Always use a soft cloth when cleaning the display screen and bar code
window. Abrasive cleaners, pads, or cloths will permanently damage the
surface of the plastic windows.
CAUTION:
Be careful not to spill any liquids on the instrument, printer
(accessory), or power supply while cleaning the exterior surfaces.
9.3
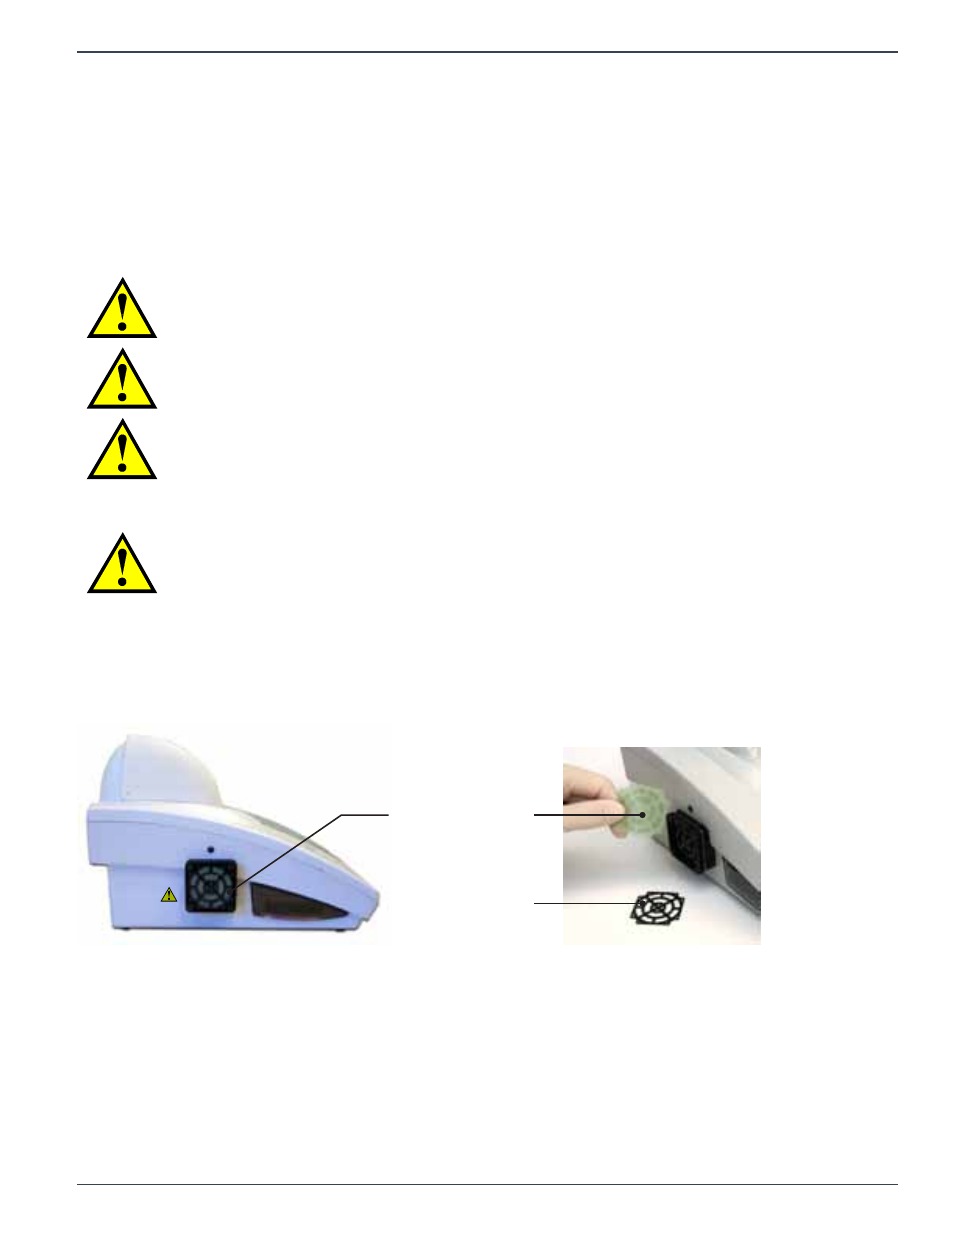
Replace the Fan Filter
The instrument is equipped with an exterior fan vent to cool the internal electronic components.
Depending on the room conditions, small amounts of dust and debris may accumulate over time
within the fan filter and obstruct airflow. Periodic cleaning of the fan filter may be performed to avoid
overheating of the instrument.
Fan
Fan Filter
Fan Retainer
Materials
•
Replacement fan filter (Accumetrics Catalog No. 37056)
•
Replacement fan filter retainer (Accumetrics Catalog No. 37060)
Procedure
Use the following procedure to remove and clean the fan filter:
1.
Power off the instrument (“O” designates off).
2.
The fan filter is held in place by a press fit retainer. Using your fingernail or a small tool (e.g.
paperclip), gently pull from the center of the filter retainer (Figure 9-4).