Rackmounting – HP A3312A User Manual
Page 127
Appendix A. A3312A Rackmount Installation
121
Rackmounting
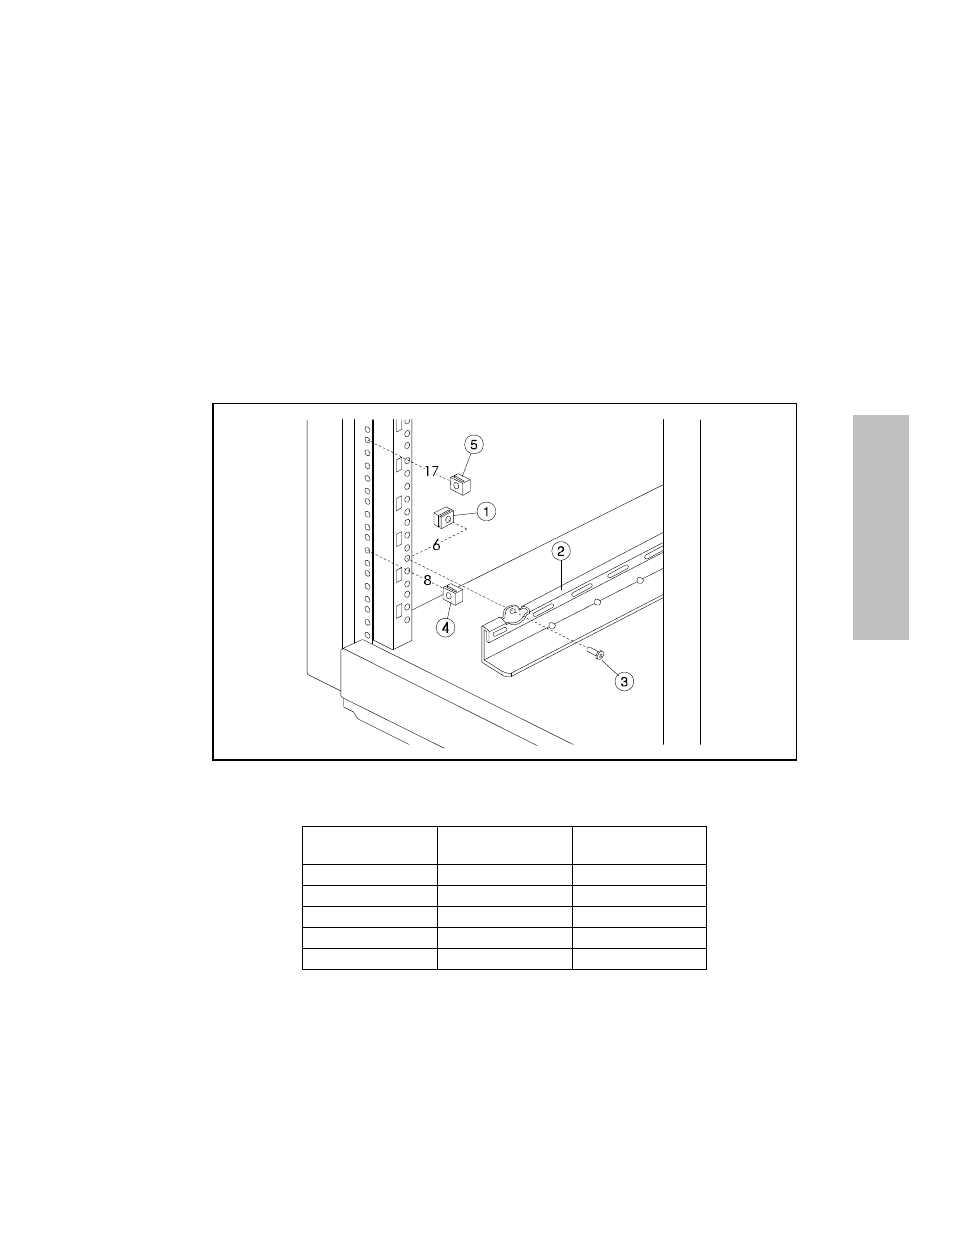
3. Install one clip nut (Figure 51, item 1) on each of the four rail standards on hole number 6, counting
from the bottom of the cabinet. Secure the rails (2) with four T25 screws (3). See Table 30 for the rail
standard holes to use when installing multiple storage systems.
4. Install two clip nuts on the right and left front ear standards: one clip nut (Figure 51, item 4) on hole
number 8 and one clip nut (5) on hole number 17. See Table 30 for the ear standard holes to use when
installing multiple storage systems.
Figure 51. Installing Clip Nuts and Rails
Table 30. Storage System Spacing in a 1.6-m EIA Cabinet
Storage System
Number
Rail Standard
Holes
Ear Standard
Holes
5
62
64, 73
4
48
50, 59
3
34
36, 45
2
20
22, 31
1
6
8, 17