Cleaning the print head – Epson CX7000F User Manual
Page 45
Cleaning the Print Head
45
5. Press the x
Start Color/OK
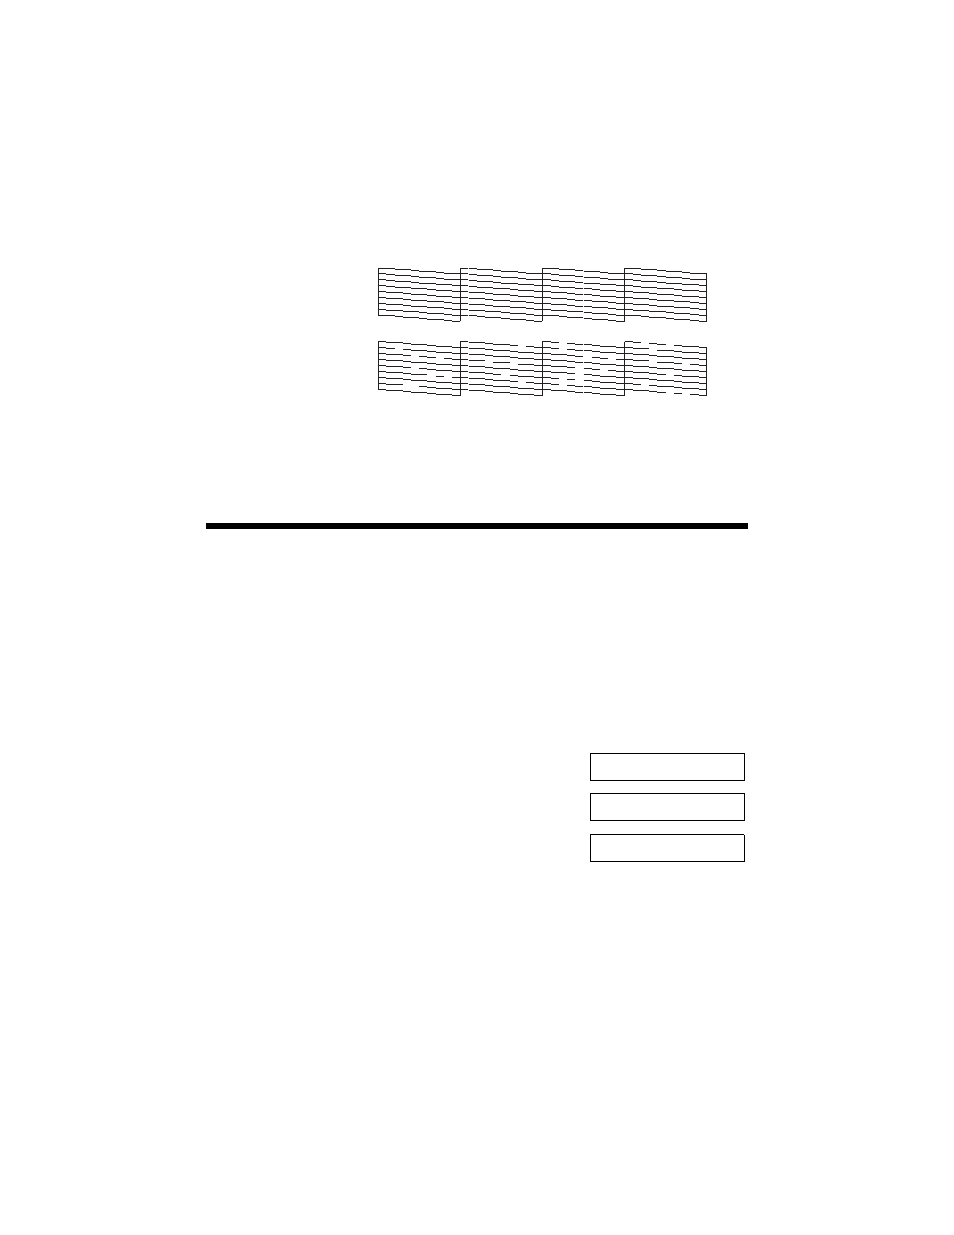
button. The CX7000F Series prints a test pattern
like this:
6. Press the y
Cancel/Back
button to return to the screen displaying the date.
If the pattern does not look good, try cleaning the print head as described below.
Cleaning the Print Head
If your printouts are unexpectedly light or faint, or you notice light or dark bands
across your printout, you may need to clean the print head. This unclogs the
nozzles so they can deliver ink properly. Run a nozzle check as described on
page 44 to see if the print head needs cleaning.
Note:
Print head cleaning uses ink, so clean it only if quality declines and the nozzle check
indicates that the print head needs to be cleaned.
1. Press the P
On
button to turn on the CX7000F
Series, or press the y
Cancel/Back
button until you
see a screen like this:
2. Press the
Setup
button. You see this display:
3. Press the u or d button, or press the
4
key on the
numeric keypad, to display this option:
4. Press the x
Start Color/OK
button. The CX7000F Series runs a head
cleaning cycle and the message
Cleaning
appears on the display.
Caution:
Never turn off the CX7000F Series while head cleaning is in progress. You may
damage it.
5. When the display returns to
4.Head Cleaning
, run a nozzle check to verify
that the print head is clean. See page 44 for details.
Print head
nozzles are clean:
Print head needs
to be cleaned:
12:00 PM Y
1.Load/Eject
4.Head Cleaning