Faxing a photo or document, Connecting a phone or answering machine – Epson CX7000F User Manual
Page 29
Faxing a Photo or Document
29
Faxing a Photo or Document
Your Epson Stylus CX7000F Series all-in-one lets you send faxes by entering fax
numbers or selecting entries from a speed dial list. You can customize the fax
header information, and select various report printing and send/receive settings.
You can also set up your CX7000F Series to automatically receive faxes or select to
receive them only when you’ve confirmed that you’re receiving a fax.
See these sections:
■
“Connecting a Phone or Answering Machine” below
■
“Setting Up Your Fax Features” on page 30
■
■
For more information on faxing and selecting fax settings, see the User’s Guide.
Connecting a Phone or Answering
Machine
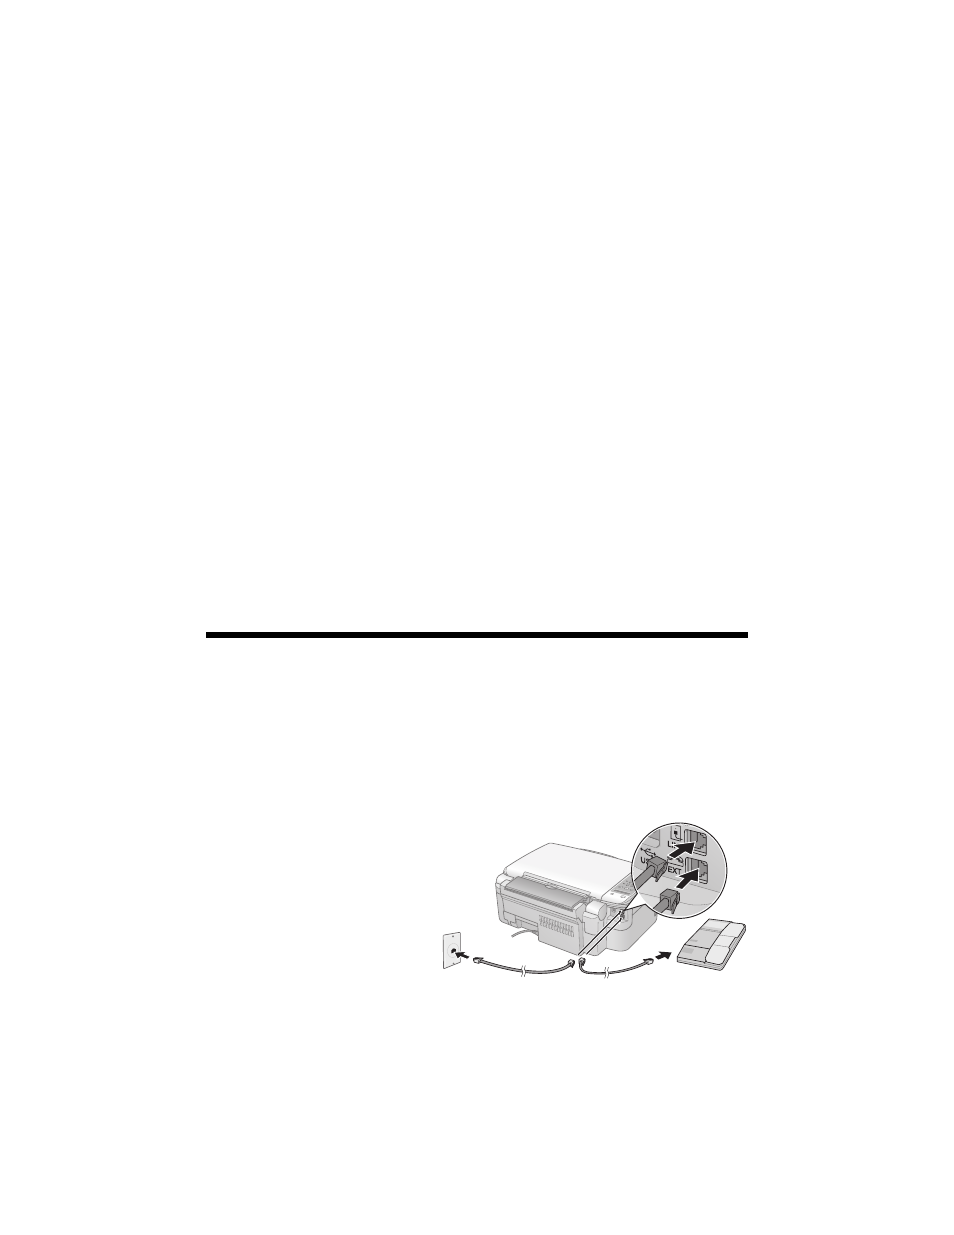
If you’re connecting the CX7000F Series to a phone line, and connecting a
telephone or answering machine to the same phone line so you can use it to make
voice calls, follow these steps:
1. Connect the phone cable leading from the wall jack to the
LINE
port.
2. Connect one end of another
phone cable to the telephone
or answering machine.
3. Connect the other end of
the phone/answering
machine cable to the
EXT
port on the back of the
CX7000F Series.