Resizing the image, Adjusting the height of your image – Epson 7700p User Manual
Page 31
Using the Projector
25
Resizing the Image
Some computer images need to be resized to display in the projector’s
native format: 1024
× 768 pixels. If only part of your computer image
is displayed, you can correct it with the
Resize
button.
■
Press the
Resize
button on the control panel. The screen image is
automatically compressed.
■
Continue pressing the
Resize
button to pan around the screen in
the original resolution.
If you’re projecting from video equipment, pressing the
Resize
button switches the aspect ratio between 4:3 and 16:9. If you’ve
zoomed in on your image (using the
E-Zoom
button on the remote),
you can press the
Resize
button to return it the original display size.
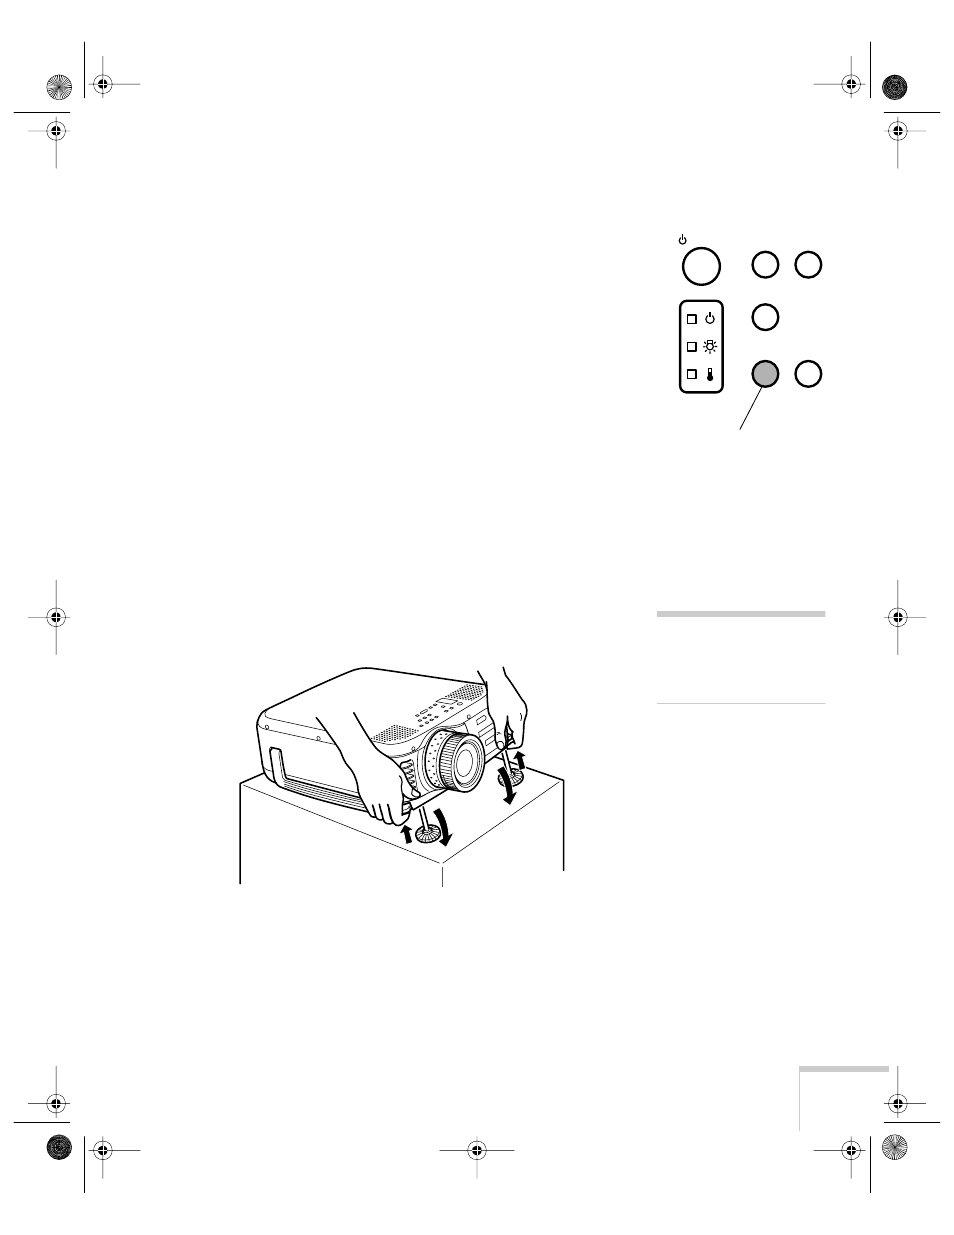
Adjusting the Height of Your Image
If the image is too low, you can raise it by extending the projector’s
feet.
1. Stand behind the projector. Pull up the blue foot release levers
and lift the front of the projector. This unlocks the feet.
2. Once the image is positioned where you want it, release the levers
to lock the feet in position.
3. To fine-tune the height of the image, rotate the thumb wheels
attached to the projector’s feet.
If the image is no longer square after raising it, see the next section.
Video
Computer
A/V mute
Resize
Shift
Power
Resize button
caution
Do not hold the
projector by the lens; this
can damage it.
7700.book Page 25 Wednesday, November 1, 2000 6:15 PM