6 assigning hot-spare disks – PLANET NAS-7450 User Manual
Page 45
44
clusters in Volume/Disk. All readable data will be placed in new clusters and defective cluster
will mark as bad in the file system. All the newly added devices will be scanned before usage
to ensure the data integrity in the NAS Server.
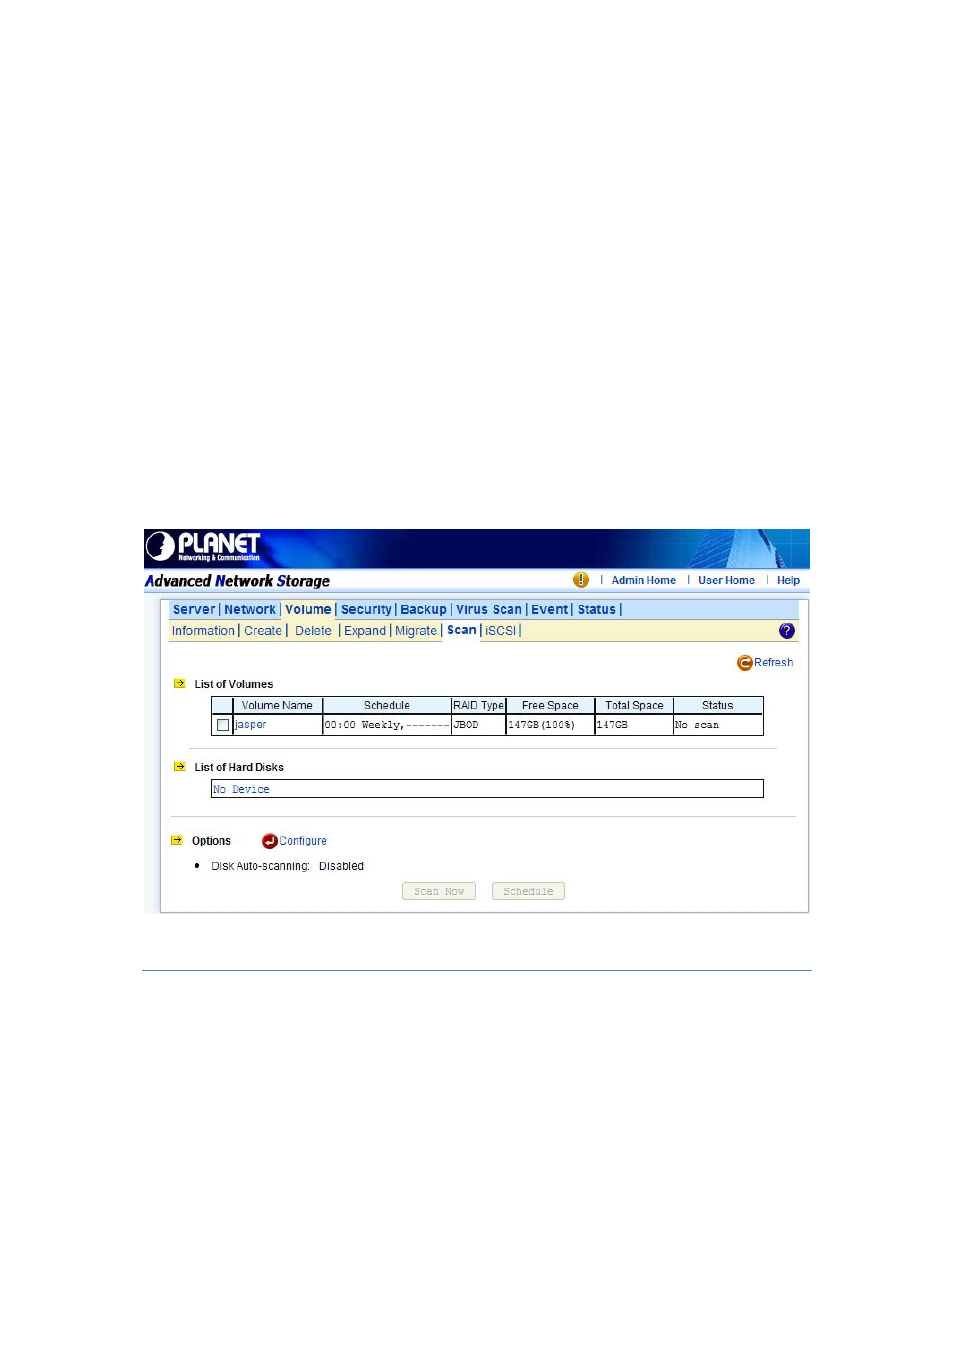
Select the volumes or disks you want to scan, click “Scan Now” button to start scanning. Or,
click “Schedule” to set the time for NAS Server to perform scanning at the scheduled time.
Disk Auto-scanning
To make sure that the hard disks contain no bad sectors before putting into use, it is suggested
to perform disk-scanning before taking such actions as creating a volume, expanding a volume,
migrating data or assigning a hot-spare disks. If disk auto-scanning is enabled, the NAS server
can scan disks automatically when you perform these actions. If the hard disks have ever been
scanned in the last 30 days, the auto-scanning will be skipped so that the auto-scanning will
not be activated too often.
To enable the feature, please click the “Configure” hyperlink on the “Volume → Scan” page.
Set the “Disk Auto-scanning” item to “Enabled”.
5.6 Assigning Hot-spare Disks
The hot-spare disks are global, which means they are not bound to any specific RAID volumes.
Whenever a RAID volume goes degraded because of a bad hard disk, a hot-spare disk will be
taken immediately to recover that RAID volume.
To assign hot-spare disks, please go to the “Volume → Create” page. Specify the volume type
as Hot-spare. Assign the free disks as hot-spares by using the dual window panes. Click
“Apply” to submit changes.
To remove disks from the hot-spare list, please go to the “Volume → Delete” page. Select the
hot-spares to be deleted in the “Remove Hot-Spare Disks” table and click “Delete”.