8 snmp settings – PLANET NAS-7450 User Manual
Page 36
35
4. Or, click “Allow individual user login”. Select “Local account authentication” to authenticate
user using the local user database or click the “Local and domain account authentication”
radio button to use both local account and Microsoft domain security authentication.
5. Select the “User Limit”. Click the “Unlimited” radio button or specify the maximum number of
users allowed to access the content in your NAS server via FTP.
6. Specify the “Home Directory” when user connects to the NAS server via FTP. Note that you
must select a volume to create a FTP home directory.
7. Specify the permission of the home directory by clicking the “Set” icon.
8. Click “Apply” to save the setting.
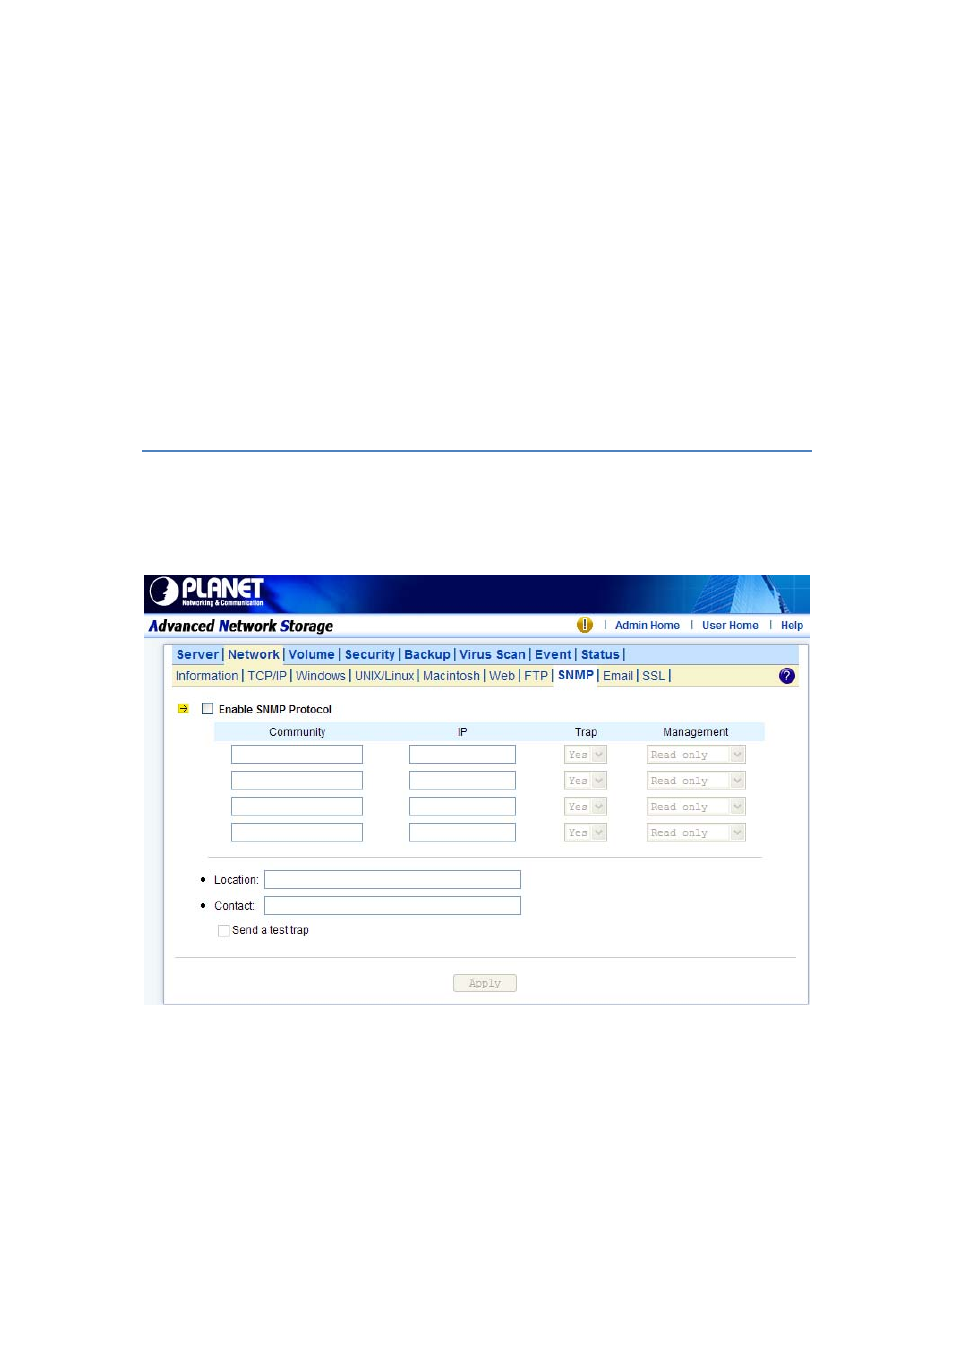
4.8 SNMP Settings
Simple network management protocol (SNMP) provides the ability to monitor and gives status
information of the SNMP agent to the SNMP management console. NAS server behaves as an
SNMP agent that answers requests from management console and sends trap information to it.
The following options should be configured to using SNMP protocol:
Community: A name serves as a simple authentication. The communication between the
SNMP management console and the NAS server cannot be established if the community
names are mismatch.
IP: IP address of the SNMP management console
Trap: A trap is a voluntary message send out from a SNMP agent (which is in this case your
NAS server) when there is an event occurred.
Management: Configure the SNMP management console as Read Only or Full Control.
Location: Provide location information of the SNMP agent.