Rugged Cams H.4 User Manual
Page 27
On the real-time monitoring screen, select {Live Menu} {Camera/TV Setting}
{Camera}.
To control the camera, select a channel on the monitoring screen.
Use the arrow buttons to adjust the camera for the selected channel.
Use the [ESC] button to activate the channel selection window and adjust the camera for the
other channels by repeating steps and .
Moving the monitor up, down, right, or left excessively may cause black or gray areas to
appear on the screen. The level at which such condition does not occur is the proper control
range for the monitor.
3-7-9 TV Control
On the real-time monitoring screen, select {Live Menu} {Camera/TV Setting} {TV Out}.
Adjust the CCTV monitor up/down or right/left using the arrow keys.
Moving the monitor up, down, right, or left excessively may cause black or gray areas to
appear on the screen. The level at which such condition does not occur is the proper control
range for the monitor.
Controlling will be available after setting up the image output switch as TV on the rear side
of the DVR.
3-7-10 Display/Hide Camera Name
On the real-time monitoring screen, select {Live Menu} Æ {Display Setting} Æ
{Name}(Camera Name).
Select the On/Off status using the arrow keys and the Select button.
3-7-11 Adjusting the Screen Border
On the real-time monitoring screen, select {Live Menu} {Display Setting} {Border}.
Select the desired item using the arrow keys and the Select button.
After assigning the setup value per field, press the [ESC] button to exit the Border Line setup
mode.
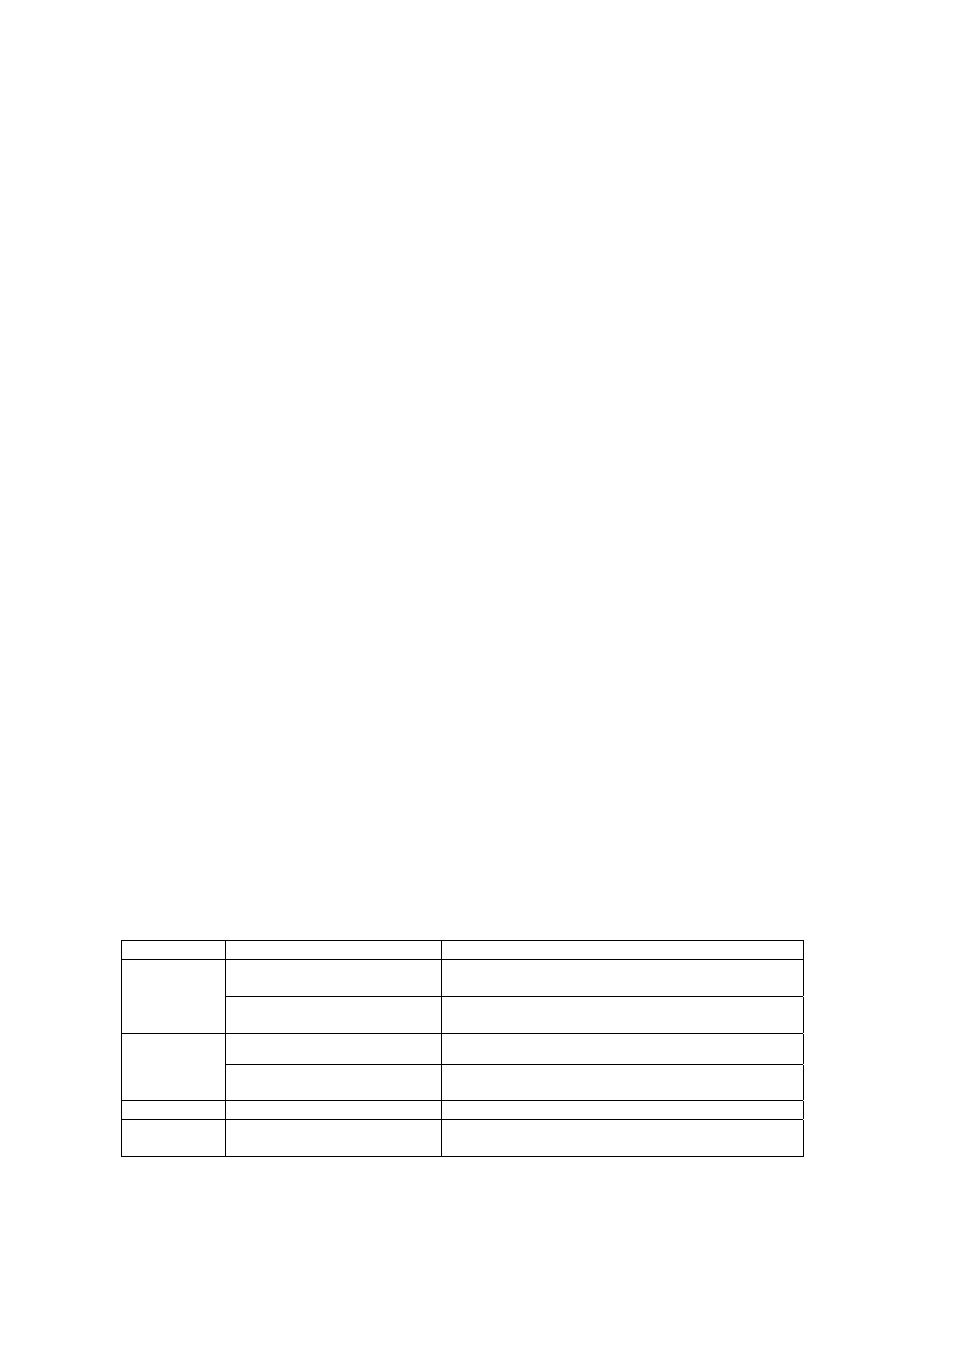
Border setting fields
Field Setup
Value
Description
On
Display the border for each channel screen in
varying modes.
Mode
setup
Off
Hide the border for each channel screen in
varying modes.
Internal
Hide the external border line.
Type
All
Display all border lines.
Width
2, 4
Set the width of the border.
Color
Black, White, Red, Green,
Blue
Set the color of the border.