Scanner instruction manual, Setting the relay operation ( relay ), Relay setup menu ( relay setup ) – Precision Digital PD6080 User Manual
Page 49
PD6080/PD6081 Super Snooper Modbus
Scanner Instruction Manual
49
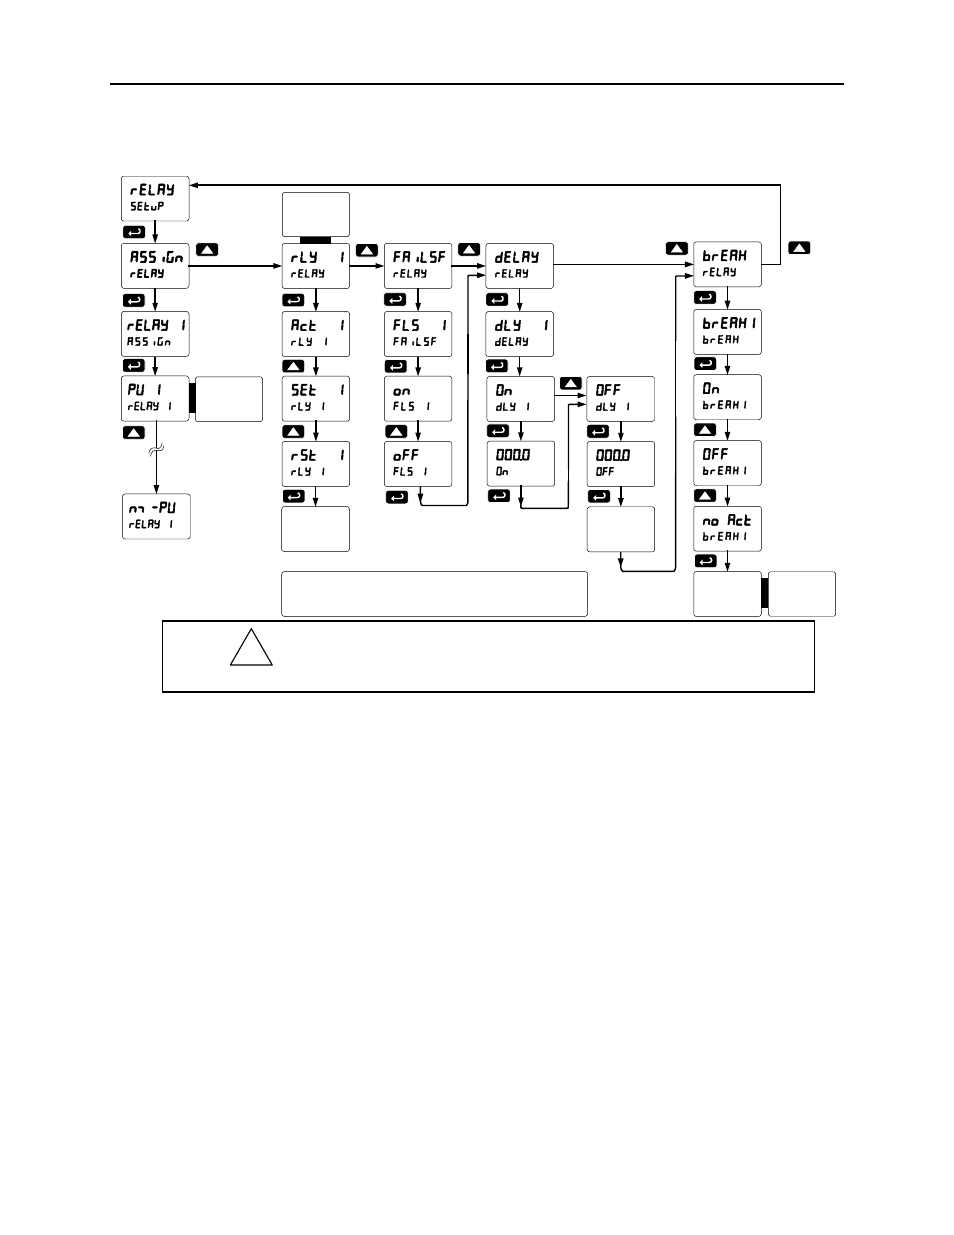
Setting the Relay Operation (relay)
This menu is used to set up the assignment and operation of the relays.
Relay Setup Menu (relay setup)
Note: The setup for relays 2-8 follows the same
pattern shown here for relay 1.
Up Arrow cycles
through all
available relays.
Up Arrow cycles
through all
enabled PVs and
multiple PVs.
Enter Button
cycles through all
enabled relays
then to BREAK.
Enter Button
cycles through all
enabled relays
then to SETUP.
Set Relay
Action Menu
continues
from here.
If Analog Output
is enabled, the
Aout Setup Menu
will appear first.
!
Caution!
During setup, the relays do not follow the input and they will
remain in the state found prior to entering the Relay menu.
1. Assign Relay assignment
a. Assign relay to PV
b. Assign relay to Math channel
c. Assign relay to multiple PVs (2 to 16 PVs)
2. Act 1 Relay action
a. Automatic reset only (non-latching)
b. Automatic + manual reset at any time (non-latching)
c. Latching (manual reset only)
d. Latching with Clear (manual reset only after alarm condition has cleared)
e. Pump alternation control (automatic reset only)
f.
Sampling (the relay is activated for a user-specified time)
g. Off (relay state controlled by Interlock feature)
3. Set 1 Set point & Rst 1 Reset point
4. Failsf Fail-safe operation
a. On
(enabled)
b. Off
(disabled)
5. Delay Time delay
a. On delay (0-999.9 seconds)
b. Off delay (0-999.9 seconds)
6. Break Relay action for communications break or loss of 4-20 mA input