Removing and installing ink cartridges – Epson 740 Series User Manual
Page 124
Maintenance and Transportation
Page 124
Removing and Installing Ink Cartridges
You can replace a cartridge when the
B
black or
A
color ink out
light is either flashing or on. (If you press the
R
cleaning button
when both ink out lights are off, the printer cleans the print heads,
as described in
.)
Follow these steps to replace ink cartridges:
1
Remove the new ink cartridge from its packaging.
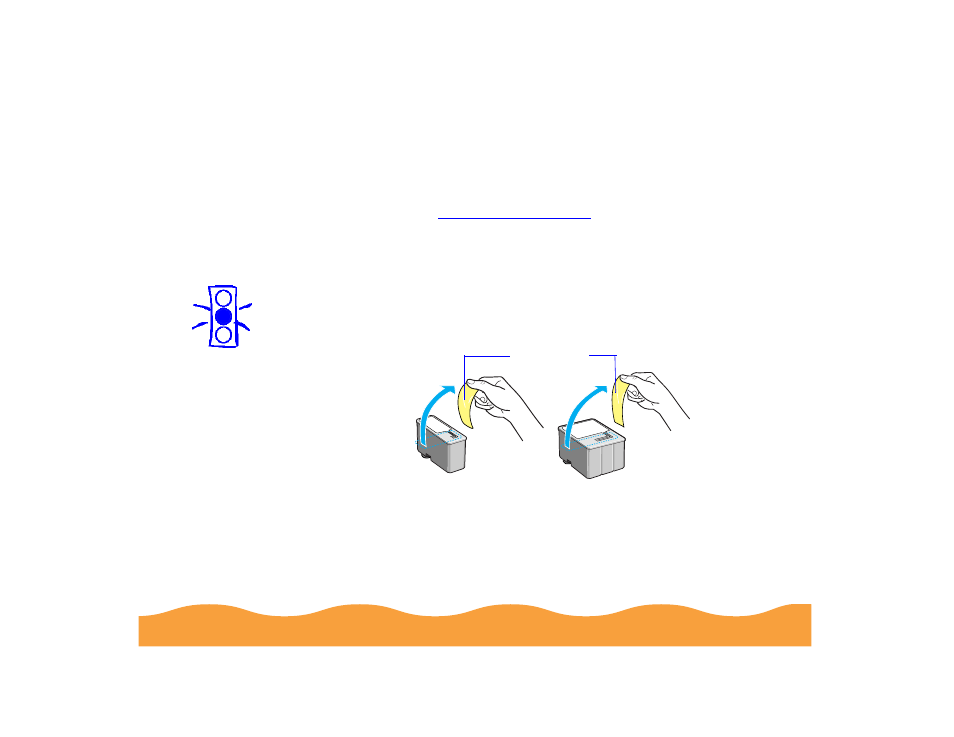
2
Remove only the yellow part of the tape seal on top as shown
below. Don’t pull off the blue portion or try to remove the
clear seal underneath the cartridge.
3
Make sure the printer is turned on and not printing, then open
the printer cover.
Caution:
You must remove the
yellow tape from the
top of the cartridge or
you will permanently
damage it. Do not
remove the clear seal
from the bottom of
the cartridge; ink will
leak out.
To avoid damaging
the printer, never
move the print head
by hand.
Black cartridge
Color cartridge
Remove the
yellow tape
- Stylus Pro 7800 (11 pages)
- Stylus Pro 4000 (49 pages)
- Stylus Photo R300 (2 pages)
- Stylus Pro 7000 (147 pages)
- AcuLaser C3000 (316 pages)
- Stylus Pro 7900 (24 pages)
- Stylus Pro 4450 (21 pages)
- 1000 (272 pages)
- T034120 (4 pages)
- T580300 (4 pages)
- 300 (91 pages)
- B 510DN (190 pages)
- B 510DN (218 pages)
- Stylus NX510 (8 pages)
- Stylus Photo RX580 (95 pages)
- T549300 (4 pages)
- B 500DN (168 pages)
- AculaserCX11NF (5 pages)
- 480SXU (24 pages)
- 4500 (317 pages)
- STYLUS RX500 (99 pages)
- 2100 (13 pages)
- Stylus NX215 (2 pages)
- T098320 (4 pages)
- T041020 (4 pages)
- R210 (8 pages)
- All-In-One Stylus Photo RX600 (164 pages)
- 777I (53 pages)
- T033120 (4 pages)
- Stylus CX7000F (8 pages)
- 60 (113 pages)
- T034220 (4 pages)
- WorkForce 40 Series (36 pages)
- T054220 (4 pages)
- Stylus CX3200 (11 pages)
- Stylus CX7800 (18 pages)
- T060220 (4 pages)
- 2500 (180 pages)
- AcuLaser CX11N (32 pages)
- AcuLaser CX11N (4 pages)
- 2000P (16 pages)
- T606600 (4 pages)
- Stylus CX6000 (18 pages)
- FS-4000DN (2 pages)
- MSDS T544700 (4 pages)