Setting the punch points, Checking the punch points, Rehearsing the punch – Teac 2488 User Manual
Page 47: Last rec in -> out last take load, Checking the punch points rehearsing the punch, 4 – recorder
4 – Recorder
TASCAM 2488
User’s Guide
47
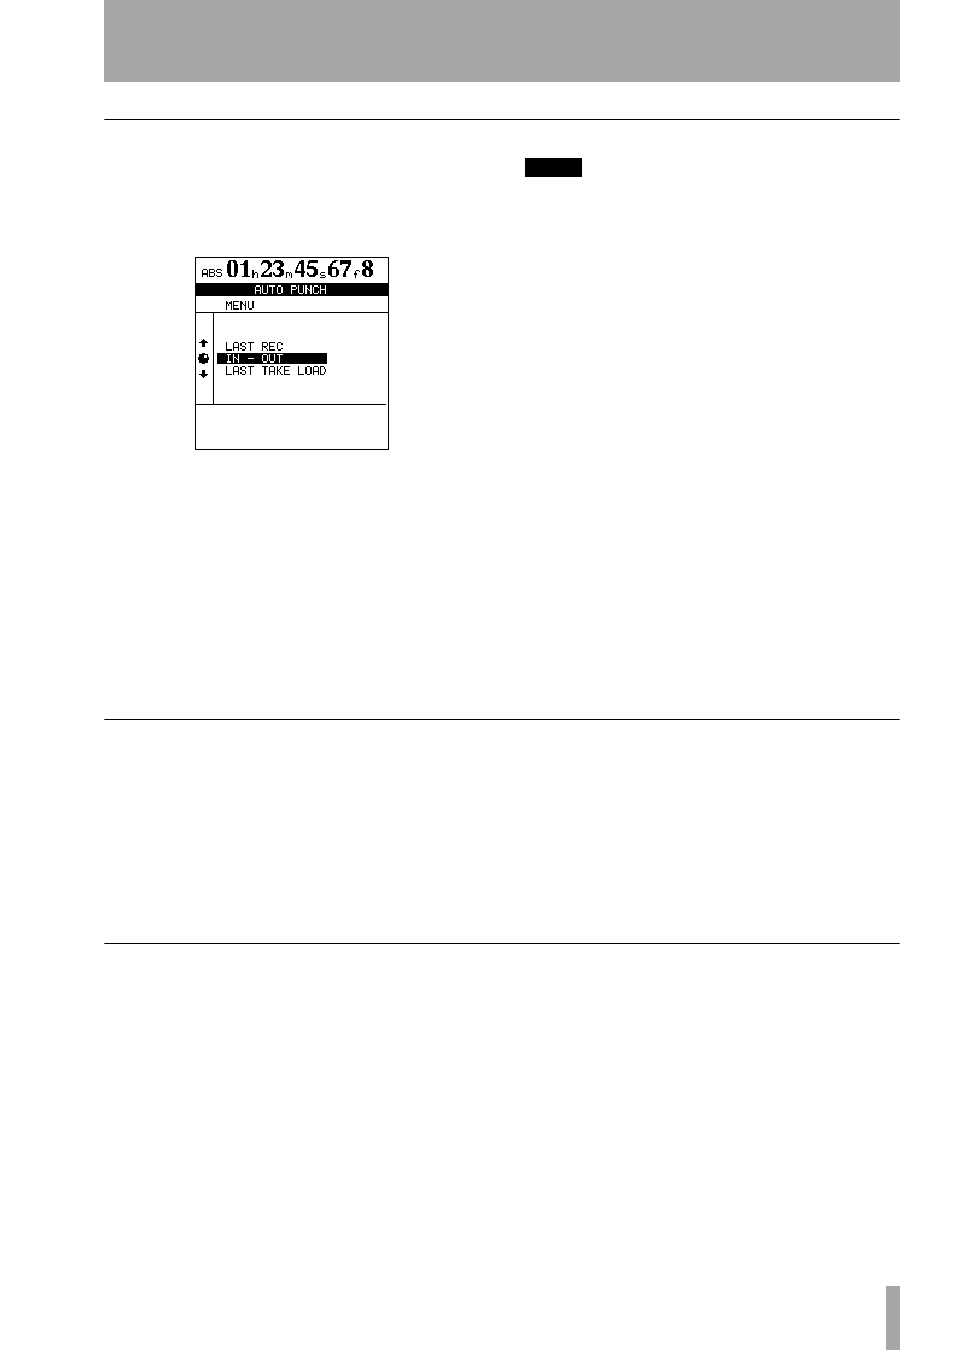
Setting the punch points
The 2488 provides three different punch settings.
1
With at least one track armed (the
REC
indi-
cator flashing), and playback stopped, press
the
AUTO PUNCH
key:
2
Select one of the three options, explained
below, using the wheel or cursor keys to move
the cursor, and the
ENTER
key to confirm the
selection (
EXIT
exits this screen without mak-
ing any settings).
3
When the selection has been made, the
AUTO
PUNCH
indicator lights, and the home display
shows
AUTO
.
NOTE
It is not strictly necessary to have a track armed when
you first press the
AUTO PUNCH
key, but this is proba-
bly the most logical way to work.
LAST REC
This sets the punch-in point to be the
last point at which recording started (the same as the
LRP described in “Last Recording Position (LRP)”
on page 39. The punch-out point is set to be the point
at which recording stopped (either when recording
dropped into play mode, or when the transport was
stopped). Note that this last recording does not have
to be a punch recording.
IN -> OUT
This uses the IN and OUT points as the
punch-in and the punch-out points. The first of these
points will be used as the punch-in point, and the sec-
ond as the punch-out point, even if the OUT point is
before the IN point.
LAST TAKE LOAD
This option is only available if
a punch recording has taken place, and no recording,
no track editing or undo/redo operations or virtual
track assignments have been done since then. It
allows you to select the takes from this punch ses-
sion, in the same way as described later in this sec-
tion.
Checking the punch points
When the punch points have been set, you can press
the
PLAY
key. The home display shows
CHECK
, and
the playback starts at the pre-roll point. It continues
to the post-roll point.
If the punch positions are not what you want, you can
press the
AUTO PUNCH
key to turn off the punch
mode, and reset the punch points as described above.
You can also adjust the pre-roll and post-roll time
using the menu system (see “Recorder” on page 85),
but you must exit the auto punch mode first by press-
ing the
AUTO PUNCH
key so that the indicator goes
out.
If you the punch points and pre and post-roll times
are what you want, you should proceed to the
rehearsal stage, as described below.
Rehearsing the punch
Although you don’t have to use the rehearsal feature
(see “Rehearsing recording” on page 41) with the
auto punch, it’s probably a good idea to rehearse
most punch recordings a few times before making a
take.
1
With the
AUTO PUNCH
indicator lit, and a
track armed, press the
RHSL
(rehearsal) key.
The indicator lights.
2
Press and hold down the
RECORD
key and
press the
PLAY
key.
•
The display shows
TAKE
.
•
Playback starts at the pre-roll point. Both
the input source and previously-recorded
material can be monitored.
•
When playback reaches the punch-in point,
the monitored signal on the armed track(s)
is muted. The
RECORD
indicator flashes (to
show that it is a rehearsal).
•
When playback reaches the punch-out
point, the recorded material is added to the
monitored signal. The
RECORD
indicator
goes out.